
This post may contain affiliate links, view our disclosure policy.
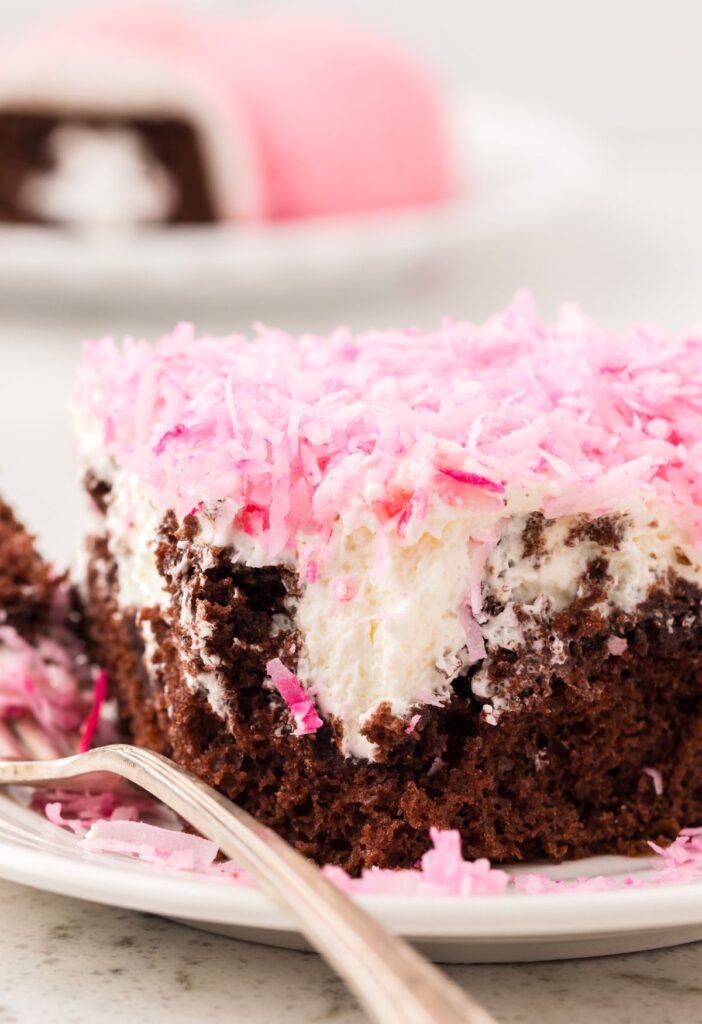
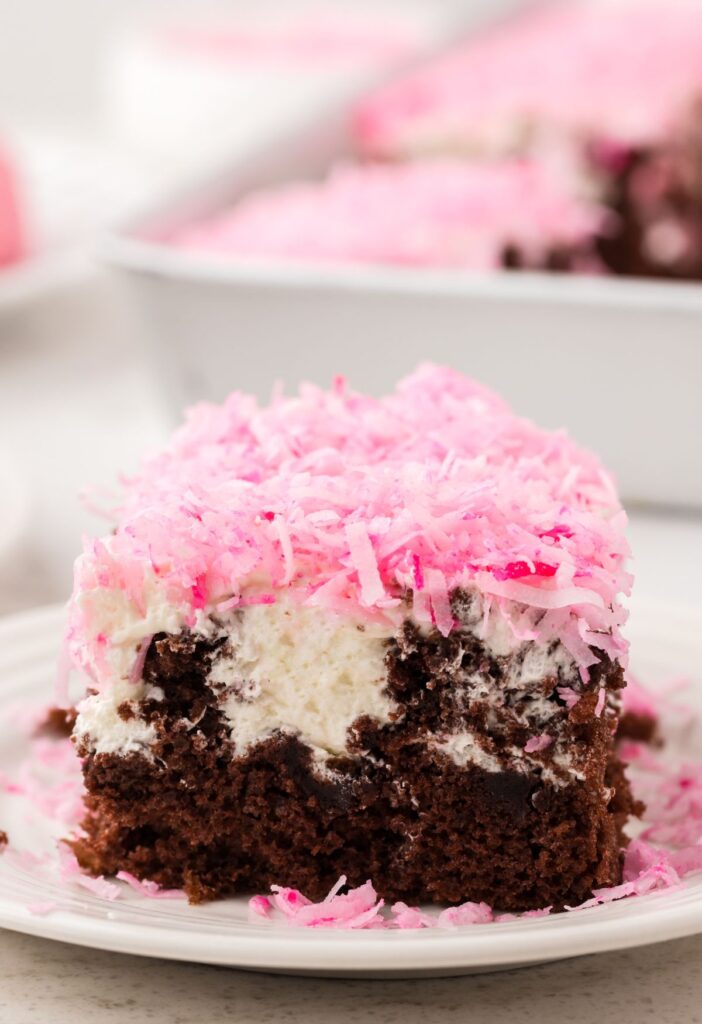
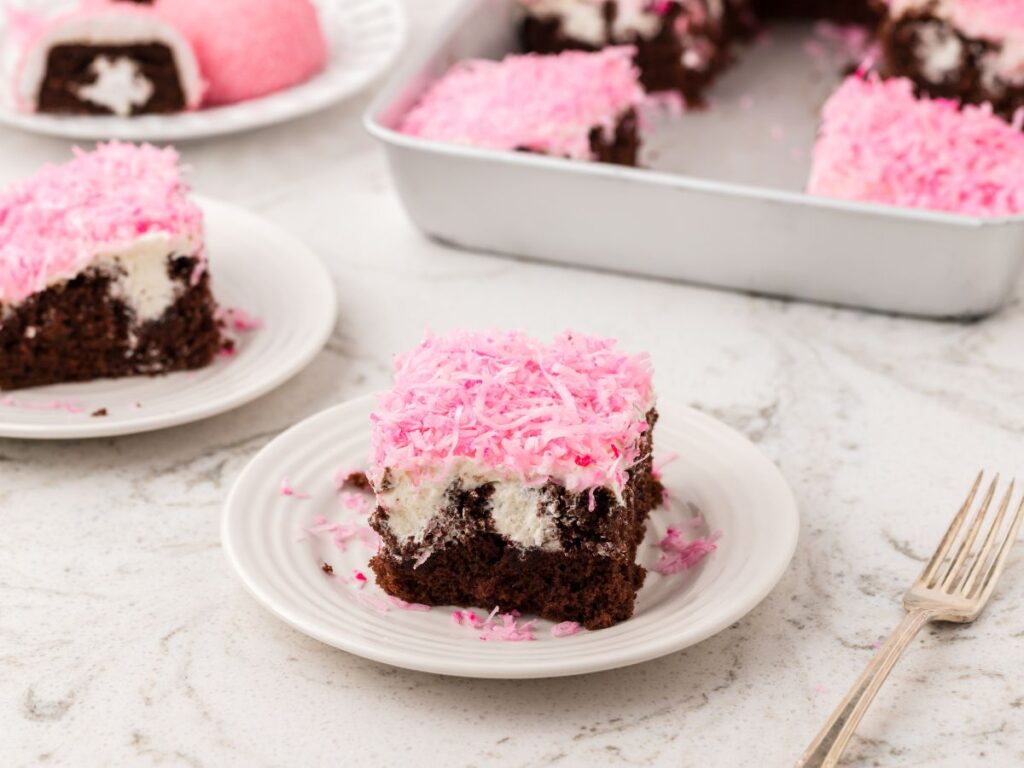
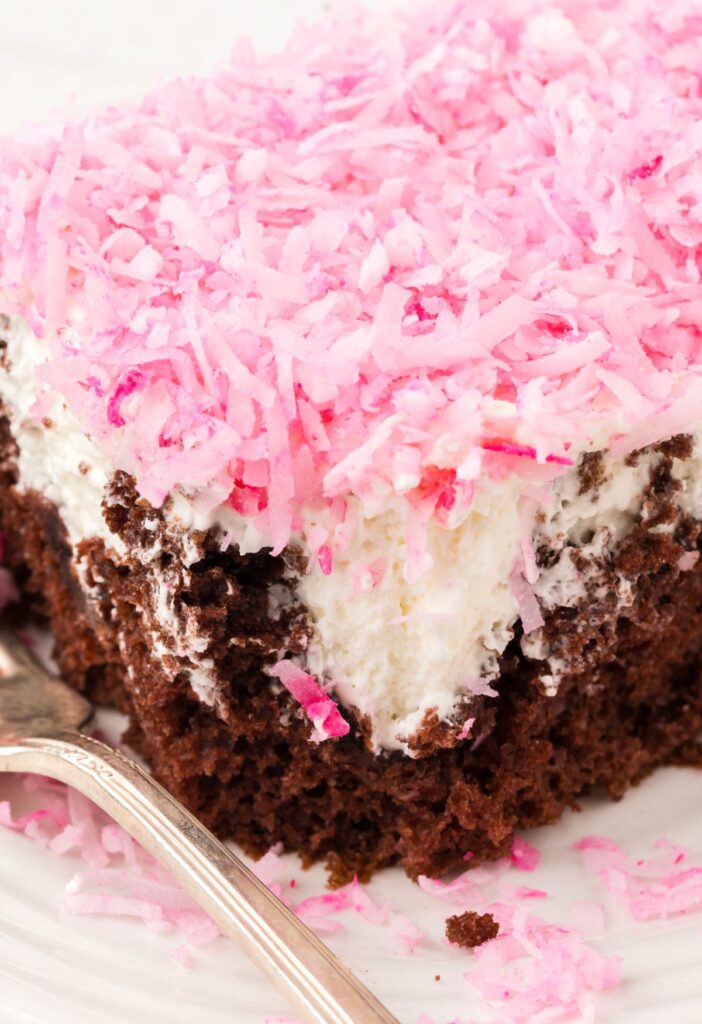
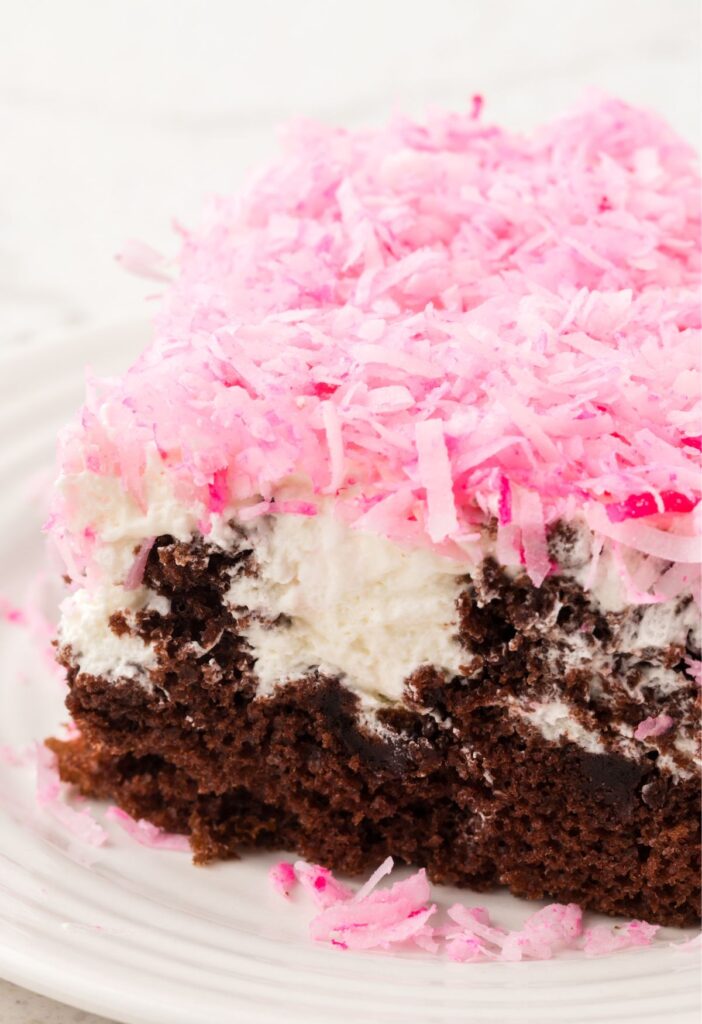
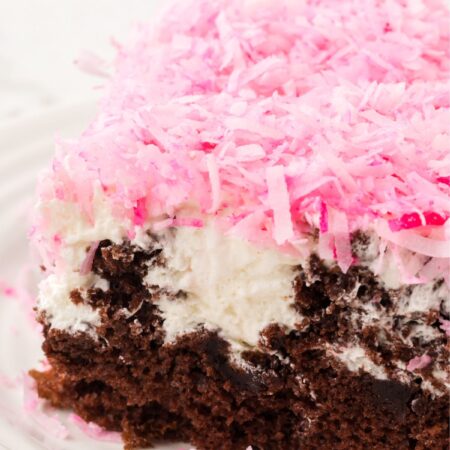
Hostess Snoballs Poke Cake has everything you love about the iconic Hostess snack cakes – a signature pink coconut topping, fluffy marshmallow center, and a soft chocolate cake. This poke cake tastes exactly like the Snoballs snack cakes.
For more cakes that replicate the iconic Hostess brand be sure and make my Hostess Cupcake Sheet Cake and this amazing Twinkie Sheet Cake.
Hostess Snoballs Poke Cake (Easy Cake Mix Dessert)
If you love nostalgic desserts with a fun twist, this Hostess Snoballs Poke Cake will become a family favorite in no time.
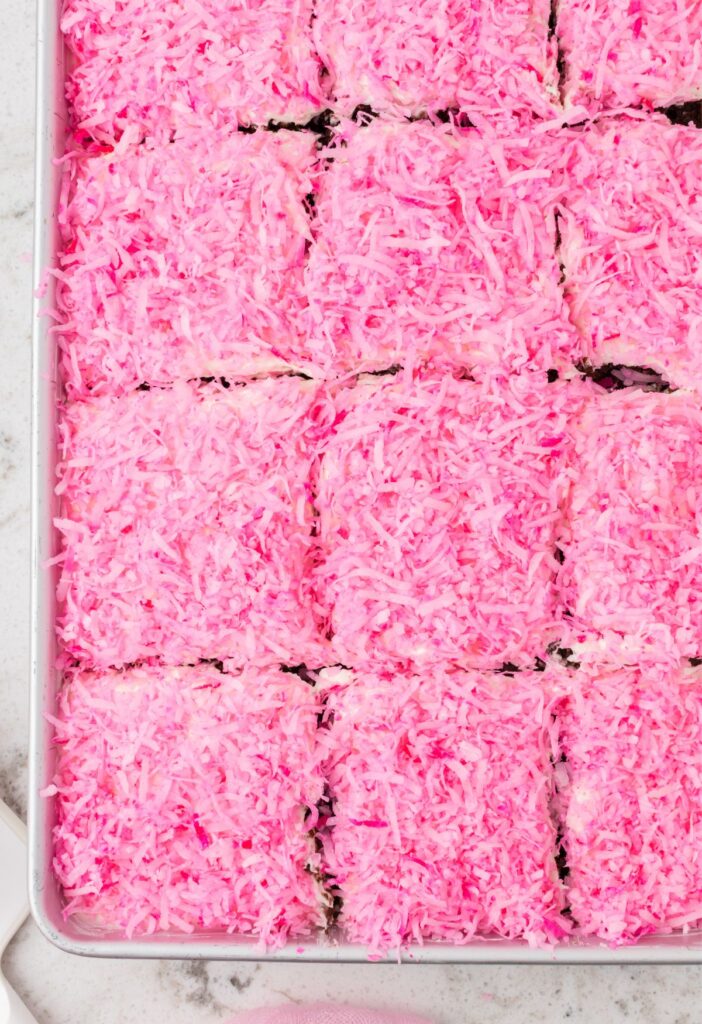
Inspired by the classic pink coconut-covered snack cakes, this easy cake mix dessert combines moist chocolate cake, cream filling, a sweet whipped marshmallow buttercream frosting, and of course sweet coconut flakes (that are pink!) on top.
It’s the ultimate retro-inspired poke cake recipe. Perfect for birthdays, potlucks, gatherings, or anytime you want a fun and colorful dessert.
Why You’ll Love This Snoballs Poke Cake
- 💕 Easy to make with simple ingredients
- 💕 Perfect make-ahead dessert for parties and gatherings
- 💕 Fun nostalgic twist on classic poke cake
- 💕 Gorgeous pink topping makes it stand-out
- 💕 Tastes exactly like the iconic Hostess Snoballs snack cakes
Ingredients Needed
Chocolate Cake Ingredients
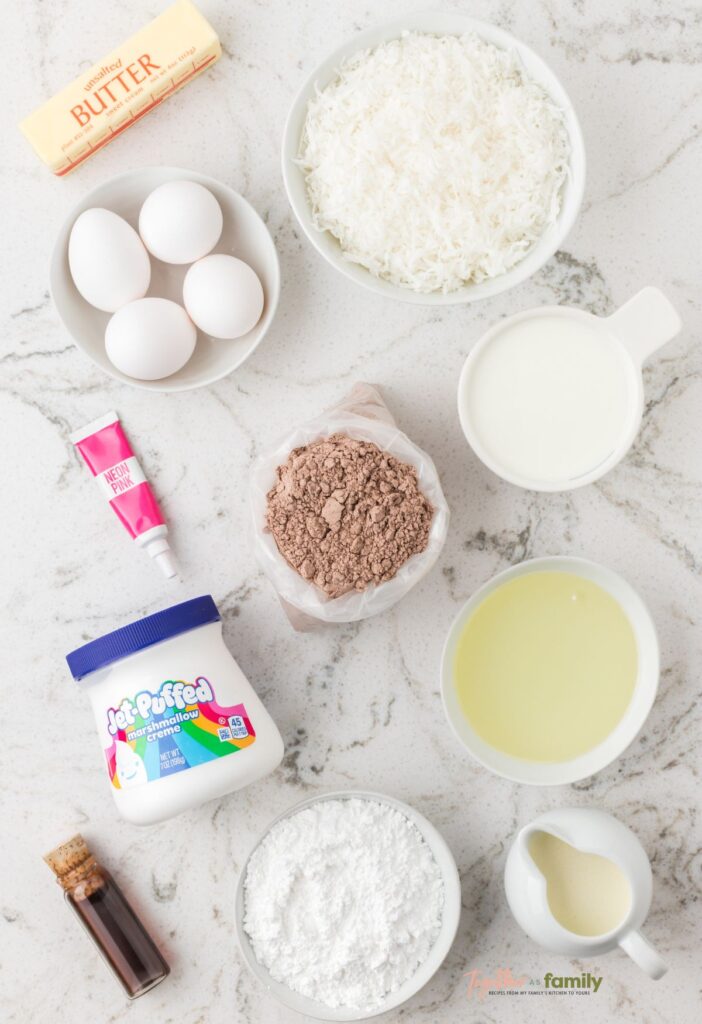
- Devil’s Food Cake Mix : Any chocolate cake mix will work, but the devil’s food chocolate cake mix has the best, richer, deeper chocolate flavor.
- Whole Milk
- Vegetable Oil
- Large Eggs
Whipped Cream Poke Filling Ingredients
- Heavy Whipping Cream : No substitutes!
- Powdered Sugar
- Pure Vanilla Extract
Marshmallow Buttercream Frosting Ingredients
- Butter : Use salted or unsalted butter; whichever you prefer baking with. I prefer salted butter.
- Marshmallow Cream : This is also called ‘marshmallow fluff’ and it’s the gooey, sticky melted marshmallow type mixture that comes in a plastic jar.
- Powdered Sugar
- Heavy Whipping Cream
- Pure Vanilla Extract
Pink Coconut Topping Ingredients
- Sweetened Shredded Coconut
- Pink Gel Food Coloring : I use the neon gel food colors and the pink that comes in that box is perfect for this recipe.
How To Make Hostess Snoballs Poke Cake (Printable Recipe Card)
Preheat the oven to 350°F and spray a 9×13-inch cake pan with nonstick cooking spray. Set aside.
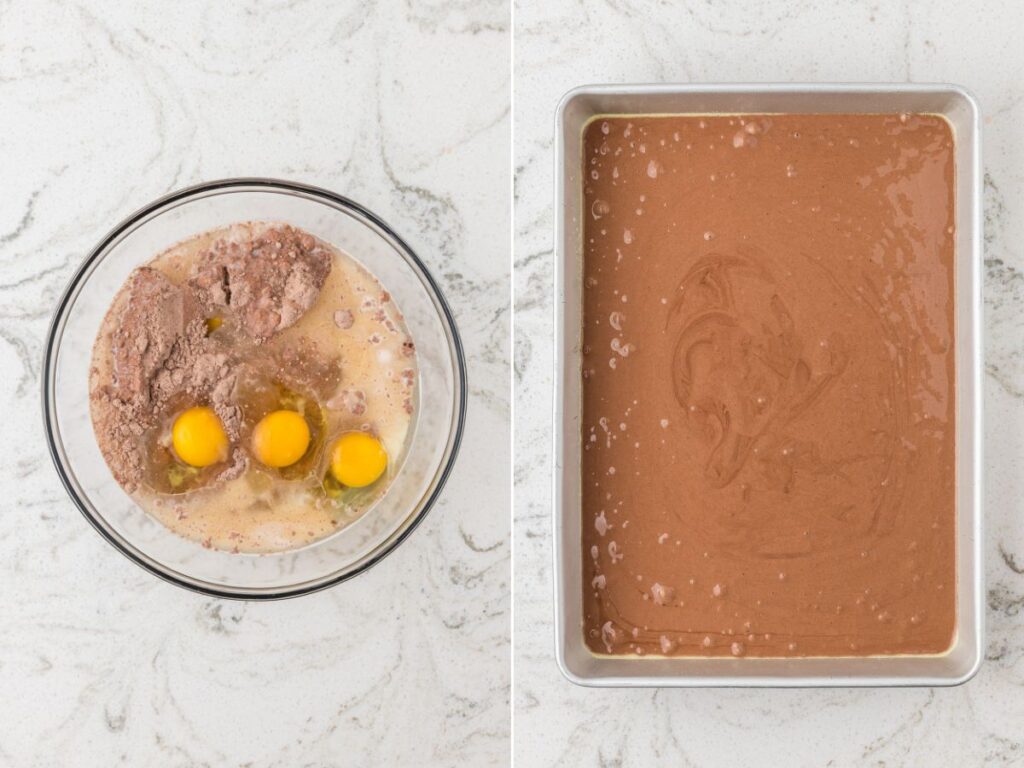
Make the Chocolate Cake : In a large bowl, add the dry chocolate cake mix, whole milk, oil, and large eggs. Blend on medium-high speed, with an electric mixer, until smooth and fully combined; about 2 minutes.
Pour the chocolate cake batter into the prepared pan and bake for 25-30 minutes, until a toothpick inserted inserted into the center comes out with crumbs and not wet batter.
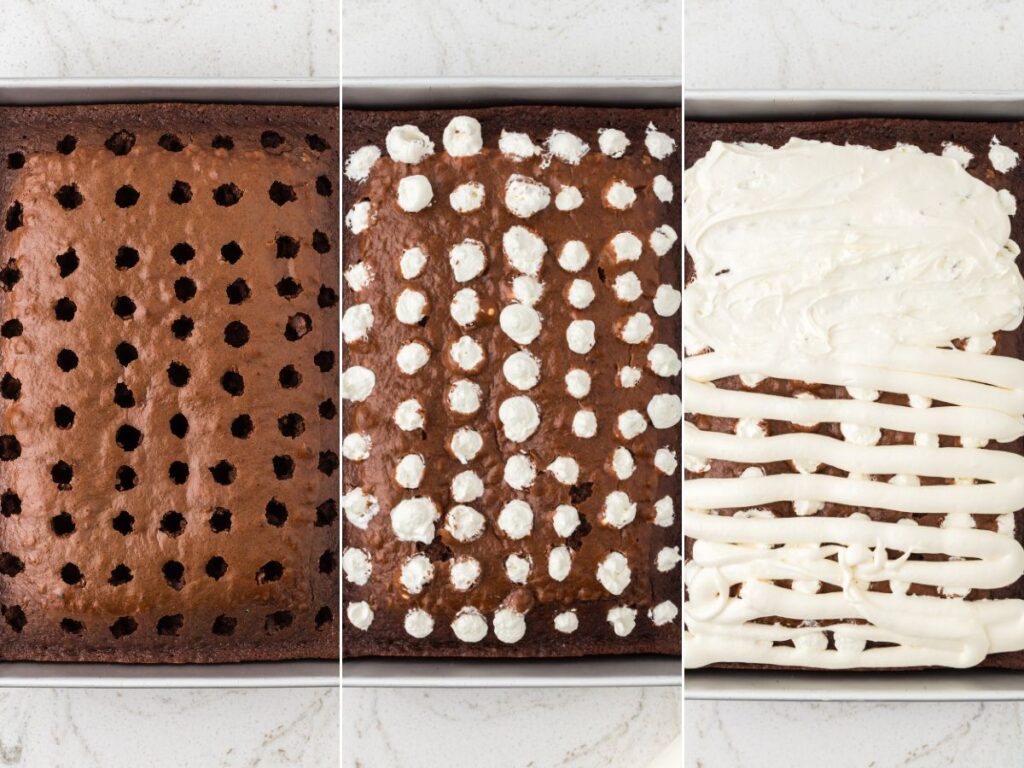
Remove the cake from the oven and immediacy poke holes across the surface, in even rows, with the handle of a wooden spoon – spacing them about 1-inch apart. Allow the cake to cool completely to room temperature before proceeding; about 1 hour.
Make The Whipped Cream Poke Filling : In a large mixing bowl, add the heavy whipping cream, powdered sugar, and vanilla extract. Use an electric mixer, or the whisk attachment on a stand mixer, to beat until stiff and stable peaks form; about 4-5 minutes.
Spoon the whipped cream into a piping-bag or large Ziploc bag, with the corner snipped, and pipe the filling directly into each poke hole. Be sure to get the cream down into each hole. Then lightly spread any remaining whipped cream across the surface of the cake.
Make The Marshmallow Buttercream Frosting : In a large mixing bowl, add the butter and use an electric mixer to beat it on medium-high speed until smooth and creamy.
Add in the marshmallow cream, powdered sugar, heavy cream, and vanilla extract. Continue beating on medium-high speed until the frosting is light, fluffy, and glossy.
Dollop spoonfuls of the frosting all over the top of the cake and use an offset spatula to gently spread it over the cake, sealing in the whipped cream filling, and creating a thick top layer.
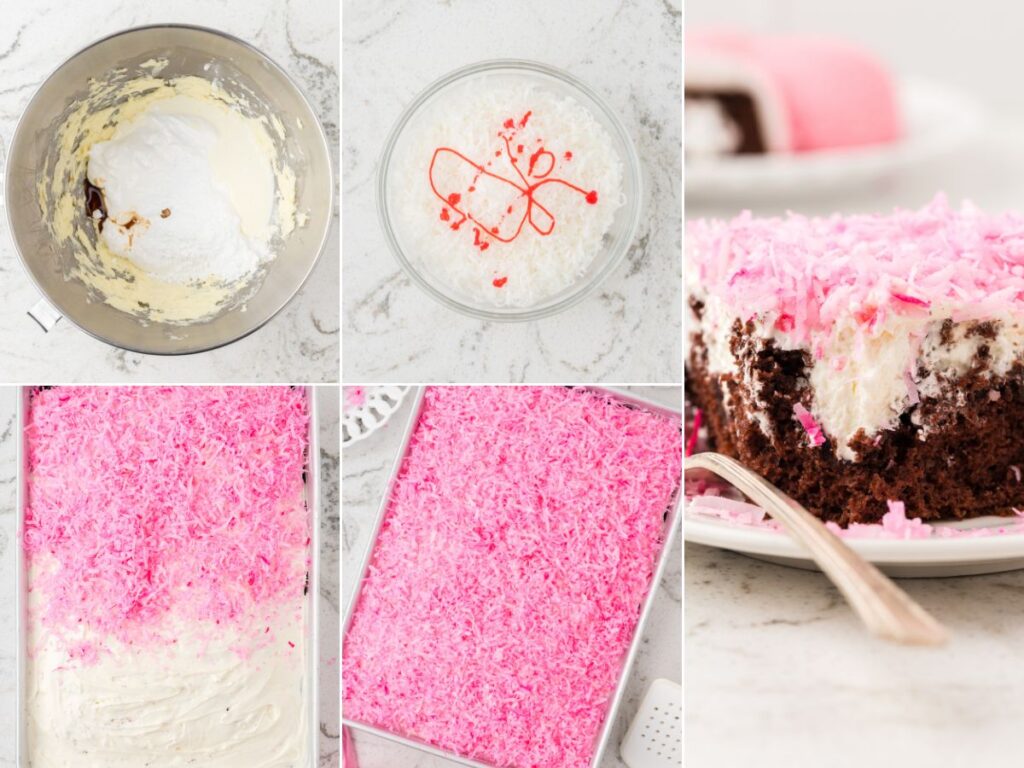
Make The Pink Coconut Topping : Add the coconut flakes into a bowl, and tint with 2-3 drops of the pink gel food coloring (adding more drops as needed), stirring together until it’s evenly coated and the pink color you prefer.
Sprinkle the pink coconut generously over the frosting and gently press it down so it sticks well to the frosting.
Cover the cake with a lid or plastic wrap and refrigerate for at least 1 hour, or up to 6 hours, before serving.
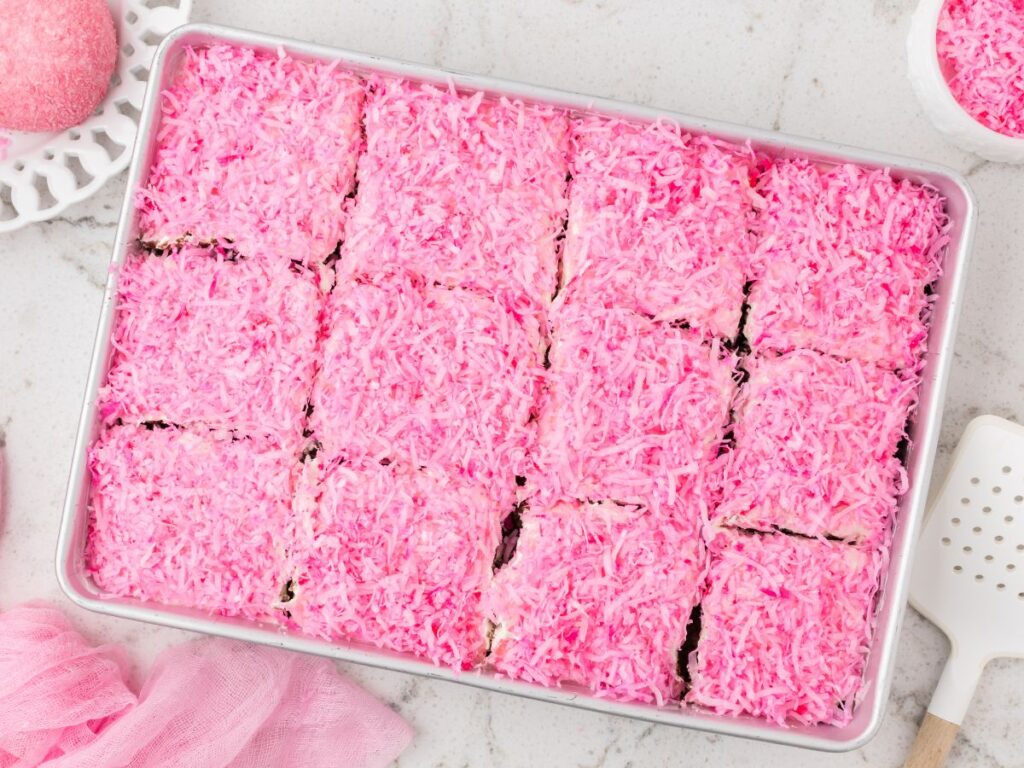
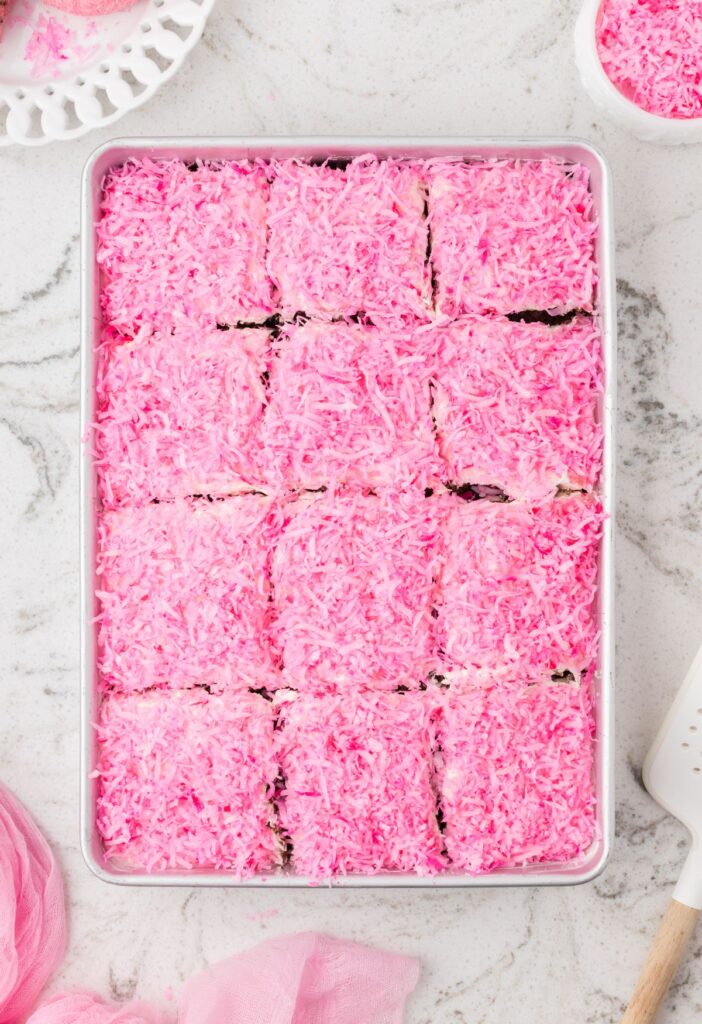
Cut into squares and serve the cake chilled. Enjoy!
How To Store Leftovers
- Fridge : Store the cake covered, in the refrigerator, for up to 4 days.
- Freezer : You can also freeze individual slices of the cake, by wrapping each cake slice in a double layer of plastic wrap, and then placing them inside a freezer-safe container. Freeze for up to 2 months and thaw in the refrigerator overnight.
- Make-Ahead Instructions : This cake can be fully assembled one day ahead and stored covered in the fridge, for up to 24 hours before serving. This improves the taste because the flavors and layers have time to blend, and it improves the structure of the cake and ensures a fully chilled cake for serving.
Pro Tips From The Test Kitchen
- This cake can be fully assembled and stored in the fridge, covered, for up to 24 hours before serving. With longer chill time the cakes structure improves, and the flavors are even better because they have time to deepen and blend, and the cake has time to fully chill before serving. I usually make this the night before or I make it the morning of and let it refrigerate all day (about 6-8 hours) before serving.
- It’s important that once you poke the holes that you let the cake cool completely to room temperature, before proceeding with the whipped cream poke filling.
- It’s best to use the end of a wooden spoon because it’s wider and creates larger holes in the cake, which is important, because we want big pockets of the whipped cream poke filling.
- Make sure you take the few minutes to poke holes in even rows across the whole surface of the cake. This way, each square has plenty of poked holes with the whipped cream filling in it.
- Devil’s food cake mix most closely replicates the flavors of the snack cake, however, a chocolate fudge cake mix is a suitable substitute if needed.
More Poke Cake Recipes To Try
- Lemon Poke Cake
- Oreo Poke Cake
- Hawaiian Poke Cake
- Easy Boston Cream Poke Cake Recipe
- Easy Snickers Poke Cake
- S’mores Poke Cake
- Banana Pudding Poke Cake
- Easy Cherry Poke Cake
- Strawberry Jello Poke Cake
- Hot Chocolate Poke Cake

Hostess Snoballs Poke Cake
Ingredients
Chocolate Cake
- 1 box (15.25 oz) devil's food cake mix
- 1 cup whole milk
- ½ cup vegetable oil
- 4 large eggs
Whipped Cream Poke Filling
- 1¼ cups heavy whipping cream
- ¼ cup powdered sugar
- 1 teaspoon pure vanilla extract
Marshmallow Buttercream Frosting
- ½ cup (1 stick) butter softened
- 1 jar (7 oz) marshmallow cream
- 1 cup powdered sugar
- 2 tablespoons heavy whipping cream
- 1 teaspoon pure vanilla extract
Pink Coconut Topping
- 1 bag (7 oz) sweetened shredded coconut
- neon pink gel food coloring (about 4-6 drops)
Instructions
- Preheat the oven to 350°F and spray a 9×13-inch cake pan with nonstick cooking spray. Set aside.
Chocolate Cake
- In a large bowl, add the dry chocolate cake mix, whole milk, oil, and large eggs. Blend on medium-high speed, with an electric mixer, until smooth and fully combined; about 2 minutes.1 box (15.25 oz) devil's food cake mix, 1 cup whole milk, ½ cup vegetable oil, 4 large eggs
- Pour the chocolate cake batter into the prepared pan and bake for 25-30 minutes, until a toothpick inserted into the center comes out with crumbs and not wet batter.
- Remove the cake from the oven and immediacy poke holes across the surface, in even rows, with the handle of a wooden spoon – spacing them about 1-inch apart. Allow the cake to cool completely to room temperature before proceeding; about 1 hour.
Whipped Cream Poke Filling
- In a large mixing bowl, add the heavy whipping cream, powdered sugar, and vanilla extract. Use an electric mixer, or the whisk attachment on a stand mixer, to beat until stiff and stable peaks form; about 4-5 minutes.1¼ cups heavy whipping cream, ¼ cup powdered sugar, 1 teaspoon pure vanilla extract
- Spoon the whipped cream into a piping-bag or large Ziploc bag, with the corner snipped, and pipe the filling directly into each poke hole. Be sure to get the cream down into each hole. Then lightly spread any remaining whipped cream across the surface of the cake.
Marshmallow Buttercream Frosting
- In a large mixing bowl, add the butter and use an electric mixer to beat it on medium-high speed until smooth and creamy.½ cup (1 stick) butter
- Add in the marshmallow cream, powdered sugar, heavy cream, and vanilla extract. Continue beating on medium-high speed until the frosting is light, fluffy, and glossy.1 jar (7 oz) marshmallow cream, 1 cup powdered sugar, 2 tablespoons heavy whipping cream, 1 teaspoon pure vanilla extract
- Dollop spoonfuls of the frosting all over the top of the cake and use an offset spatula to gently spread it over the cake, sealing in the whipped cream filling, and creating a thick top layer.
Pink Coconut Topping
- Add the coconut flakes into a bowl, and tint with 2-3 drops of the pink gel food coloring (adding more drops as needed), stirring together until it's evenly coated and the pink color you prefer.1 bag (7 oz) sweetened shredded coconut, neon pink gel food coloring
- Sprinkle the pink coconut generously over the frosting and gently press it down so it sticks well to the frosting.
- Cover the cake with a lid or plastic wrap and refrigerate for at least 1 hour, or up to 8 hours, before serving. * I think the cake tastes best with a longer chill time (8-10 hours). The flavors blend, the cake is not as sweet, texture gets better, and the cake has time to fully chill.
- Cut into squares and serve the cake chilled. Enjoy!
Notes
- This cake can be fully assembled and stored in the fridge, covered, for up to 24 hours before serving. With longer chill time the cakes structure improves, and the flavors are even better because they have time to deepen and blend, and the cake has time to fully chill before serving. I usually make this the night before or I make it the morning of and let it refrigerate all day (about 6-8 hours) before serving.
- It’s important that once you poke the holes that you let the cake cool completely to room temperature, before proceeding with the whipped cream poke filling.
- It’s best to use the end of a wooden spoon because it’s wider and creates larger holes in the cake, which is important, because we want big pockets of the whipped cream poke filling.
- Make sure you take the few minutes to poke holes in even rows across the whole surface of the cake. This way, each square has plenty of poked holes with the whipped cream filling in it.
- Devil’s food cake mix most closely replicates the flavors of the snack cake, however, a chocolate fudge cake mix is a suitable substitute if needed.
Nutrition
Did You Make This Recipe?
I’d love to see it! You can share it with me on @togetherasfamilyblog and follow on Pinterest @together-as-family-blog-recipes or Facebook @togetherasfamilyblog for more!







Did you love this recipe?
Make sure to comment below so we can chat about it! Or follow on your favorite social network for even more family recipes.