
This post may contain affiliate links, view our disclosure policy.
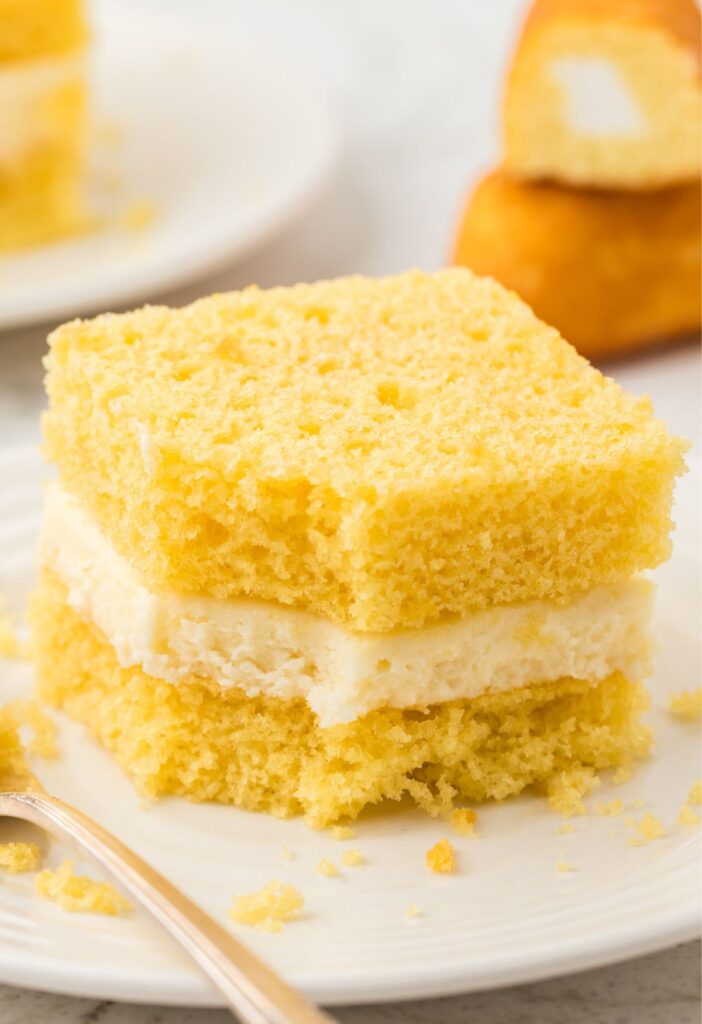
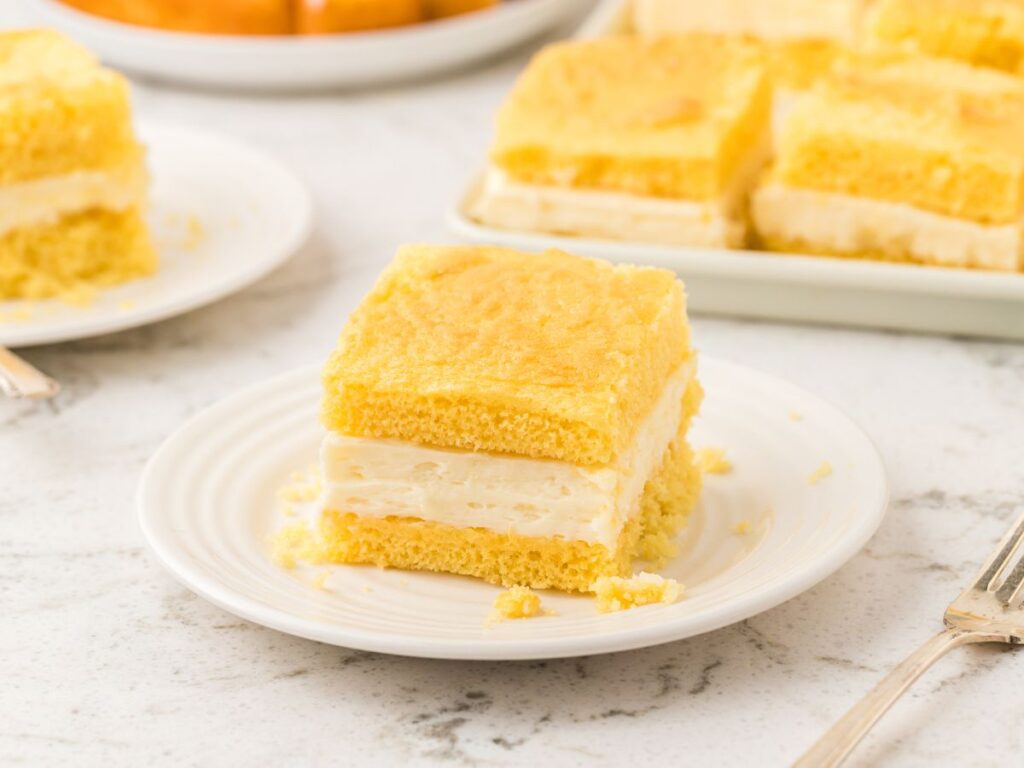
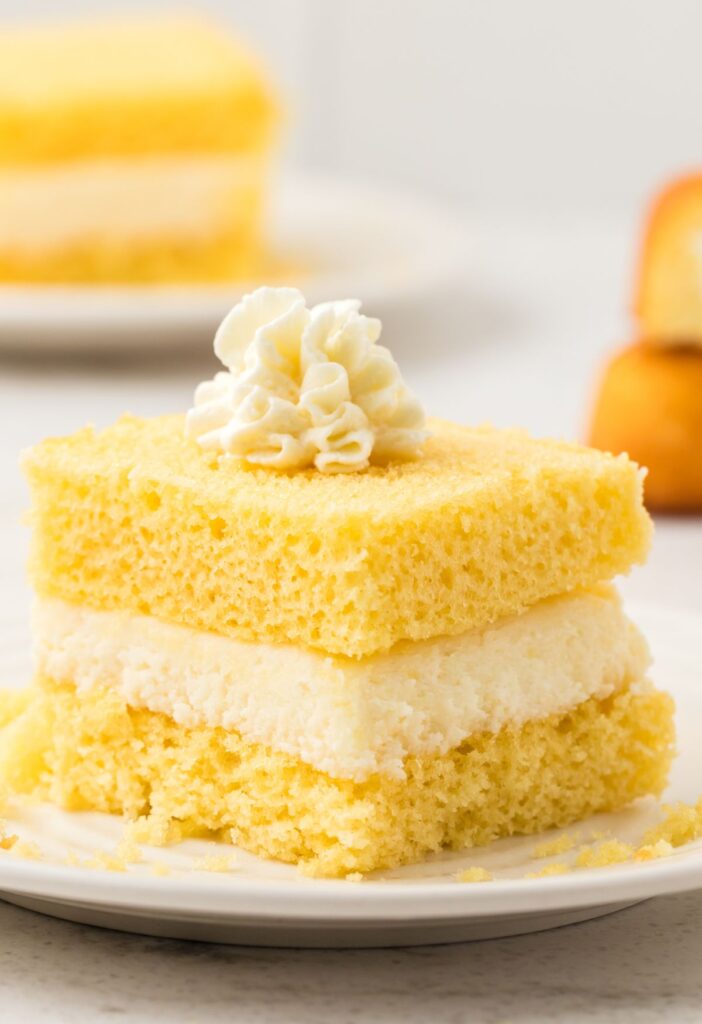
If you love the nostalgic taste of the classic snack cakes – Twinkies from Hostess – this Twinkie Cake is a must-make dessert. This easy sheet cake recipe, made in a 9×13 cake pan, starts with a yellow cake mix and transforms it into a fluffy, cream-filled cake.
The best part? You get that signature golden sponge and sweet whipped filling flavor without the hassle and mess of a homemade cake and individually filling cakes. For another copycat Hostess cake recipe – you must try my Hostess Sheet Cake ❤︎
Twinkie Sheet Cake Recipe (Made With Yellow Cake Mix)
This Twinkie sheet cake recipe made simple, even for beginner bakers, begins with a yellow cake mix and delivers all that nostalgic flavor of your favorite childhood treat – Twinkies.
It’s an easy dessert, that’s crowd friendly, perfect for gatherings and families. The best part is that it’s best to make it ahead of time. I LOVE make ahead desserts. It keeps things simple.
So if you’re craving a retro-inspired desserts that’s simple yet impressive, this is the recipe to make 🍰
Why You’ll Love This Twinkie Cake
- ✔️Starts with a boxed yellow cake mix (quick & foolproof)
- ✔️Light and fluffy whipped marshmallow cream filling
- ✔️Feeds a crowd, perfect for gatherings, or family dessert
- ✔️Tastes just like a Twinkie
- ✔️Great make-ahead dessert
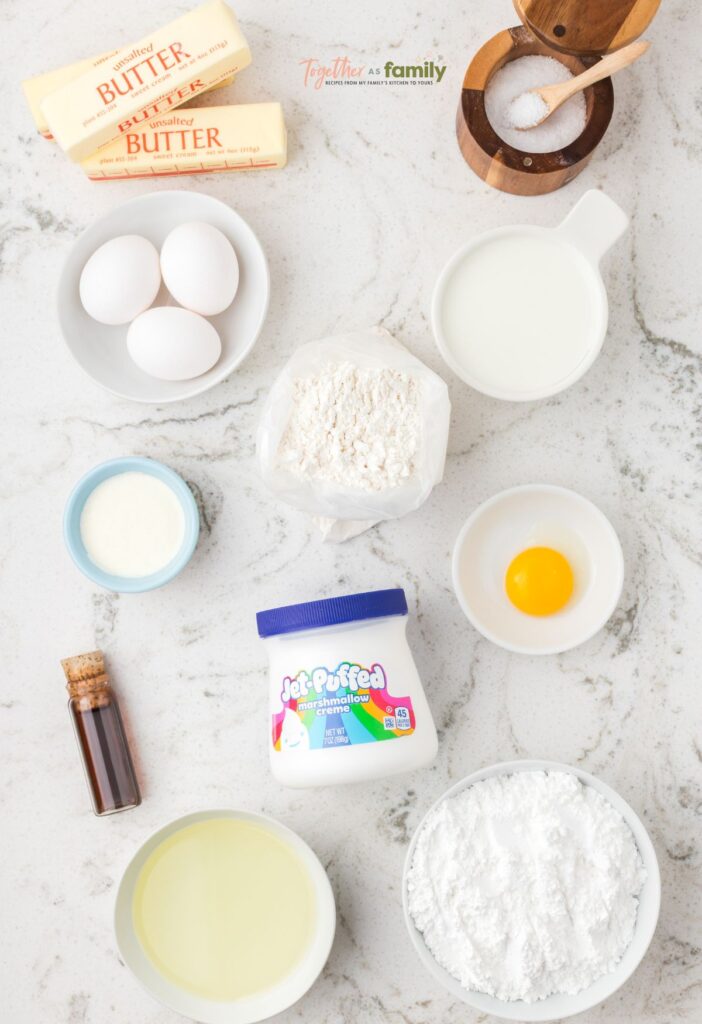
Ingredients Needed
Twinkie Cake Ingredients
- Yellow Cake Mix : An 15.25 ounce boxed cake mix
- Whole Milk
- Vegetable Oil
- Large Eggs
- Large Egg Yolk : Only use the yolk and discard the egg white
- Pure Vanilla Extract
Whipped Marshmallow Filling Ingredients
- Butter : You can use unsalted butter and add just a small pinch of salt, or use salted butter and omit the salt
- Marshmallow Fluff : Sometimes also called marshmallow creme
- Powdered Sugar
- Heavy Whipping Cream : No substitutes! This is the only think that will give you that whipped, thick texture for the filling
- Pure Vanilla Extract
How To Make A 9×13 Twinkie Cake With Marshmallow Cream Filling (Printable Recipe Card)
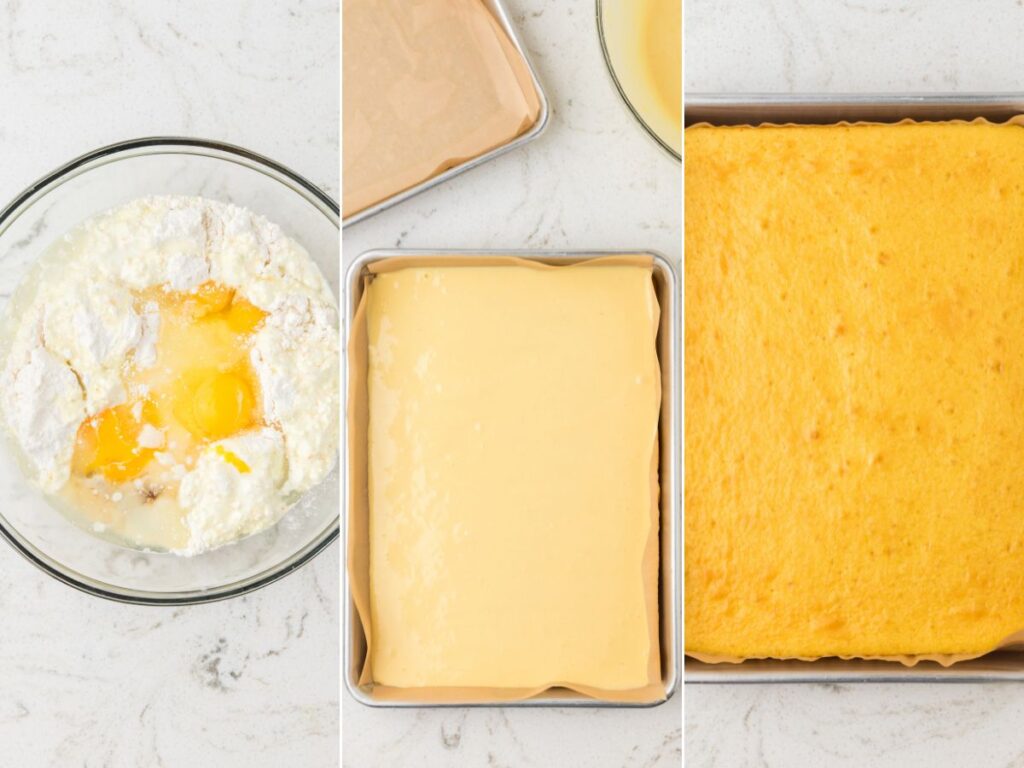
Preheat the oven to 350°F. Line two 9×13 cake pans with parchment paper, leaving a slight overhang for easy removal. Then lightly spray the parchment paper with nonstick cooking spray. Set aside.
Make The Twinkie Cake : In a large mixing bowl, add the dry yellow cake mix, whole milk, vegetable oil, large eggs, large egg yolk, and vanilla extract. Beat with a hand or stand mixer on medium speed for 2 to 3 minutes, until smooth and slightly thick.
Divide the batter evenly between the two prepared cake pan, spreading each portion into an even layer. It will be thin and that’s ok.
Bake both cakes on the center rack in the oven for 15-20 minutes, until the tops are light golden and a toothpick inserted in the center comes out clean with just a few moist crumbs.
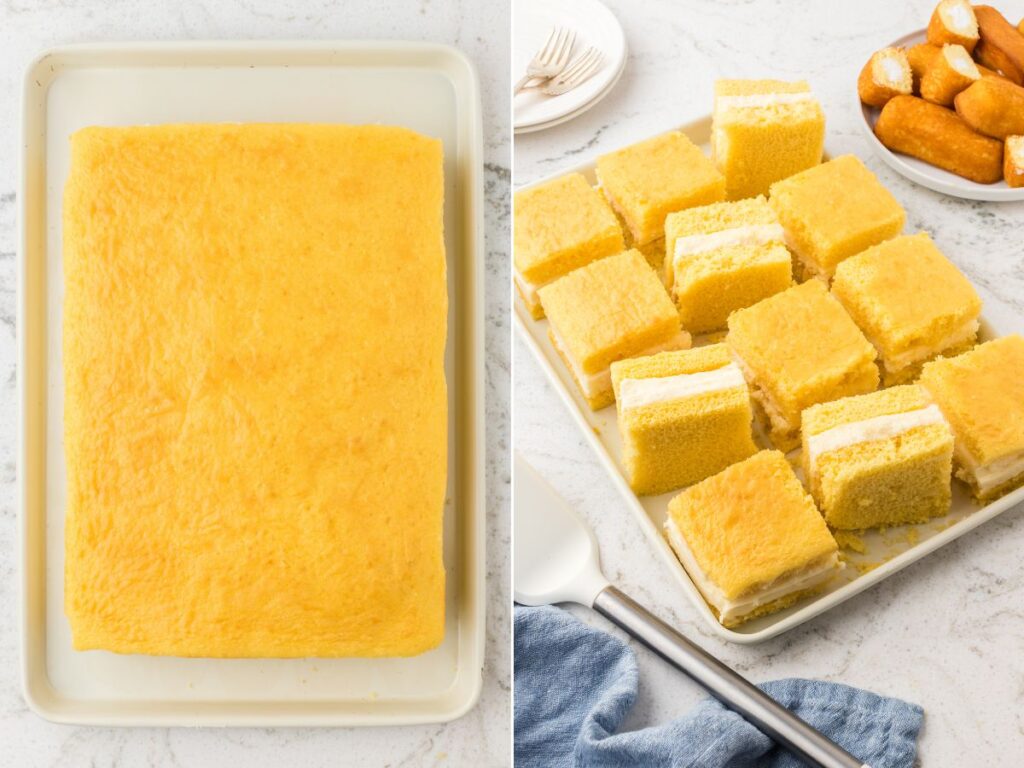
Remove the cakes from the oven and let them cool completely in the pans. About 1 hour.
Make The Whipped Marshmallow Filling : In a large bowl, beat the softened butter on medium speed for 1-2 minutes until smooth, pale, and creamy.
Add the marshmallow fluff and continue beating on medium speed until the ingredients are fully combined and fluffy, about 1 minute.
Add the sifted powdered sugar and beat on low speed, increasing the speed as needed, until it’s smooth. Scrape down the sides of the bowl as needed.
Add the heavy cream, vanilla extract, and pinch of salt (if using unsalted butter). Continue beating on medium speed until the filling is light, fluffy, and holds its shape. Add the remaining 1 tablespoon heavy cream only if needed to thin the frosting more for spreadability

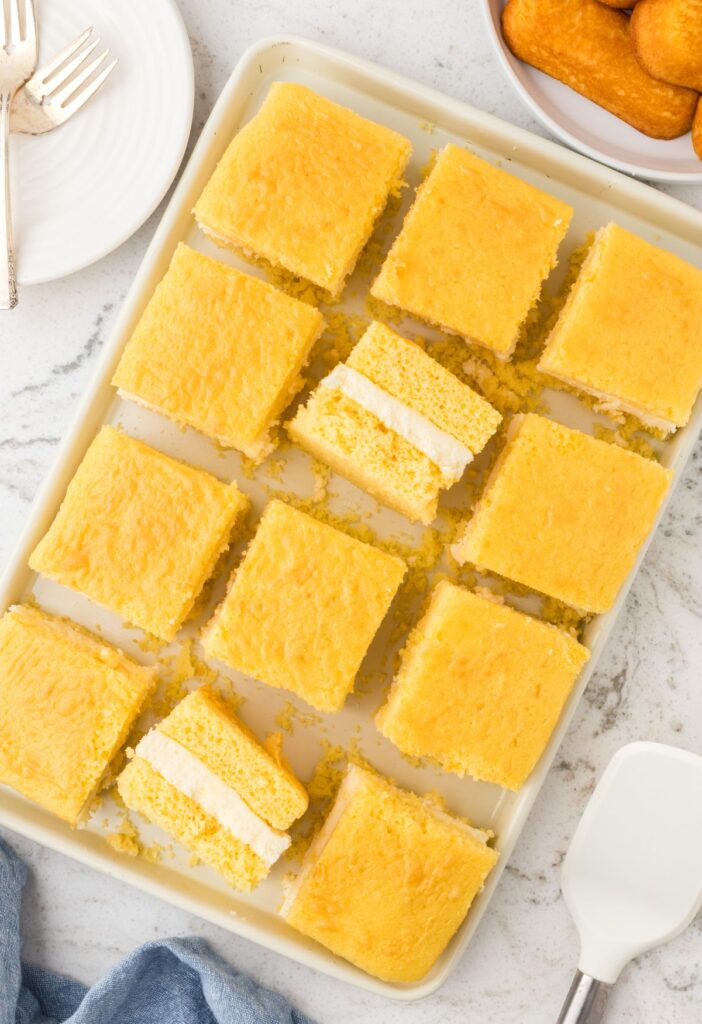
Assemble The Twinkie Cake : Lift one completely cooled cake layer out of the pan, using the parchment paper overhang, and place it on a serving platter, cake platter, or just leave the cake inside the cake pan for serving/storage/refrigerating (or whatever you want to keep it on for serving). Then spread the marshmallow filling evenly over the surface in a thick, generous layer, leaving a small border around the edges. Carefully place the second cake layer on top of the filling without pressing it down.
You can serve the cake immediately OR cover the cake with plastic wrap and refrigerate for up to 6-8 hours before serving. I prefer refrigerating the cake before serving so I spread the filling over the cake layer inside the cake pan, and then place the other cake layer on top of it. I then cover the cake pan with a lid or plastic wrap and refrigerate.
How To Store Leftover Twinkie Cake
- Room Temperature : You can store the finished cake covered, at room temperature, for up to 24 hours in your kitchen (as long as the kitchen is not too warm). The filling will soften which is why I recommend fridge storage.
- Fridge : For the best texture and chilled taste, I recommend storing the leftover cake in the fridge for up to 4 days. Leave the cake inside the cake pan and cover with a lid or plastic wrap, or remove leftover slices into an airtight container for storage.
- Make-Ahead Instructions : The cake layers can be baked up to 2 days ahead, wrapping them tightly in plastic wrap, or just cover the cake pans tightly, and store at room temperature or the fridge.
- Freeze Leftovers : Wrap individual slices of the cake in a double layer of plastic wrap. Store the wrapped slices in a freezer-safe container or bag, and freeze for up to 2 months. Let the cake slices thaw overnight in the fridge.
Substitutions & Ingredient Notes
- Yellow Cake Mix : Make sure you are using a 15.25 oz boxed cake mix. Use a yellow cake, buttery golden cake, or a yellow buttery cake. For some reason different brands call their yellow cakes a slightly different name. Just make sure it’s a yellow cake mix.
- Whole Milk : This is the best milk to use because its not too thick but still as the fat needed to add some moisture and richness to the cake.
- Butter : If using unsalted butter then you will want to add a pinch of salt (sea salt or kosher salt) to the filling mixture. If using salted butter don’t add the extra pinch of salt. You could actually still add it for more of that salty & sweet contrast if wanted.
- Heavy Whipping Cream : Absolutely no substitutes! You need the thickness, creaminess, and high fat content to help the frosting whip, set, and thicken.
- Powdered Sugar : Make sure you are using sifted powdered sugar – either use a sifter or a fine mesh strainer. If none of those are available, stir the powdered sugar with a wire whisk to help break up clumps. This isn’t the most ideal way but it is better than nothing.
Pro Tips From The Test Kitchen
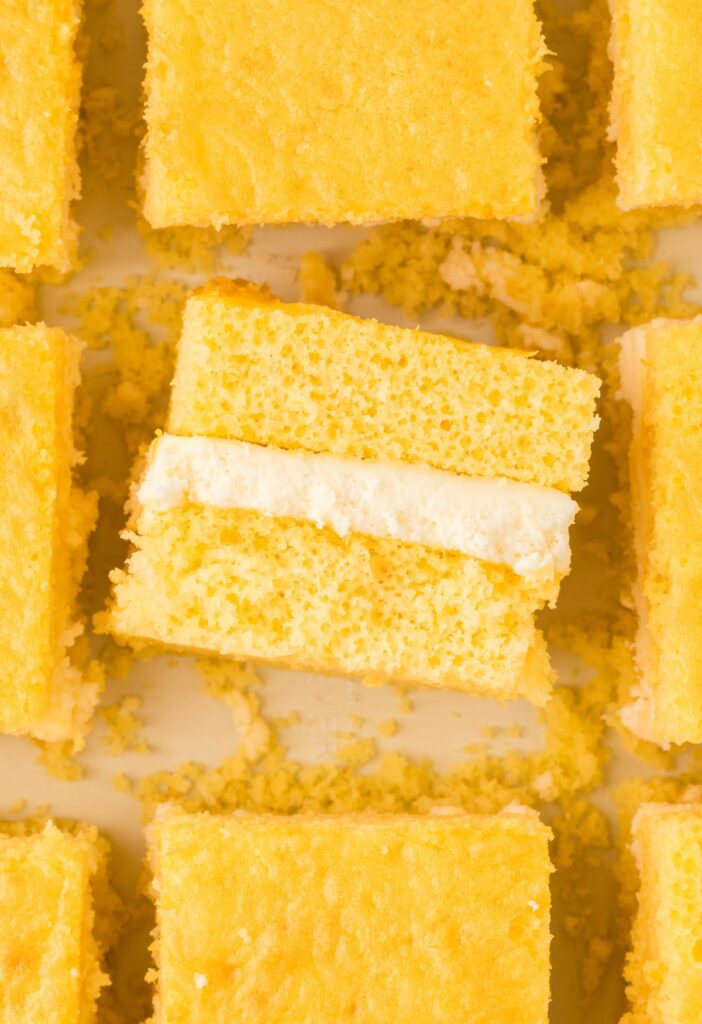
- Using a higher fat milk (like whole milk) and an extra egg yolk gives the cake that soft, plush texture that mimics the classic Twinkie crumb.
- Make sure the cake layers are completely cooled before assembling, or the filling will melt and slide off, and you will end up without the thick creamy filling layer (like a Twinkie).
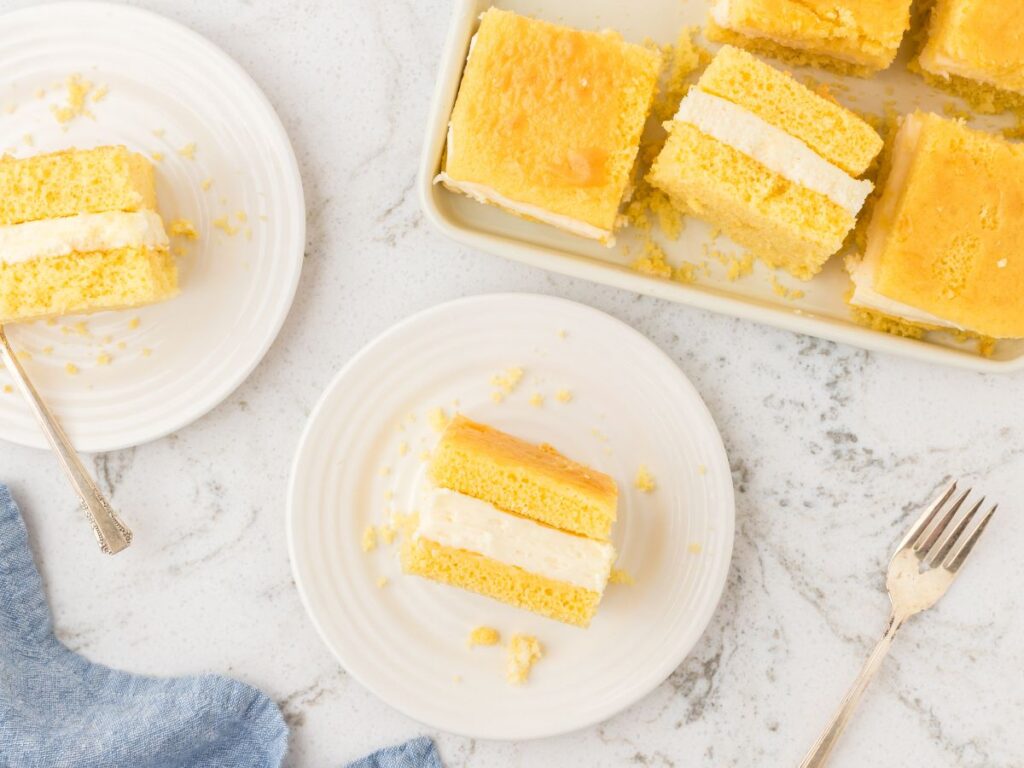
- The filling needs to be thick but creamy, similar to a cupcake frosting, that stays on and will hold its shape in a thick layer when sliced.
- If the filling feels too soft, refrigerate it for 10 minutes before spreading to help it firm slightly.
- Sift the powdered sugar! This keeps the filling ultra smooth and prevents a gritty texture. Use a sifter specifically for sifting, or I just use a fine mesh strainer (linked below in the recipe card) to sift.

More 9×13 Cake Recipes
- Dr. Pepper Texas Sheet Cake
- Earthquake Cake Recipe (German Chocolate Cake Mix)
- Raspberry Poke Cake (With A White Cake Mix)
- Chocolate Tres Leches Cake
- Easy Honey Bun Cake Recipe (With a Cake Mix)
- Quick EASY Lemon Jello Cake
- Lemon Blueberry Sheet Cake (Lemon Cream Cheese Frosting)
- Easy Mississippi Mud Cake Recipe (Chocolate Cake Mix)

Twinkie Cake
Equipment
Ingredients
Yellow Sponge Cake
- 1 box (15.25 oz) yellow cake mix
- 1 cup whole milk
- 1/2 cup vegetable oil
- 3 large eggs
- 1 large egg yolk (only use the yolk, discard the egg whites)
- 1 teaspoon pure vanilla extract
Marshmallow Cream Filling
- 1¼ cups unsalted butter (softened, see notes)
- 1 jar (7 oz) marshmallow fluff
- 4 cups powdered sugar (sifted)
- 3-4 tablespoons heavy whipping cream
- 1¼ teaspoons pure vanilla extract
- ¼ teaspoon sea salt
Instructions
- Preheat the oven to 350°F. Line two 9×13 cake pans with parchment paper, leaving a slight overhang for easy removal. Then lightly spray the parchment paper with nonstick cooking spray. Set aside. *You can also skip the parchment paper and spray each pan really well with nonstick spray.
Yellow Sponge Cake
- In a large mixing bowl, add the dry yellow cake mix, whole milk, vegetable oil, large eggs, large egg yolk, and vanilla extract. Beat with a hand or stand mixer on medium speed for 2 to 3 minutes, until smooth and slightly thick.1 box (15.25 oz) yellow cake mix, 1 cup whole milk, 1/2 cup vegetable oil, 3 large eggs, 1 large egg yolk, 1 teaspoon pure vanilla extract
- Divide the batter evenly between the two prepared cake pans, spreading each portion into an even layer. It will be thin and that's ok.
- Bake both cakes on the center rack in the oven for 15-20 minutes, until the tops are light golden and a toothpick inserted in the center comes out clean with just a few moist crumbs.
- Remove the cakes from the oven and let them cool completely in the pans. About 1 hour.
Marshmallow Cream Filling
- In a large bowl, beat the softened butter on medium speed for 1-2 minutes until smooth, pale, and creamy.1¼ cups unsalted butter
- Add the marshmallow fluff and continue beating on medium speed until the ingredients are fully combined and fluffy, about 1 minute.1 jar (7 oz) marshmallow fluff
- Add the sifted powdered sugar and beat on low speed, increasing the speed as needed, until it's smooth. Scrape down the sides of the bowl as needed.4 cups powdered sugar
- Add 3 tablespoons heavy cream, vanilla extract, and salt. Continue beating on medium speed until the filling is light, fluffy, and holds its shape.*Add the remaining 1 tablespoon heavy cream only if needed to thin the frosting more for spreadability.3-4 tablespoons heavy whipping cream, 1¼ teaspoons pure vanilla extract, ¼ teaspoon sea salt
Assemble The Twinkie Cake
- Lift one completely cooled cake layer out of the pan, using the parchment paper overhang or invert the pan and the cake should fall right out, and place it on a serving platter, cake platter, or just leave the cake inside the cake pan for serving/storage/refrigerating (or whatever you want to keep it on for serving).*I leave the one cake inside the pan, add the cream filling, and then remove the other cake from the pan and place it on top.
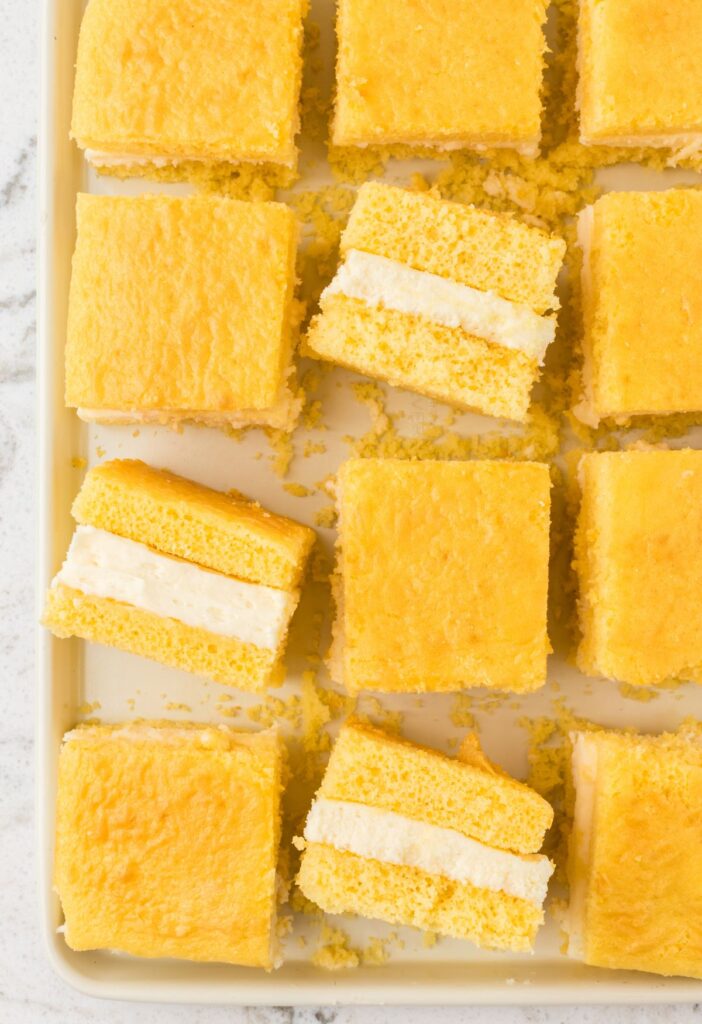
- Then spread the marshmallow filling evenly over the surface in a thick, generous layer, leaving a small border around the edges. Carefully place the second cake layer on top of the filling, and very gently press it down so it stays in place.
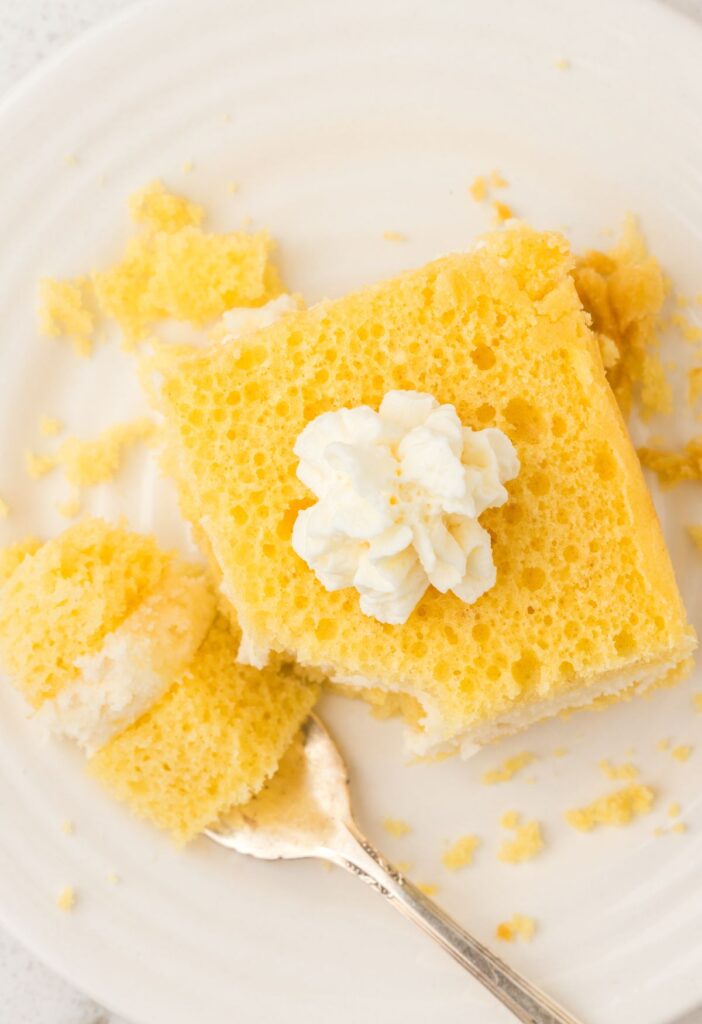
- You can serve the cake immediately OR cover the cake with plastic wrap and refrigerate for up to 6-8 hours (or overnight) before serving.*I prefer refrigerating the cake before serving so I spread the filling over the cake layer inside the cake pan, and then place the other cake layer on top of it. I then cover the cake pan with a lid or plastic wrap and refrigerate. *Because I usually have leftover heavy whipping cream (the recipe only calls for a few tablespoons) I like to use the remaining heavy whipping cream to make homemade whipped cream for serving on top of each slice. Add 1.5 cups heavy whipping cream + 1/3 cup powdered sugar to a bowl and beat until stiff peaks form.
Notes
Did You Make This Recipe?
I’d love to see it! You can share it with me on @togetherasfamilyblog and follow on Pinterest @together-as-family-blog-recipes or Facebook @togetherasfamilyblog for more!


Did you love this recipe?
Make sure to comment below so we can chat about it! Or follow on your favorite social network for even more family recipes.