
This post may contain affiliate links, view our disclosure policy.
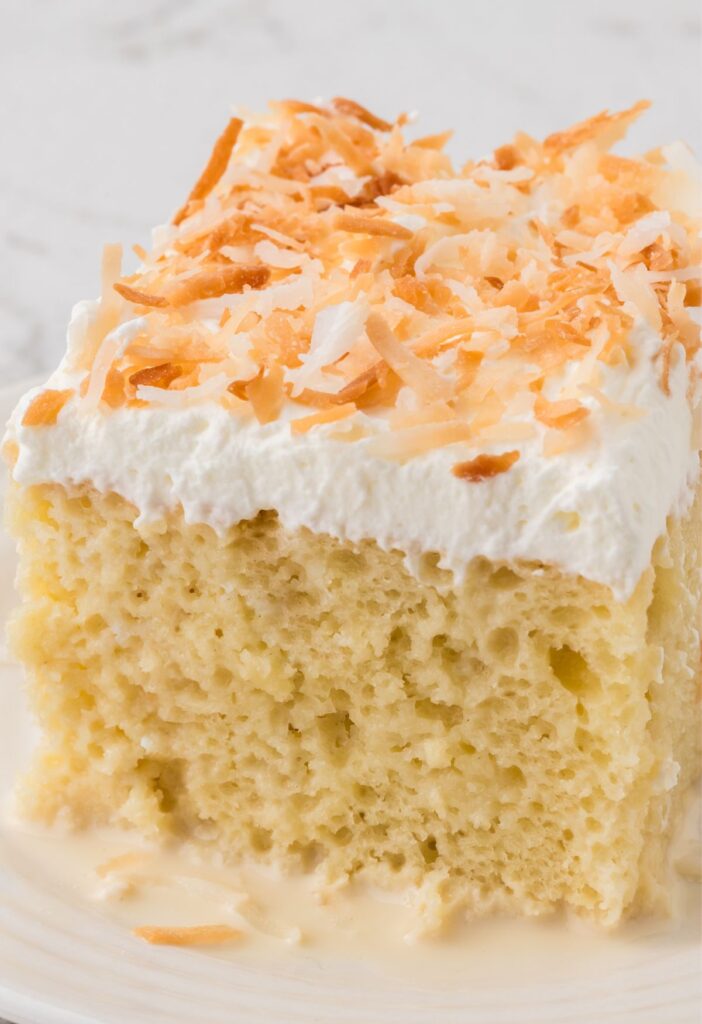
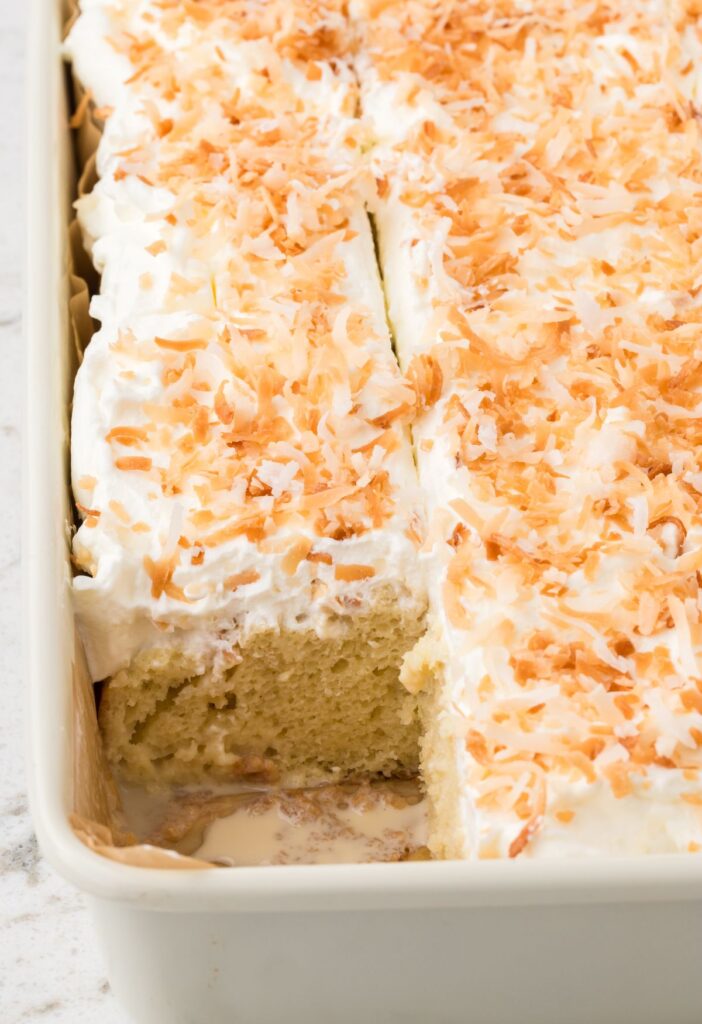
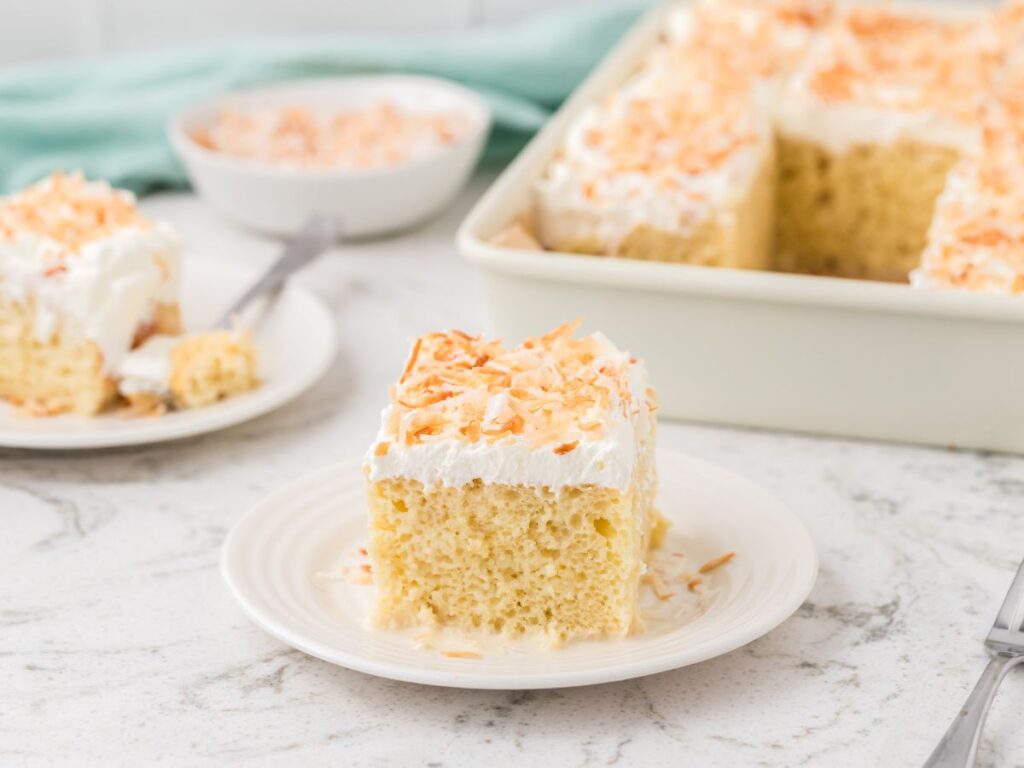
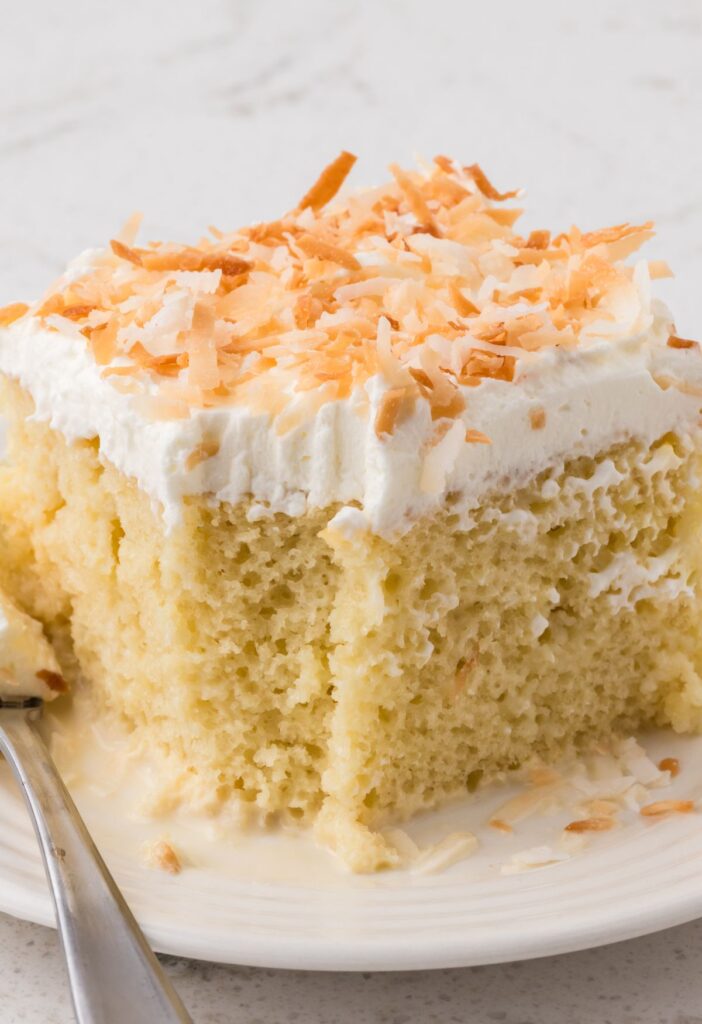
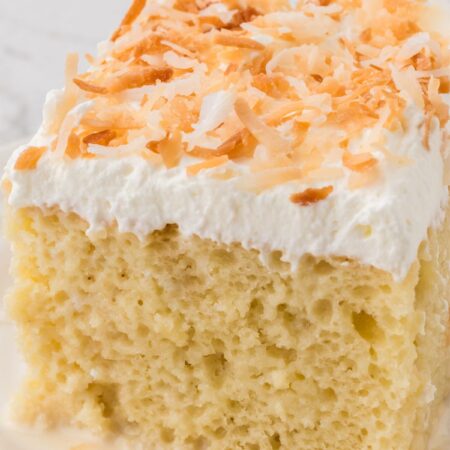
This Coconut Tres Leches Cakes starts with a coconut sponge cake (from a cake mix!) that is soaked in three different types of milk; sweetened condensed milk, evaporated milk, and creamy coconut milk. The coconut cake then gets topped off with freshly whipped cream and toasted coconut flakes. If you love coconut – then this tropical twist to a traditional tres leches cake is a must-bake!
Do you love tres leches cake recipe? Then be sure and try my Chocolate Tres Leches Cake and Strawberry Tres Leches Cake.
Coconut Tres Leches Cake Recipe
A tres leches cake is a sponge cake that gets soaked in three different kinds of milk. I love this coconut version because not only will it be one of the easiest cakes you’ll ever make, but it’s loaded with creamy coconut flavor all throughout. It’s the perfect dessert for a hot day during the summertime with it’s cool, creamy, and refreshing tropical coconut flavors.
You will start with a vanilla cake mix that has been ‘doctored up’ slightly to make it even better! Then the cake gets poked with a wooden skewer and soaked in the milk mixture. The key to a great tres leches cake is refrigerating it overnight. Trust me, it makes the biggest different in flavor! So plan on making this the day before.
When you’re ready to serve, whip up the homemade whipped cream and toast the coconut flakes for the garnish. Assemble it and serve the cake chilled from the fridge. I just know you’re going to LOVE this one 🥥
Ingredients Needed
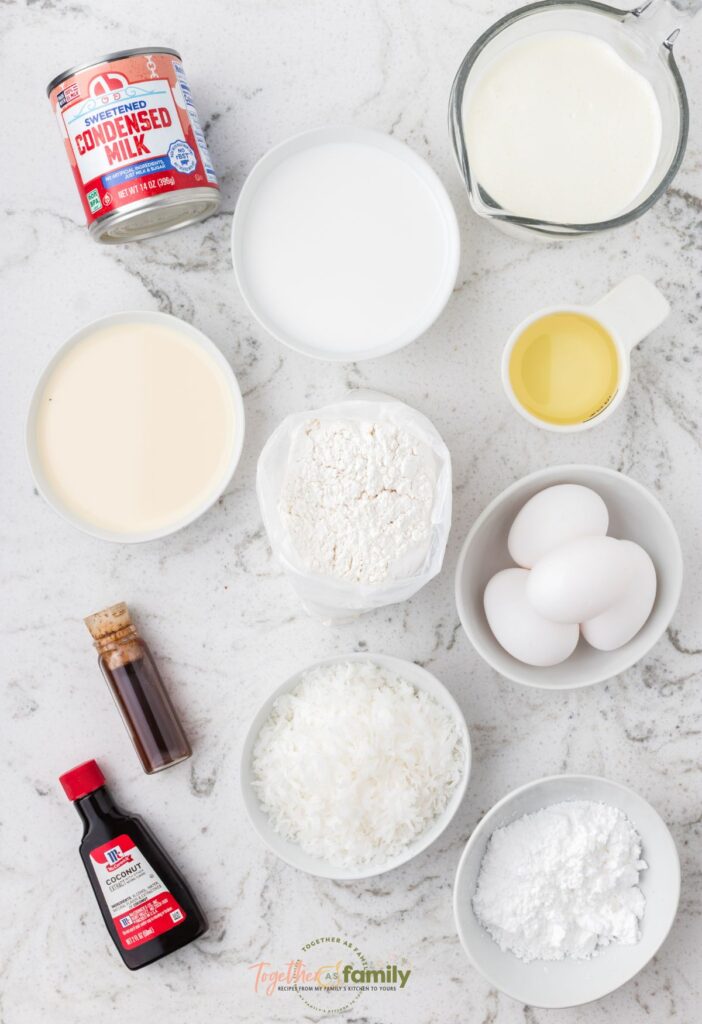
Coconut Cake Ingredients
- Vanilla Cake Mix
- Canned Coconut Milk
- Vegetable Oil
- Large Eggs
- Coconut Extract
- Vanilla Extract
Coconut Tres Leches Soak Ingredients
- Sweetened Condensed Milk
- Evaporated Milk
- Canned Coconut Milk
Whipped Cream Topping Ingredients
- Heavy Whipping Cream
- Powdered Sugar
- Vanilla Extract
- Toasted Coconut Flakes
How To Make Coconut Tres Leches Cake With A Cake Mix (Printable Recipe Card)
Preheat the oven to 350 degrees F. Prepare a 9×13-inch cake pan or baking dish and spray with nonstick cooking spray, or line with parchment paper. Set aside.
In a large bowl, add the vanilla cake mix, canned coconut milk, vegetable oil, eggs, coconut extract, and vanilla extract. Beat with a hand mixer or stand mixer (with the paddle attachment) on medium speed for 2 minutes, or until the cake batter is well combined and smooth.
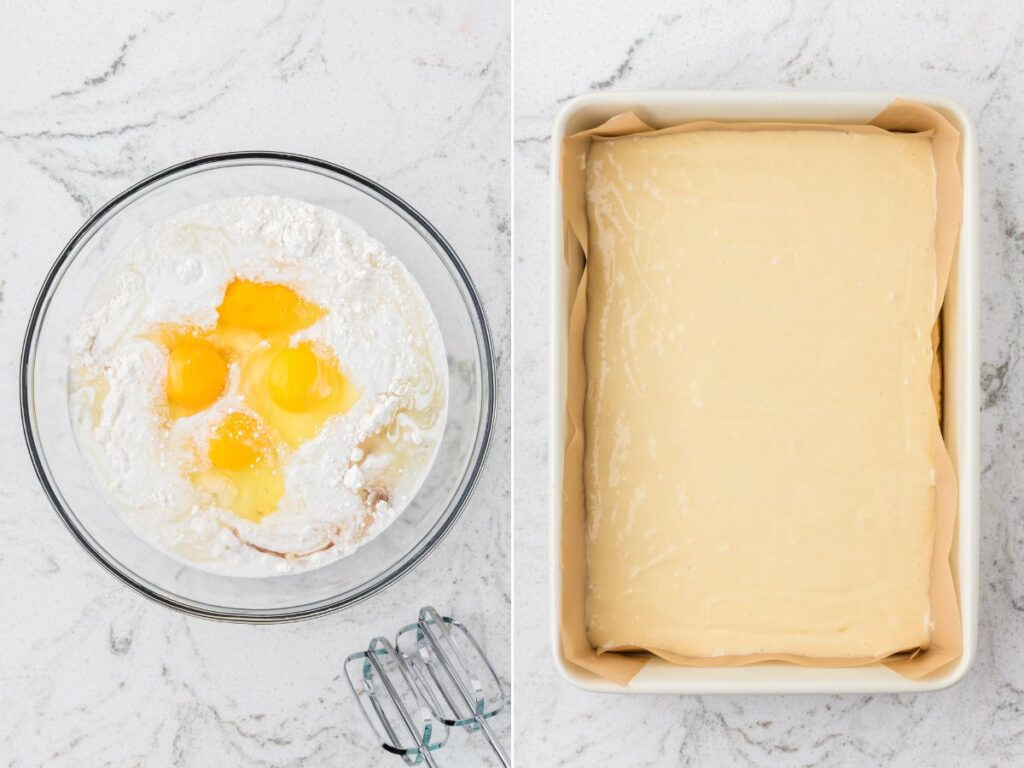
Pour the cake batter into the prepared pan and smooth out the top with a spatula. Bake for 20-30 minutes, or until a toothpick or cake tester inserted in the center comes out clean.
Remove the cake from the oven and allow it to cool for 20 minutes before you poke holes into the cake.
Once it has cooled slightly, use a wooden skewer, a fork, or the end of the handle of a wooden spoon to carefully poke lots of holes all over the cake. Allow the cake to cool completely to room temperature before proceeding. A warm cake absorbs the milk mixture too quickly and can make it collapse or become mushy, so be sure to let it cool completely for best results.
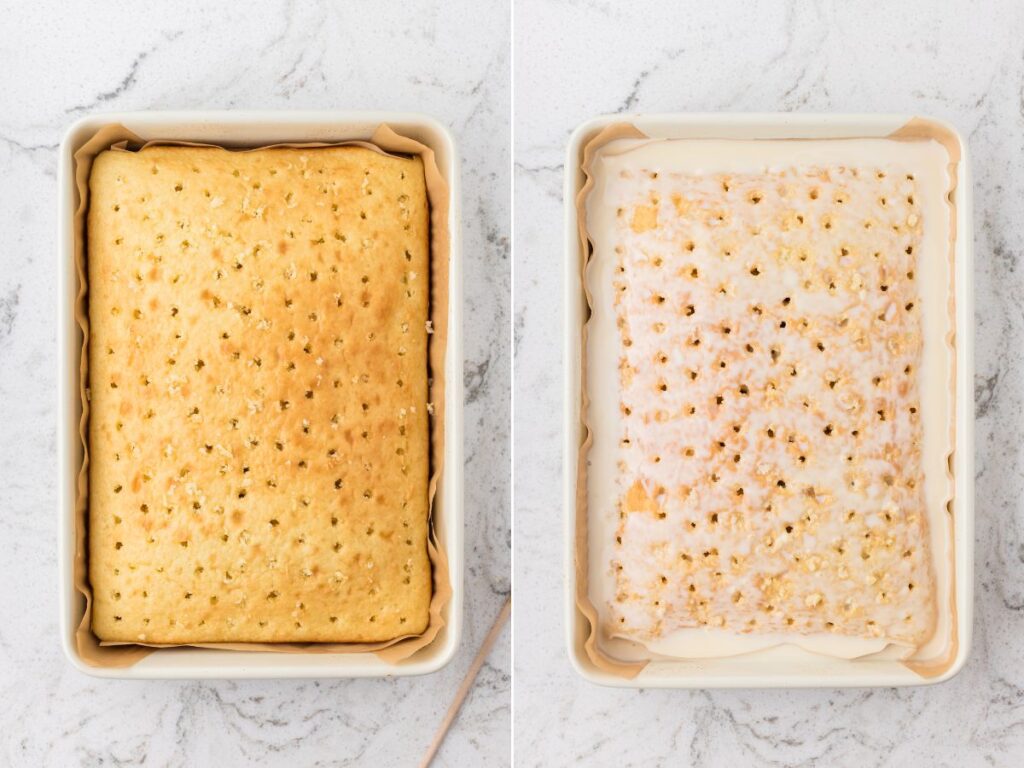
In a small bowl, whisk together the sweetened condensed milk, evaporated milk, and canned coconut milk until fully blended. Slowly pour the milk mixture over the entire cake, making sure it soaks into the holes. Pour just a bit of the milk mixture at a time, letting it absorb before adding more. If it starts to pool and not soak in, stop and let the cake rest a bit before continuing.
Cover the cake with a lid or plastic wrap, and refrigerate for at least 6 hours, or overnight is preferred. The longer it sits in the fridge, the better the soak settles in and sets the texture of the cake.
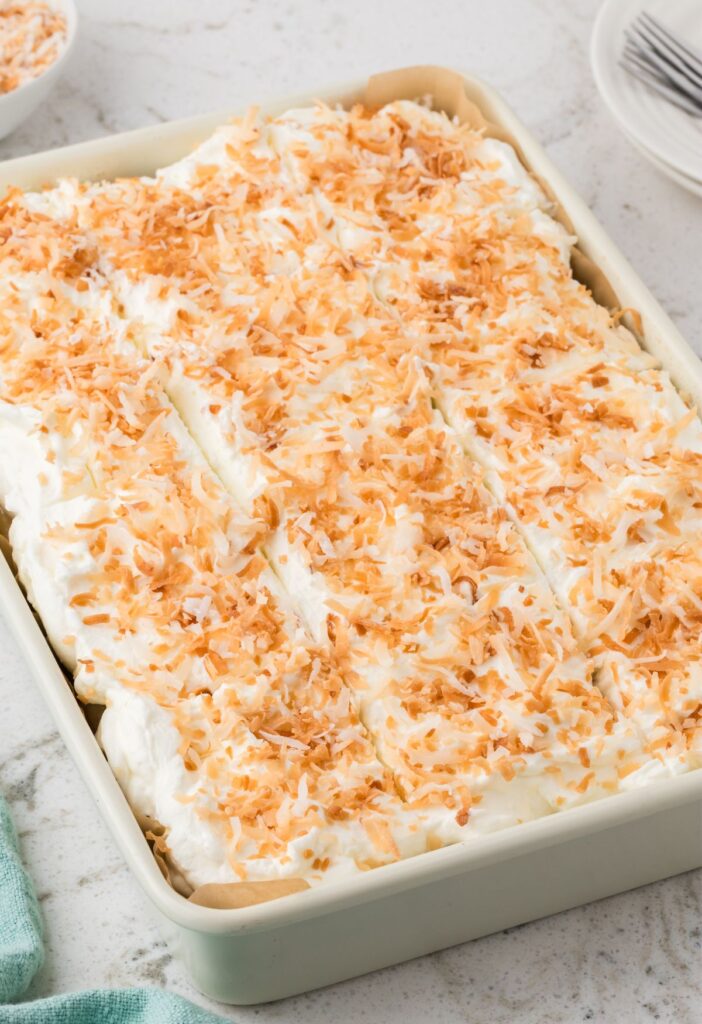
Once you are ready to serve the cake, prepare the homemade whipped cream. Using a mixing bowl with a hand mixer, or use the bowl of a stand mixer with the whisk attachment, beat the heavy whipping cream, powdered sugar, and vanilla extract together until stiff peaks form. This takes about 3-4 minutes. Start at low speed to avoid splashing and increase the speed, as needed, to high speed.
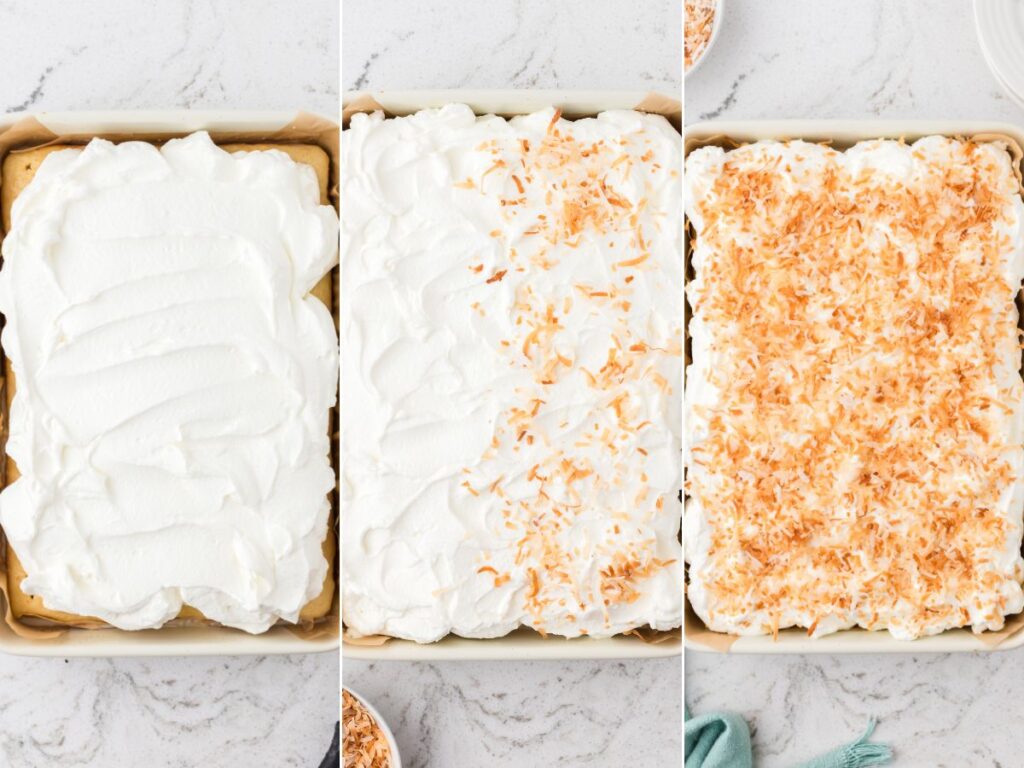
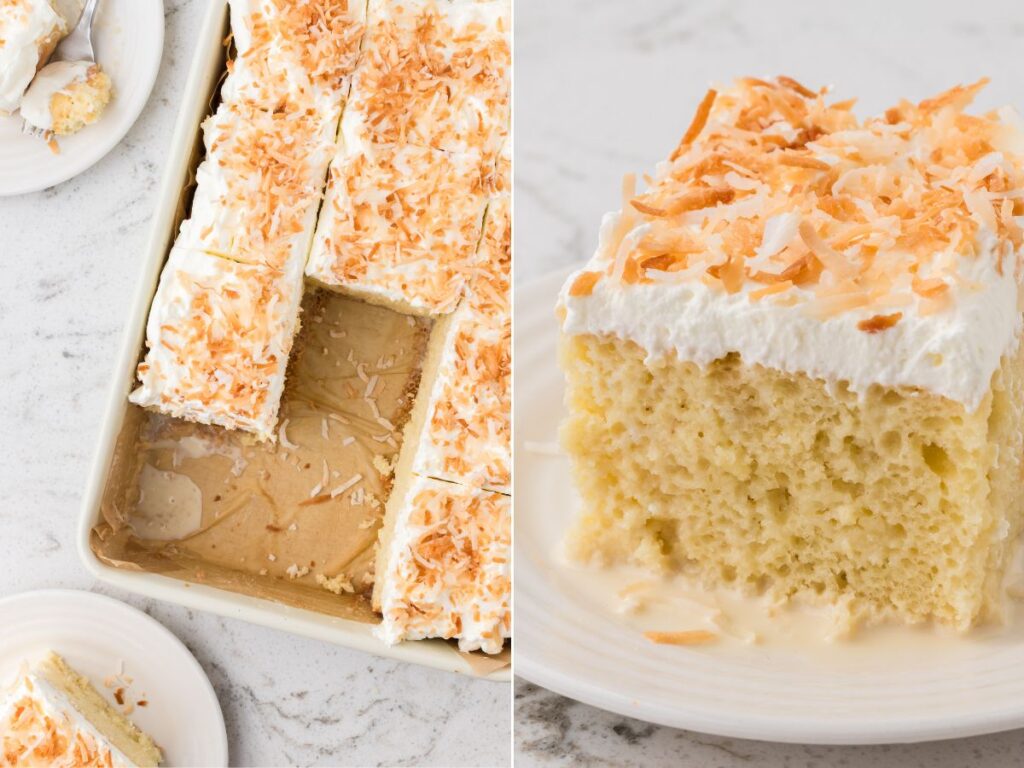
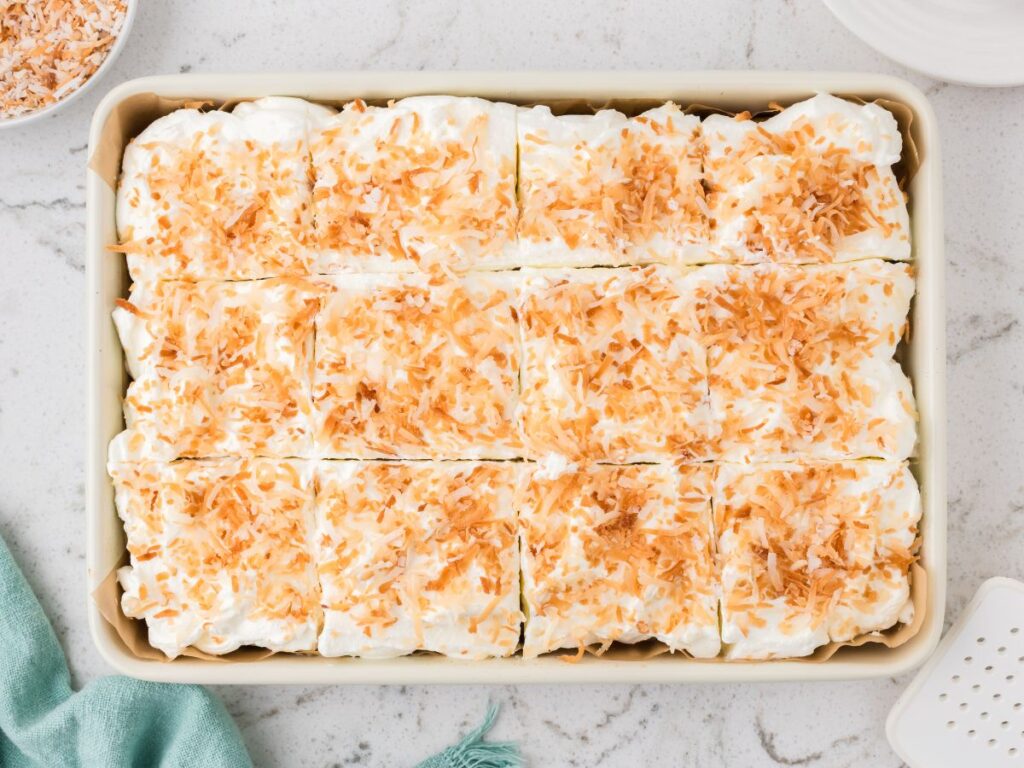
Use an offset spatula or rubber spatula to evenly spread the whipped cream on top of the chilled cake. Sprinkle the toasted coconut over top (optional, if using). Slice the cake and serve cold. Enjoy!
How To Store Coconut Tres Leches Cake
- Storage : Store the cake, and any leftovers, in the fridge covered tightly with a lid, foil, or plastic wrap. It keeps well in the fridge for up to 4 days.
- Make-Ahead Instructions : You can make the cake, including the soak, a day in advance. The cake needs time to refrigerate anyways so make it the night before and let it chill overnight along with the milk mixture that you can whisk and chill in the fridge alongside the cake, so it’s ready to go. Make sure to give the milk mixture a good mix if using it from the fridge after it has sat for awhile. Wait to add the whipped cream topping and toasted coconut until right before serving so it stays fluffy and fresh.
Follow These Recipe Tips For Success
- Be sure to let the cake cool completely, at room temperature, before pouring the tres leches milk soak over it. The cake being cooled will help the mixture soak properly into the cake, without causing it to be mushy.
- Use the canned coconut and NOT the carton coconut milk; the canned coconut milk makes a huge different in the creaminess of the cake. Also, make sure you shake the can of coconut milk really well because it does separate in the can. So shake it good before measuring out the amount needed. You can find the canned coconut milk in the baking aisle or near the asian ingredients like soy sauce, etc.
- I like to use a wooden skewer to poke holes in the cake, instead of a larger wooden spoon handle, because it creates smaller holes all over, which helps the soak distribute more evenly without leaving big gaps or making the cake look torn up; it just creates a neater finish, especially when slicing and serving. Fork tines are another great one to use.
- I highly recommend chilling the poked and milk soaked cake overnight for best results. The longer the cake sits in the fridge, the better the soak settles in, the better the texture will be, and the flavors will meld together perfectly.
- Use a full-fat canned coconut milk for best results. I use a brand called Imperial Dragon that I find at Walmart and it comes in a blue can. Unsweetened coconut milk is just fine, as I think most of the canned coconut milks are unsweetened.
- If wanted, you can use an 8 ounce container of Cool Whip (instead of making your own whipped cream) but I recommend making your own for the best flavor!
- Use full-fat versions of sweetened condensed milk, evaporated milk (vitamin D is the full-fat version) and coconut milk.
More Coconut Dessert Recipes


Coconut Tres Leches Cake
Equipment
Ingredients
Vanilla Coconut Cake
- 1 box (15.25 oz) vanilla cake mix
- 4 large eggs
- 1 cup full-fat canned coconut milk (shake the can well before measuring)
- 1/3 cup vegetable oil
- 2 teaspoons coconut extract
- 1 teaspoon vanilla extract
Coconut Tres Leches Soak
- 1 can (14 oz) sweetened condensed milk
- 3/4 cup evaporated milk
- 3/4 cup full-fat canned coconut milk
Toasted Coconut Whipped Cream
- 2 cups heavy whipping cream
- 1/4 cup powdered sugar
- 1 teaspoon vanilla extract
- 1 cup toasted coconut flakes (optional, see notes)
Instructions
- Preheat the oven to 350℉. Prepare a 9×13-inch cake pan or baking dish and spray with nonstick cooking spray, or line with parchment paper. Set aside.
Make The Vanilla Coconut Cake
- In a large bowl, add the vanilla cake mix, large eggs, canned coconut milk, vegetable oil, coconut extract, and vanilla extract. Beat with a hand mixer or stand mixer (with the paddle attachment) on medium speed for 2 minutes, or until the cake batter is well combined and smooth.1 box (15.25 oz) vanilla cake mix, 4 large eggs, 1 cup full-fat canned coconut milk, 1/3 cup vegetable oil, 2 teaspoons coconut extract, 1 teaspoon vanilla extract
- Pour the cake batter into the prepared pan and smooth out the top with a spatula. Bake for 20-30 minutes, or until a toothpick or cake tester inserted in the center comes out clean.
- Remove the cake from the oven and allow it to cool for 20 minutes before you poke holes into the cake.
- Once it has cooled slightly, use a wooden skewer, a fork, or the end of the handle of a wooden spoon to carefully poke lots of holes all over the cake. Allow the cake to cool completely to room temperature before proceeding. A warm cake absorbs the milk mixture too quickly and can make it collapse or become mushy, so be sure to let it cool completely for best results.
Coconut Tres Leches Soak
- In a small bowl, whisk together the sweetened condensed milk, evaporated milk, and canned coconut milk until fully blended.1 can (14 oz) sweetened condensed milk, 3/4 cup evaporated milk, 3/4 cup full-fat canned coconut milk
- Slowly pour the milk mixture over the entire cake, making sure it soaks into the holes. Pour just a bit of the milk mixture at a time, letting it absorb before adding more. If it starts to pool and not soak in, stop and let the cake rest a bit before continuing.
- Cover the cake with a lid or plastic wrap, and refrigerate for at least 6 hours, or overnight is preferred. The longer it sits in the fridge, the better the soak settles in and sets the texture of the cake.
Toasted Coconut Whipped Cream
- Once you are ready to serve the cake, prepare the homemade whipped cream. Using a mixing bowl with a hand mixer, or use the bowl of a stand mixer with the whisk attachment, beat the heavy whipping cream, powdered sugar, and vanilla extract together until stiff peaks form.*This takes about 3-4 minutes. Start at low speed to avoid splashing and increase the speed, as needed, to high speed.2 cups heavy whipping cream, 1/4 cup powdered sugar, 1 teaspoon vanilla extract
- Use an offset spatula or rubber spatula to evenly spread the whipped cream on top of the chilled cake. Sprinkle the toasted coconut over top (optional, if using). Slice the cake and serve cold. Enjoy!1 cup toasted coconut flakes
Notes
Did You Make This Recipe?
I’d love to see it! You can share it with me on @togetherasfamilyblog and follow on Pinterest @together-as-family-blog-recipes or Facebook @togetherasfamilyblog for more!


Did you love this recipe?
Make sure to comment below so we can chat about it! Or follow on your favorite social network for even more family recipes.