
This post may contain affiliate links, view our disclosure policy.
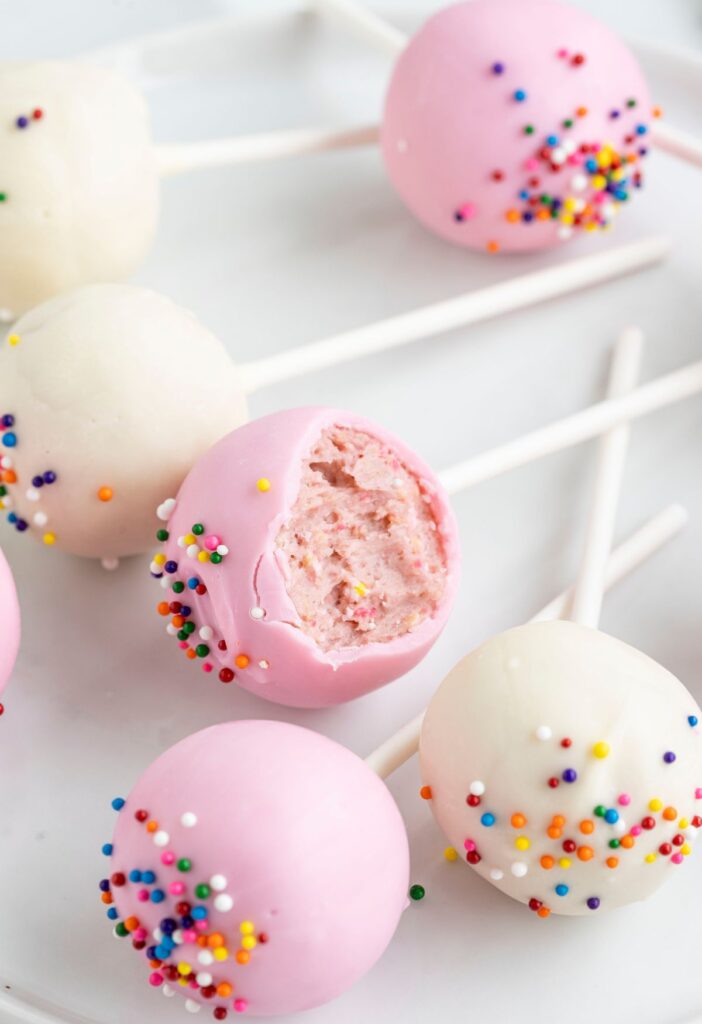
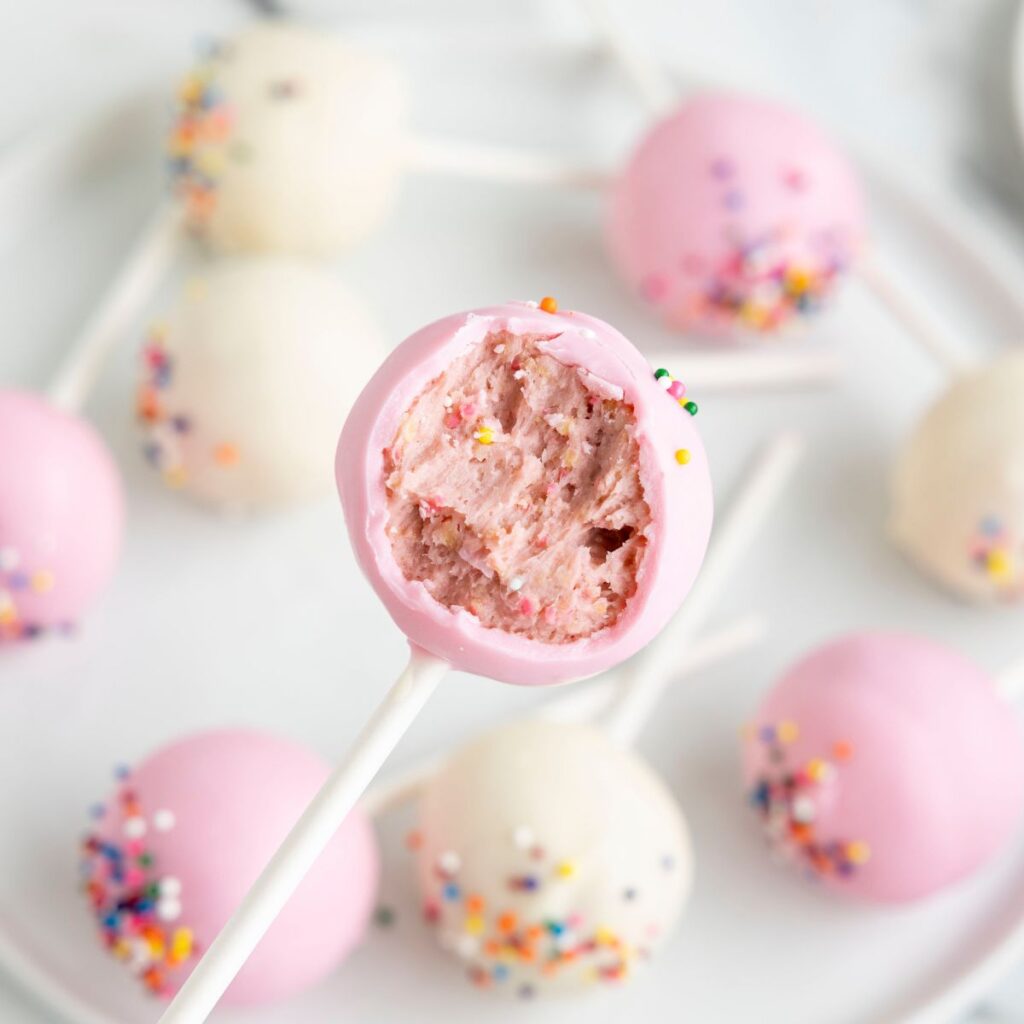
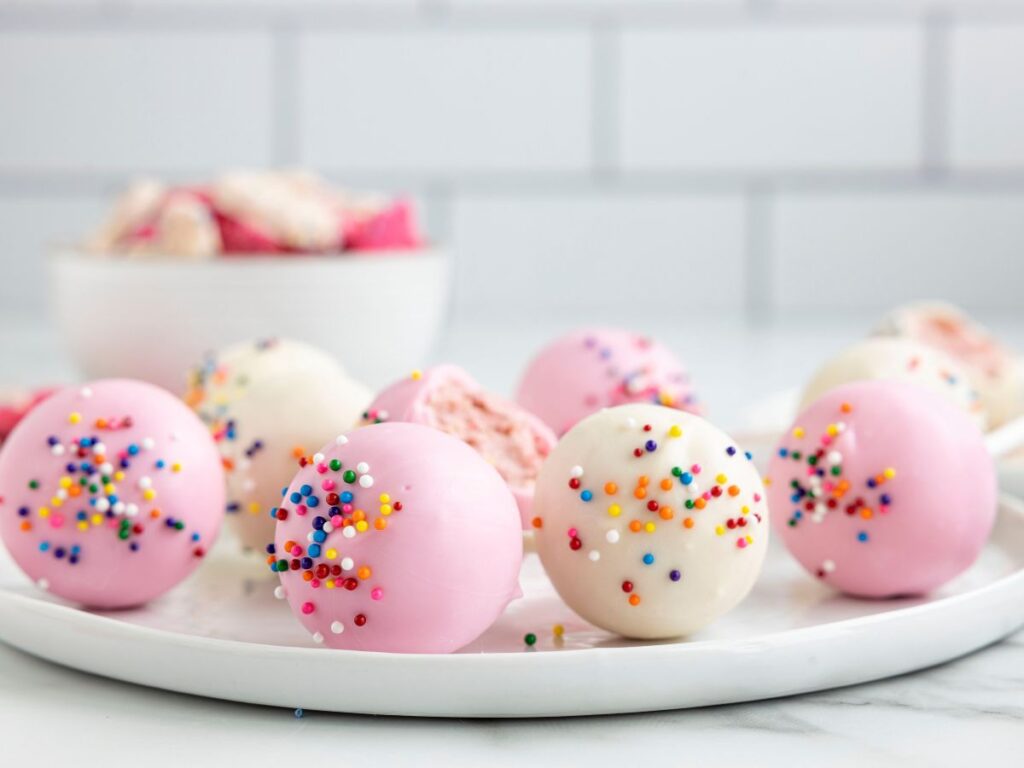
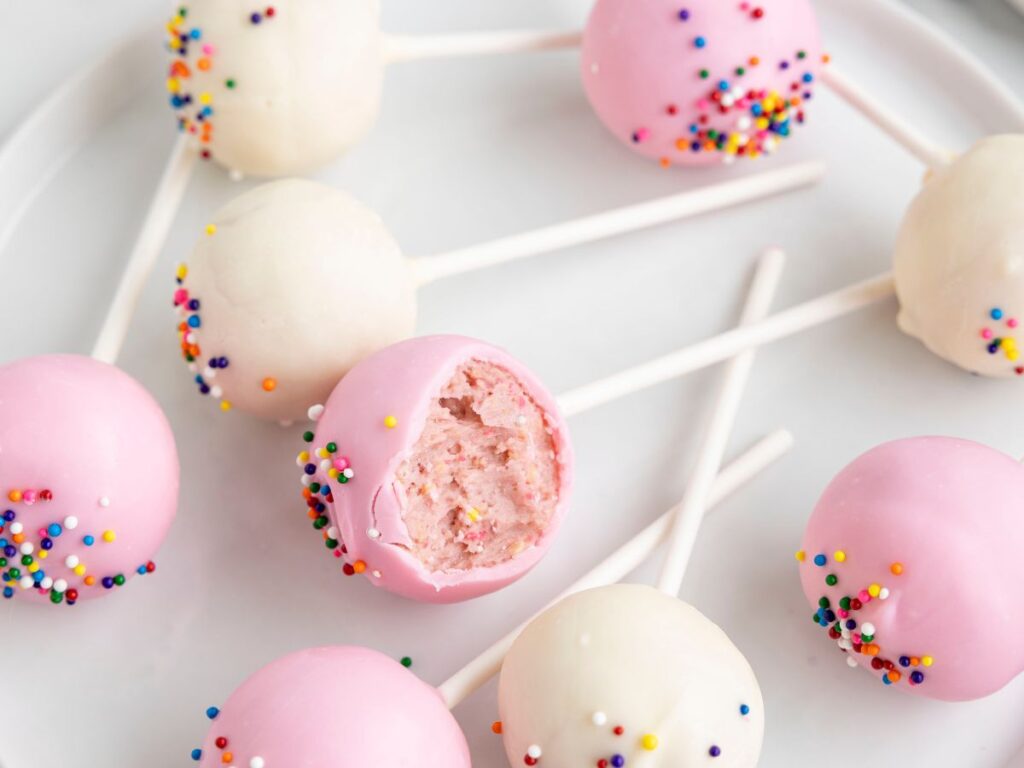
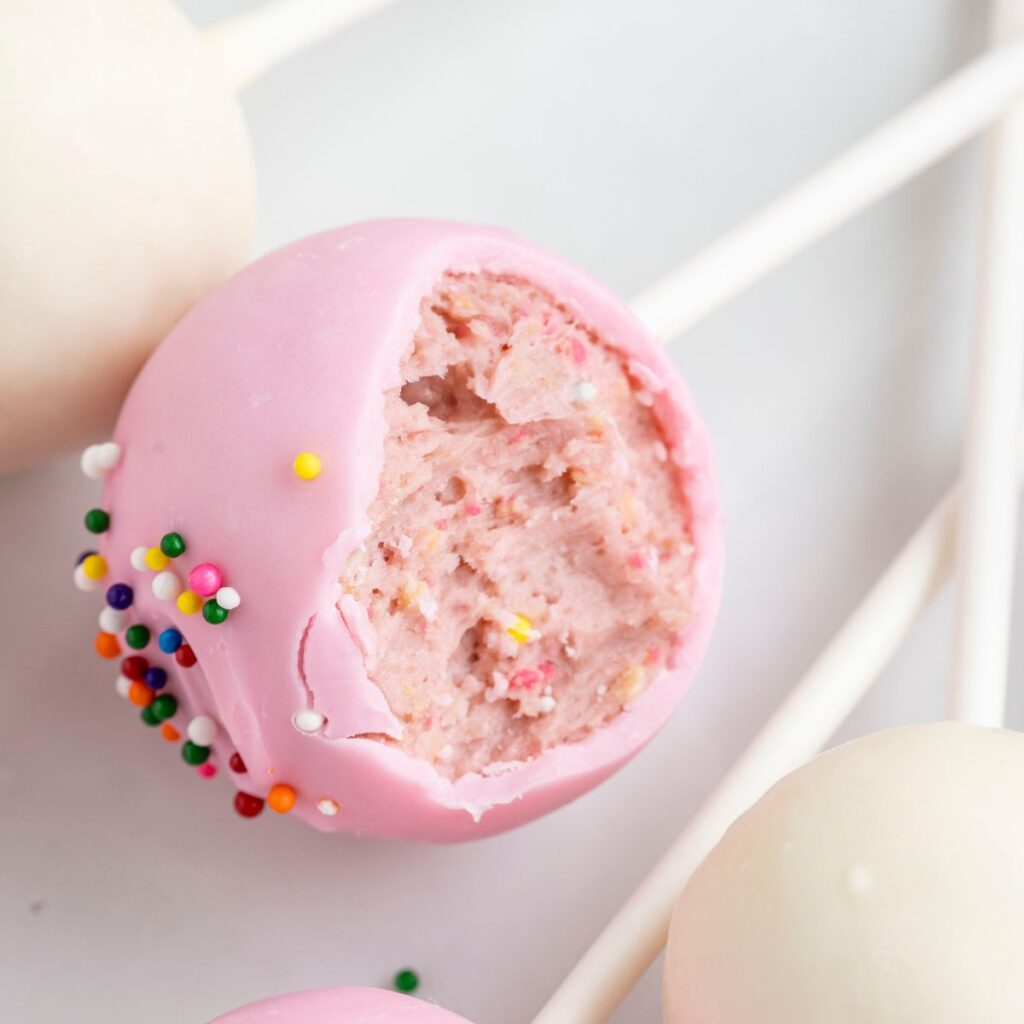
Reimagine the nostalgic Circus Animal Cookies and make these super fun and colorful Circus Animal Cake Pops. You can even make Circus Animal Cookie Truffles if wanted! Bright pink chocolate covered balls of crushed up circus animal cookies and topped with colorful rainbow sprinkles.
For another easy cake pop recipe be sure and make my Donut Cake Pops – It’s an easier way to make classic cake pops but you wouldn’t even know all it takes is a donut hole! Be sure and also try these Sugar Cookie Truffles that are made with crushed up sugar cookies.
Easy No Bake Treat Recipe With Circus Animal Cookies
I used to always beg my mom to buy Circus Animal Cookies at the store. What kid can resist the colorful white & pink chocolate coated animal crackers with sprinkles?! To this day, it’s still one of those nostalgic treats that bring me right back to my childhood – and I can’t help but to sneak a handful whenever my own kids convince me to buy them.
These circus animal cake pops, or make circus animal cookie balls with them, are so delicious and kids and adults alike won’t be able to resist the bright colors and sprinkles of this sweet treat.
Ingredients Needed
- Circus Animal Cookies – These are the white and pink coated animal crackers with rainbow sprinkles over top.
- Cream Cheese – The cream cheese helps hold together the crushed up circus animal cookie crumbs.
- Light Pink Candy Melts – I love using just the light pink candy melts but you could also use white candy melts, white chocolate melting wafers, or use some of each color and dip half the cake pops or cookie truffles in the white and the other half in the pink.
- Non Peril Rainbow Sprinkles – These are the little ball shaped sprinkles just like the ones that are on the outside of the circus animal cookies.
- Coconut Oil – This is what will help the chocolate stay shiny and smooth.

How To Make Circus Animal Cake Pops or Circus Animal Cookie Truffles
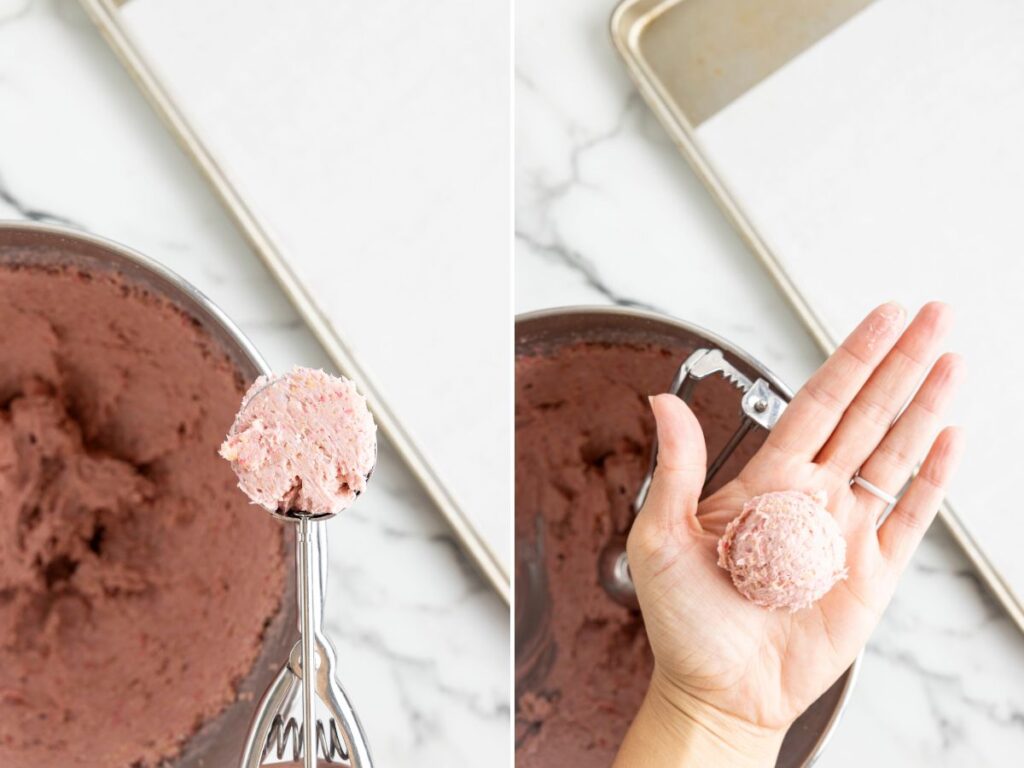
Place the circus animal cookies into the bowl of a food processor, or use a stand mixer with the paddle attachment. Process or beat on high speed until the cookies are in fine crumbs. If you don’t have a food processor then place the cookies inside a gallon size Ziploc bag and crush them with a rolling pin or meat pounder.
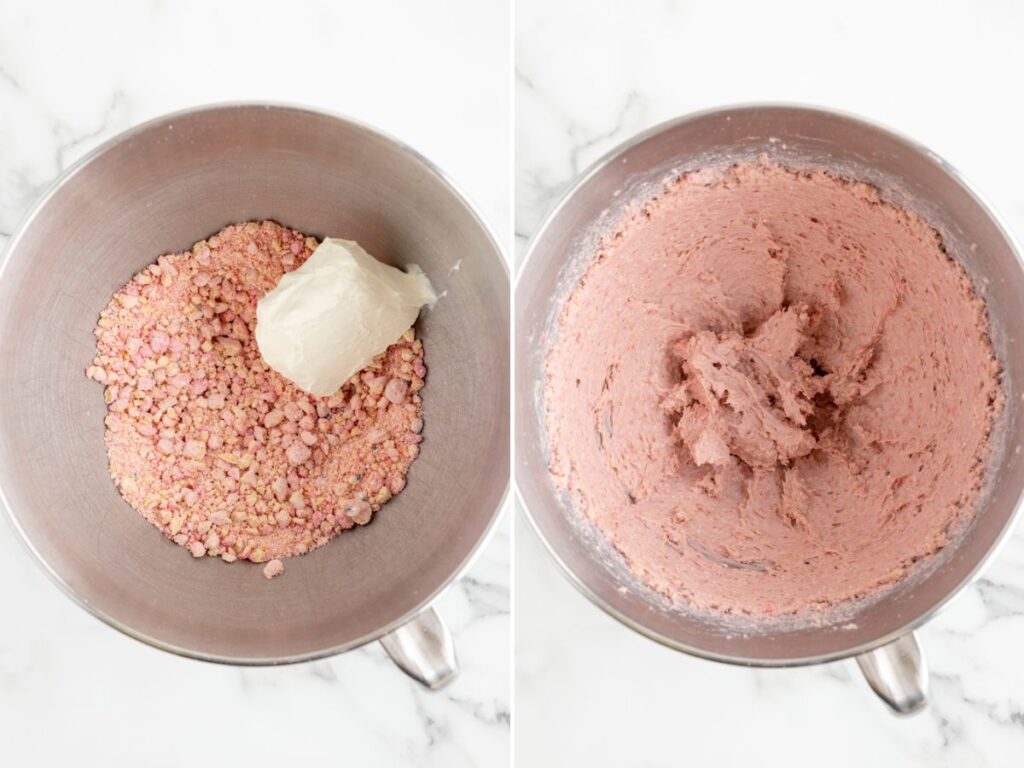
Add the cream cheese into the food processor bowl and pulse until it’s combined well and it’s a thick, slightly sticky mixture. If not using a food processor, add the crushed cookies and cream cheese into a mixing bowl and stir together until a dough forms.
Use a medium cookie scoop (1.5 tablespoons) to scoop the dough and roll it into a ball. Place the balls onto a parchment-lined baking sheet.
Melt the chocolate and coconut oil in a microwave-safe bowl until smoothly melted. This will take about 2 minutes, making sure to stir it every 30 seconds.
Take the cake pop stick and dip the end of it into the melted chocolate. Then stick it about halfway into the dough balls. Repeat with the remaining balls, placing them back onto the baking sheet when done.
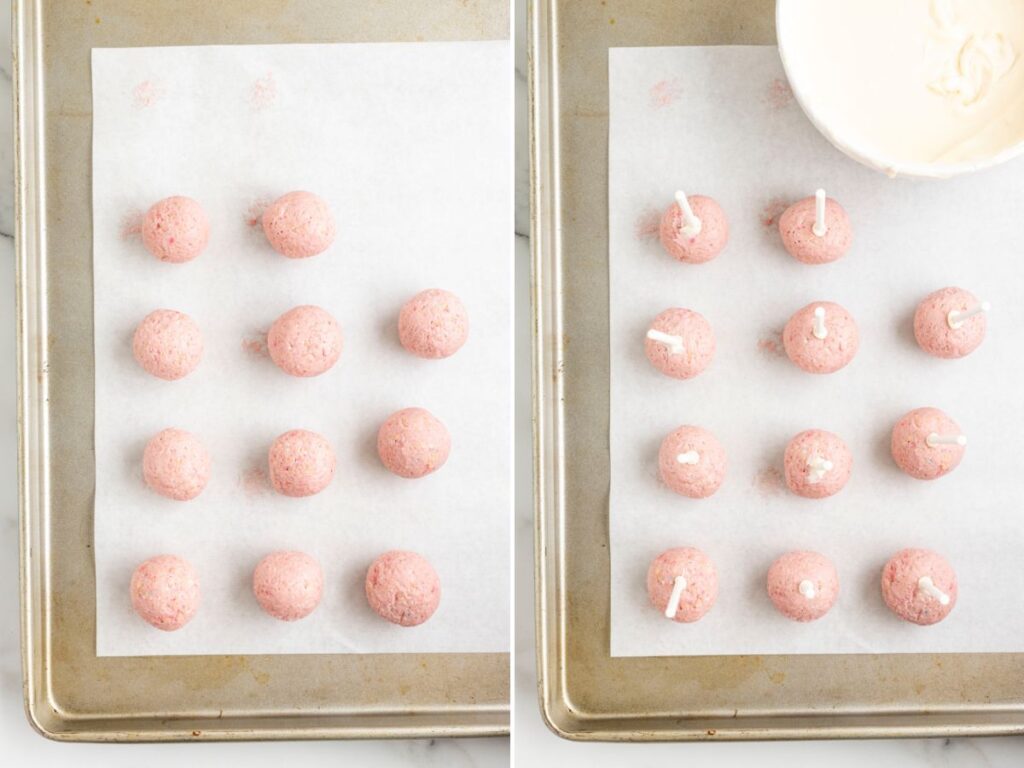
Place the baking sheet into the fridge for 5 minutes. Or the freezer for 2 minutes.
Working one cake pop at a time, dip it into the melted chocolate making sure to let the excess chocolate drip off. Gently move the cake pop around in a circular pattern in order to help the excess chocolate run off.
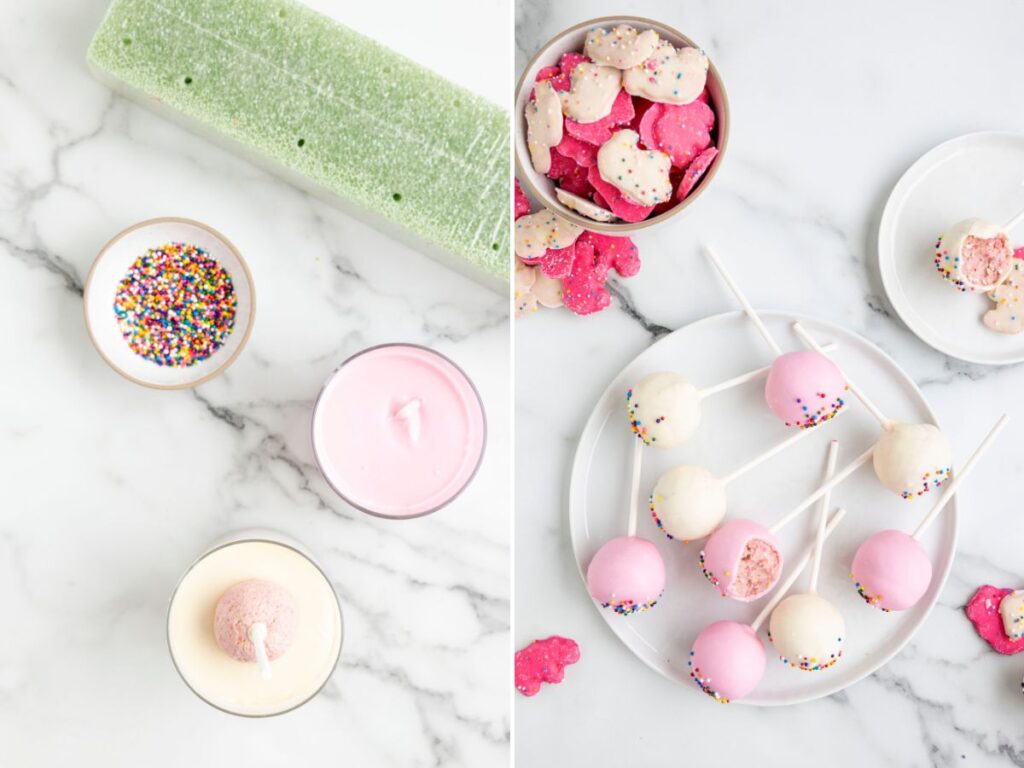
Immediately add some sprinkle to the cake pop. Place it back onto the baking sheet on it’s side. Repeat with the remaining cake pops.
Allow the cake pops to set at room temperature for about 20 minutes. Enjoy!
Changes & Variations
- Although the recipe calls for both white & pink candy melts, you do not have to use both of them. The pink and white just match the theme of the circus animal cookies. Use a bag of pink candy melts to cover all the cake pops or you can use a bag of melting wafers instead. A bag that is 10-12 ounces is enough to cover all the cake pops.
- Use any sprinkles you want! I recommend sticking with the little ball sprinkles (also called non-pareils) because it matches the circus animal cookies. You could use pink sprinkles or any mix of sprinkles you like. Try using pink and white sprinkles for a fun Valentines treat.

How To Store Cake Pops & Truffles
These cake pops, or truffles, can be stored at room temperature for up to 3 days. Or store them in the fridge for a chilled treat. The outside chocolate coating gets slightly firmer if stored in the fridge, but the chilled cake pop is actually really good. My kids prefer them stored at room temperature because the chocolate coating starts softer – still set and hardened but a softer texture than the fridge.
Helpful Tips When Making Cake Pops or Truffles
- Smooth Paste : It’s so important that you mix the crushed circus cookies and cream cheese for a few minutes until a smooth and uniform paste forms.
- Stand Mixer, Food Processor, OR Ziploc Bag : Use a stand mixer with the paddle attachment or the food processor to crush the cookies and combine the cream cheese to form the paste. I find that it’s easiest, and yields the finest cookie crumbs, if you use a food processor. A stand mixer does the job just fine tho. I don’t recommend using an electric hand mixer because it won’t crush the cookies enough. You can also add the cookies into a Ziploc bag and use a rolling pin or meat tenderizer/pounder to crush the cookies into fine crumbs. Combine the cookie crumbs and cream cheese inside a mixing bowl and mix together. If you are doing it this way, you can use an electric hand mixer to combine them together.
- Rolling Balls : Once you scoop out some of the cake pop mixture, smoosh it together between your fingers. This will get out any lumps in the batter and help yield a smoother cake pop ball.
- Don’t Skip The Chill Time : Whether you’re making cake pops or truffles, don’t skip the chill time in the fridge. The cake pop sticks need to harden and set inside the cake pop before dipping them. The truffles need to be chilled/firm to make it easier to dip them inside the melted chocolate.
- Cookie Scoop : I highly recommend using a medium cookie scoop to ensure that all the cake pops are the same size. The medium cookie scoop is exactly 1.5 tablespoons so it makes measuring and scooping the cake pop balls really easy.
- Cake Pop Stand : To avoid the small flat spot on the cake pop (from setting it down on the baking sheet to dry) try using a cake pop stand.
- Excess Chocolate Drip Off : Once the cake pop or truffle is dipped in the chocolate, it’s important to allow the excess chocolate to drip off. This way you don’t end up with a pool of chocolate that settles as the cake pop is setting and hardening. I like to gently swirl the cake pop in a circular motion to keep that smooth round shape but also release the excess chocolate. If making truffles, use a plastic fork with the middle prong taken out, and then gently tap the fork against the cup to allow the excess chocolate to drain off through the fork.

Try These Other Circus Animal Cookie Treats


Circus Animal Cake Pops (Or Circus Animal Cookie Truffles)
Equipment
Ingredients
- 24 6-inch cake pop sticks (if making cake pops)
- 1 bag (9 oz) circus animal cookies
- 4 ounces cream cheese
- 12 ounces white melting wafers OR white candy melts
- 12 ounces pink candy melts
- 2 tablespoons coconut oil divided
- non-pareil rainbow sprinkles
Instructions
- Prep : Prepare a baking sheet by lining it with parchment paper or wax paper. Set aside.
- Place the entire bag of circus animal cookies into a food processor, or you can use a stand mixer with the paddle attachment, and mix them until they're in small crumbs.1 bag (9 oz) circus animal cookies
- Add in the cream cheese and mix until a smooth and combined paste forms. About 2 minutes of mixing or blending in the food processor.4 ounces cream cheese
- Use a medium cookie scoop, or 1.5 tablespoons of dough, to scoop the dough out and roll it into a ball. Place the balls onto the prepared baking sheet. * It helps to press and smush the dough between your fingers before rolling it, this helps smooth out the dough of lumps and makes it easier to roll into a ball.
- Melt Chocolate : Use separate bowls for each color. Add the candy melts or melting wafers into a microwave-safe glass bowl or measuring cup (I use a 2-cup Pyrex measuring cup) and 1 tablespoon of coconut oil per color. Cook in 30-second increments, stirring well after each one, until it's completely melted and smooth.12 ounces white melting wafers OR white candy melts, 12 ounces pink candy melts, 2 tablespoons coconut oil
- Dip the end of the cake pop stick into the melted chocolate and insert it about 2/3 of the way into the balls. Place them back onto the baking sheet.24 6-inch cake pop sticks
- Place the balls into the fridge for 5 minutes so the stick can set inside the cake pop.
- Dip Cake Pops : Dip each cake pop into the melted chocolate, dipping half of the cake pops into the pink and the other half into the white chocolate, allow the excess chocolate to drain off. * I recommend swirling the cake pop in a circular pattern (over the melted chocolate cup) to allow the excess chocolate to drain off and to keep that smooth round patter.
- Immediately add some sprinkles and then place the cake pop on it's side on the baking sheet or in a cake pop stand. Repeat the process with the other cake pops.non-pareil rainbow sprinkles
- Let the cake pops set at room temperature for 15-30 minutes or until the chocolate is set and hardened. Enjoy!
- To Make Circus Animal Cookie Truffles : Omit the cake pop stick step, instead roll the dough into the balls (medium cookie scoop) and place them on the baking sheet. Refrigerate the truffle balls for 10 minutes so the balls can chill and harden a bit. Working one truffle at a time, drop it into the melted chocolate and make sure it's well coated. Use a plastic fork, with the middle prong removed, to lift it out and tap the fork against the jar or cup to remove the excess chocolate from the truffle. Use a toothpick to help gently nudge the truffle off of the fork and onto the baking sheet. Immediately add sprinkles. Repeat with the remaining truffles.Allow them to set at room temperature for 15-30 minutes.
Notes
Did You Make This Recipe?
I’d love to see it! You can share it with me on @togetherasfamilyblog and follow on Pinterest @together-as-family-blog-recipes or Facebook @togetherasfamilyblog for more!


Did you love this recipe?
Make sure to comment below so we can chat about it! Or follow on your favorite social network for even more family recipes.