
This post may contain affiliate links, view our disclosure policy.
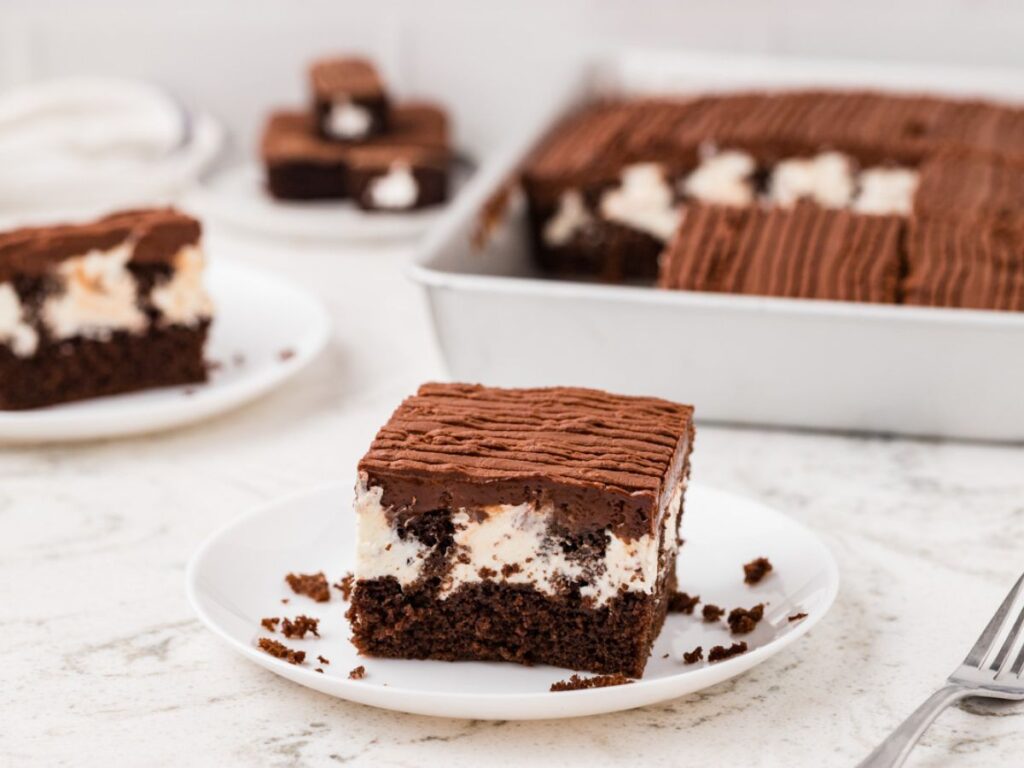
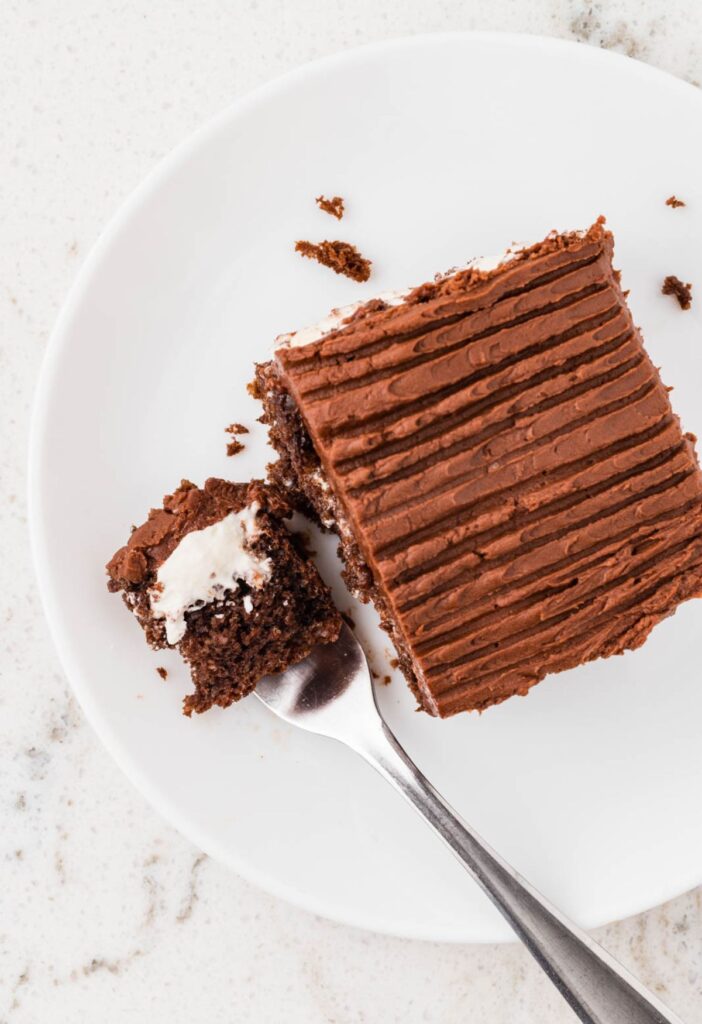
Devil’s Food Zingers Cake is inspired by the beloved Hostess Devil’s Food Zingers snack cakes – this easy poke cake features a doctored up cake mix, a creamy whipped marshmallow filling, and a decadent chocolate striped coating.
For the raspberry version of the this classic snack cake – be sure and also make this Raspberry Zinger Cake (Copycat Hostess Raspberry Zingers).
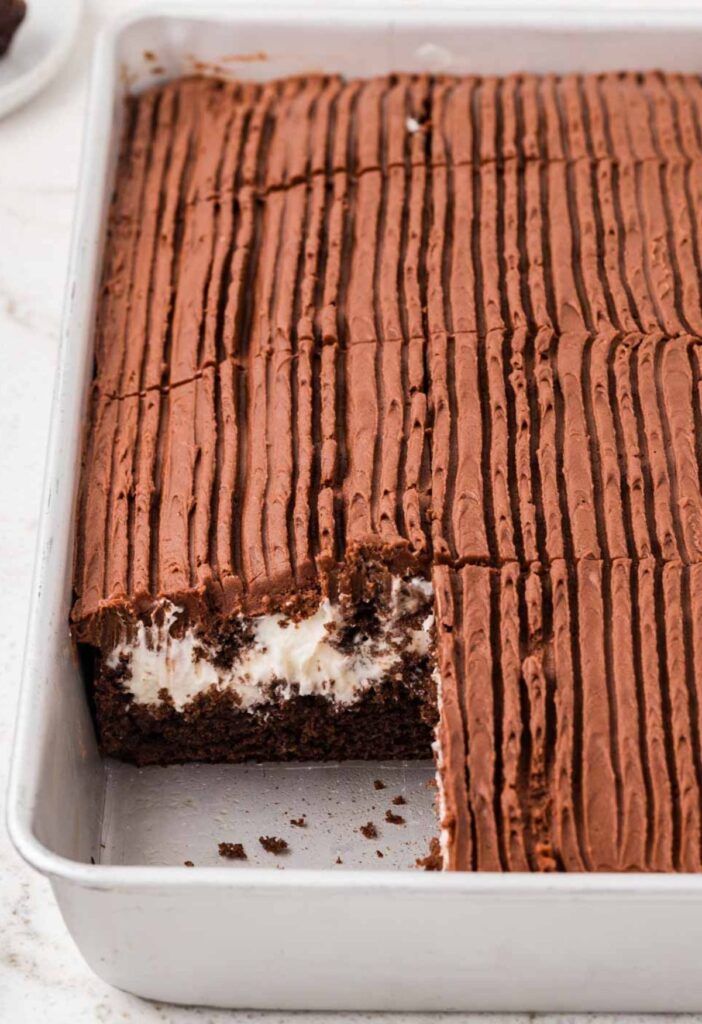
Devil’s Food Zingers Cake (9×13 Sheet Cake)
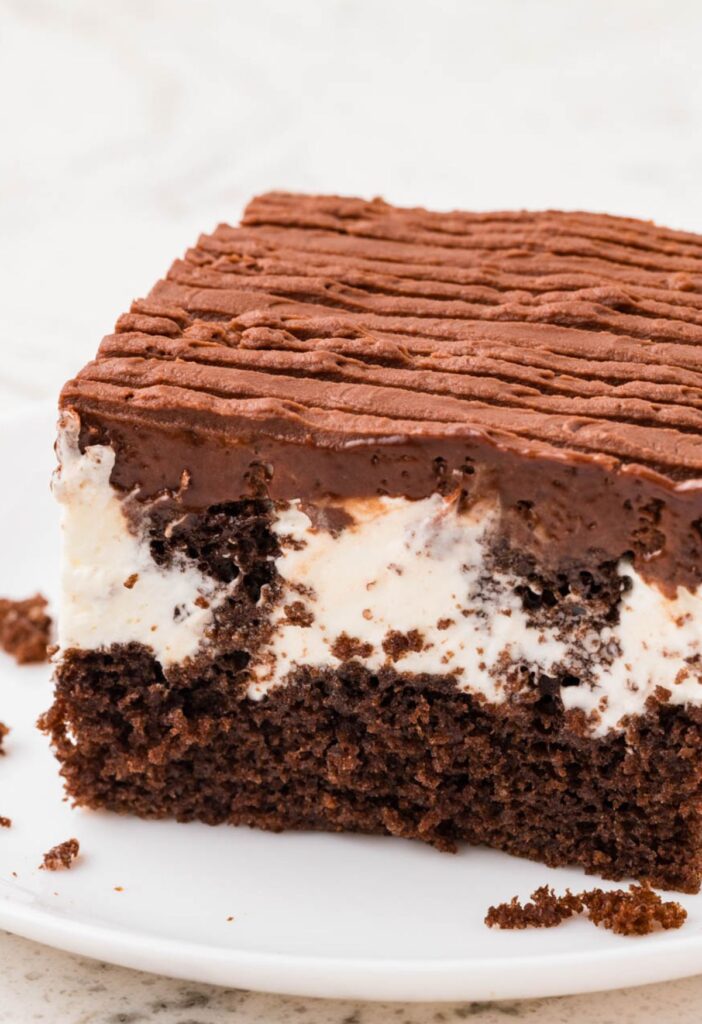
The original snack cakes – Devil’s Food Zingers – are known for their soft chocolate cake, sweet cream filling, and signature striped chocolate coating. This semi-homemade cake captures all those nostalgic flavors ❤︎
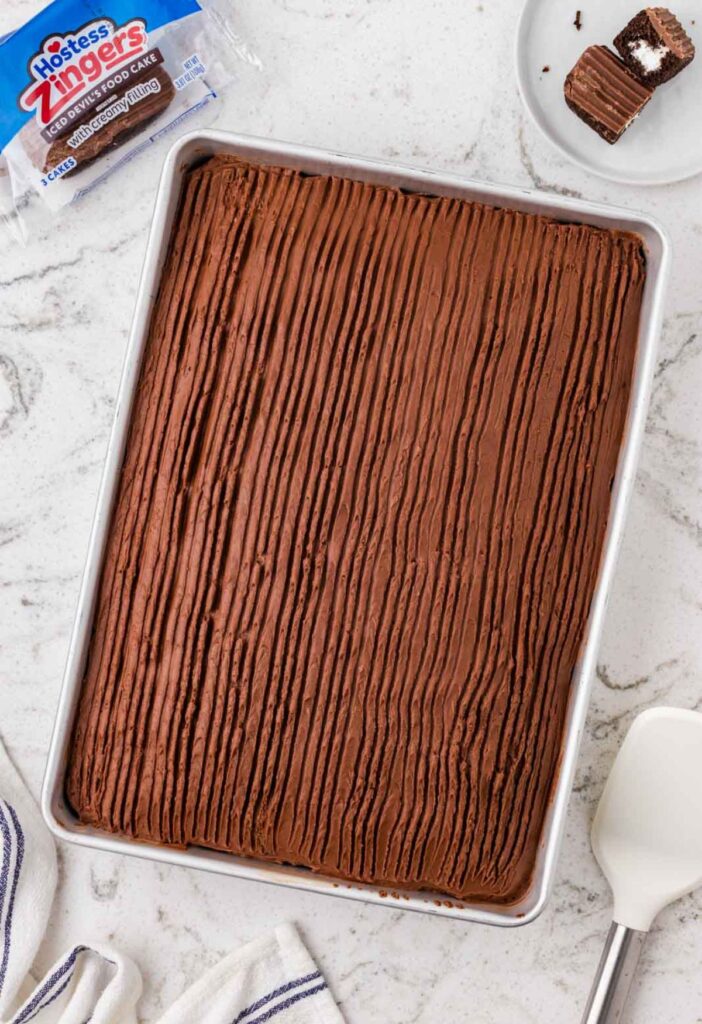
This copycat sheet cake version looks just like the classic snack cake, and every bite delivers the nostalgic flavors of the packaged snack cake in an easy-to-make, semi-homemade dessert. It transforms a childhood favorite into a simple 9×13 sheet cake that serves a crowd and requires minimal effort.
Why You’ll Love This Copycat Hostess Devil’s Food Zingers Cake
- ❤︎ Tastes and looks just like the classic Hostess snack cakes
- ❤︎ Rich chocolate flavor in every bite
- ❤︎ Light and fluffy whipped marshmallow cream filling
- ❤︎ Easy, semi-homemade dessert
- ❤︎ Perfect make-ahead dessert
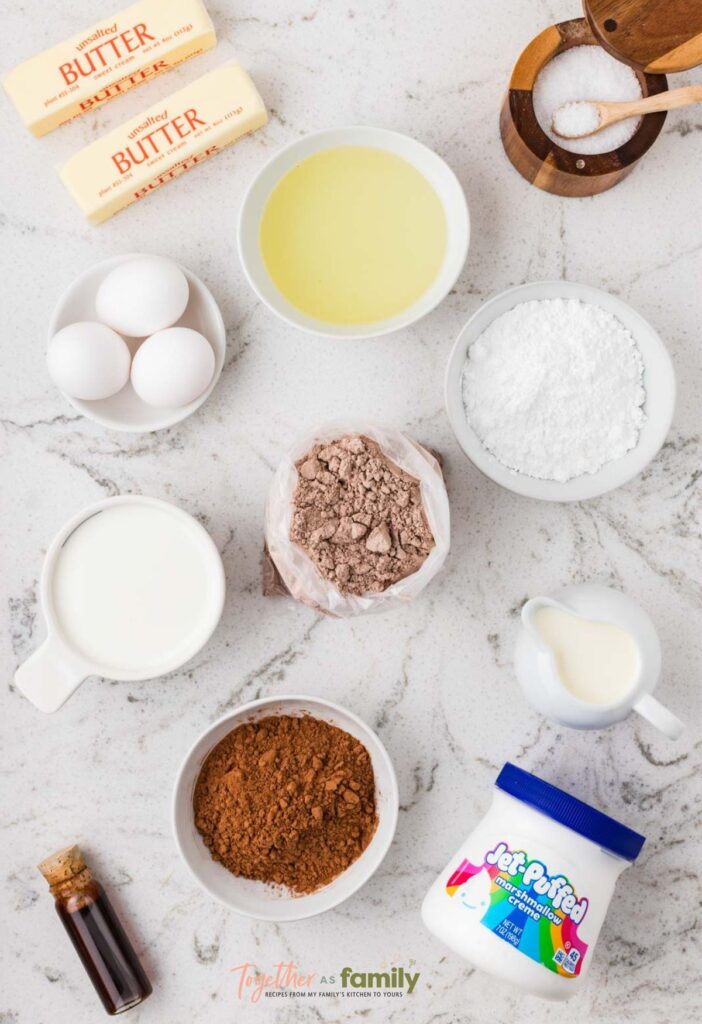
Ingredients Needed
Devil’s Food Cake Ingredients
- Devil’s Food Chocolate Cake Mix
- Whole Milk
- Vegetable Oil
- Large Eggs
- Pure Vanilla Extract
Whipped Marshmallow Cream Filling Ingredients
- Heavy Whipping Cream
- Powdered Sugar
- Pure Vanilla Extract
- Salt : Sea salt or kosher salt work well.
- Marshmallow Fluff : Sometimes also labeled as ‘marshmallow cream’.
Chocolate Buttercream Ingredients
- Butter : I prefer using salted butter but unsalted butter also works just fine. I still use the added salt even when using salted butter, but that’s entirely up to you.
- Powdered Sugar
- Unsweetened Cocoa Powder
- Heavy Whipping Cream
- Pure Vanilla Extract
- Salt : Sea salt or kosher salt work well.
How To Make Devil’s Food Zinger Cake (Printable Recipe Card)
Preheat the oven to 350°F. Spray a 9×13-inch cake pan with nonstick cooking spray and/or line with parchment paper.
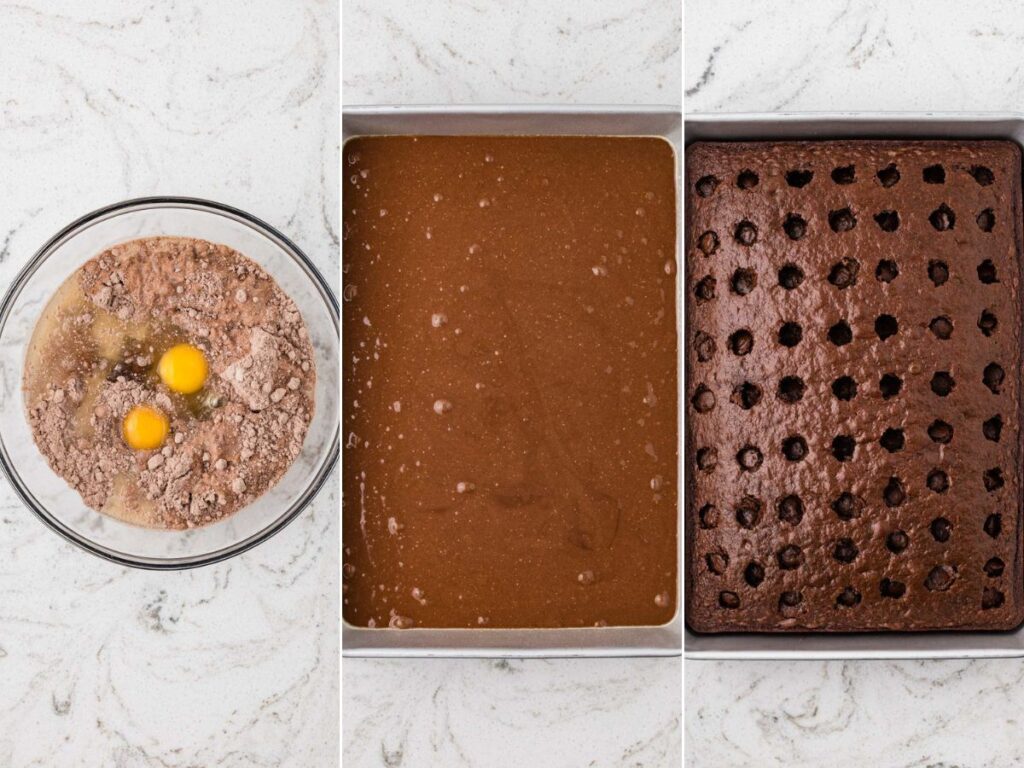
Make The Devil’s Food Chocolate Cake : In a large bowl, add the devil’s food cake mix, whole milk, vegetable oil, large eggs, and pure vanilla extract. Using an electric hand mixer, beat at medium speed for 2 minutes, until the batter looks smooth and glossy. Scrape down the sides and bottom of the bowl as needed with a rubber spatula.
Pour the chocolate cake batter evenly into the prepared cake pan and smooth out the top. Bake for 22-30 minutes, or until a toothpick inserted into the middle comes out clean or with a few crumbs.
Remove the cake from the oven and let it cool for 20 minutes, then use the handle of a wooden spoon to poke holes, evenly in rows, all across the cake, spacing them about 1-inch apart.
Let the cake cool completely before adding the filling.
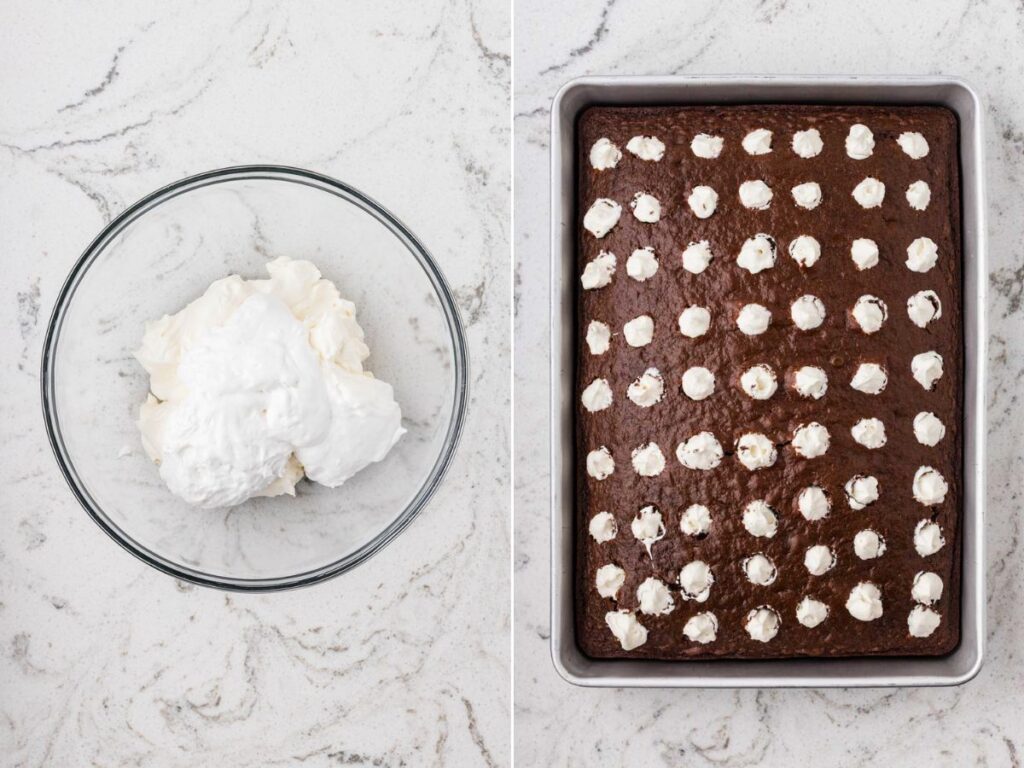
Make The Whipped Marshmallow Cream Filling : In a large bowl, add the heavy whipping cream, powdered sugar, vanilla extract, and salt. Using an electric hand mixer, or hand mixer, beat at medium-high speed until stiff soft peaks form (which means the whipped cream should hold it’s shape but still look creamy and soft).
Add the marshmallow fluff to the whipped cream mixture and beat on low speed just until combined, smooth, and fluffy.
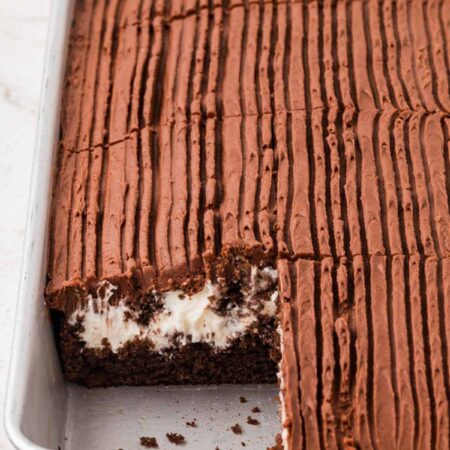
Pipe or spoon the filling into the holes and over the top of the cooled cake. Then smooth it out with an offset spatula. I like to put some filling into a Ziploc bag with the corner snipped, and then use that to fill each hole, that way I know each hole is fully filled.
Cover the cake pan with a lid or plastic wrap, and refrigerate for 1 hour so the cream filling can settle into the cake and firm slightly before frosting.
Make The Chocolate Buttercream : In a large mixing bowl, or the bowl of a stand mixer, beat the butter on medium speed for 2-3 minutes, until very smooth, creamy, and whipped.
Add the powdered sugar and cocoa powder, then beat on low speed just until the dry ingredients are incorporated.
Add in the heavy whipping cream, vanilla extract, and kosher salt. Beat on medium speed for 2-3 minutes, until the chocolate buttercream is smooth, fluffy, and easy to spread. If the frosting is still too stiff, add additional heavy whipping cream, 1 tablespoon at a time, until you reach the desired consistency.
Evenly spread the buttercream over the chilled cake, over the marshmallow layer, and spread it out using an offset spatula using light pressure.
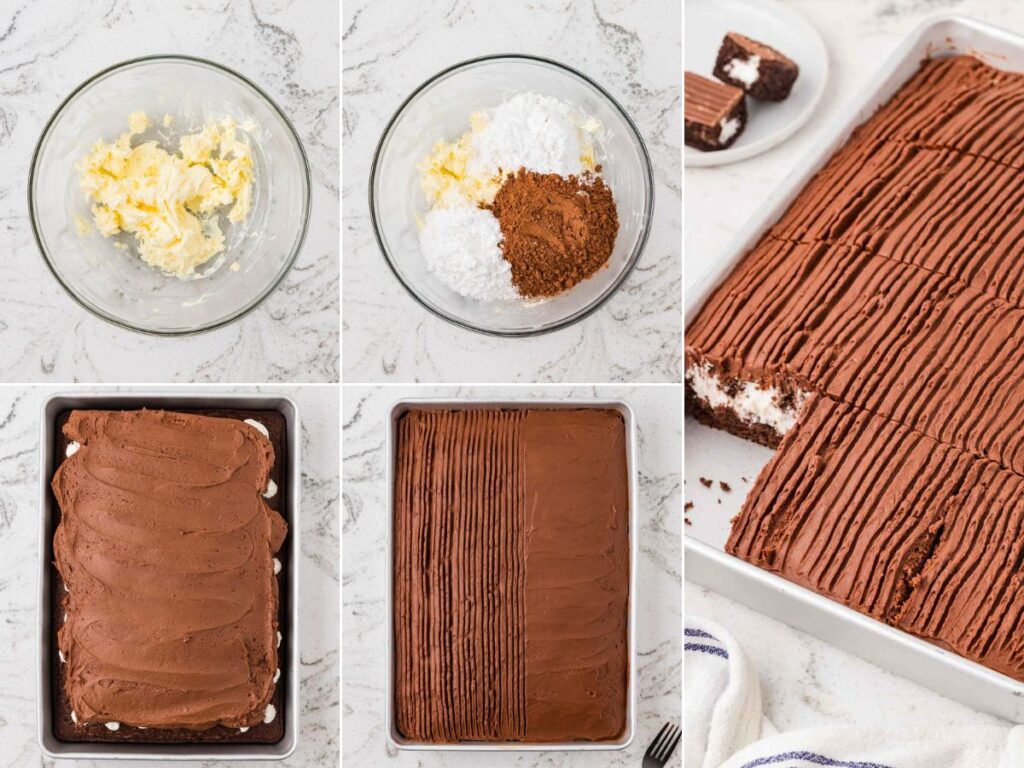
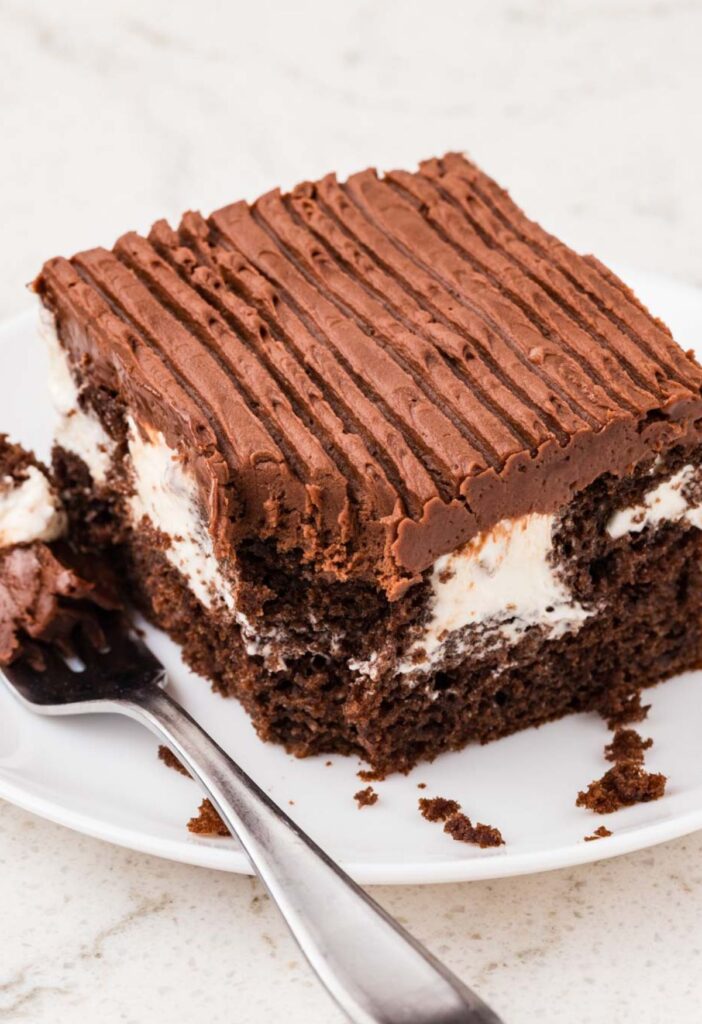
Use a fork or the tip of an offset spatula to make soft lengthwise lines through the chocolate buttercream, similar to the ridged chocolate top on a Devil’s Food Zinger.
Cover the cake and refrigerate for at least 1 hour, or up to 8 hours, before serving.
Slice the cake chilled from the fridge, and let each slice sit at room temperature for about 5-10 minutes before serving, for the softest texture. Enjoy!
How To Store Leftovers
Store the cake covered in the refrigerator for up to 4-5 days. You can keep the cake inside the cake pan covered with a lid or plastic wrap, or transfer individual slices to an airtight container.
For the best texture, let each slice or the cake sit out at room temperature for about 5-10 minutes before serving.
Pro Tips From The Test Kitchen
- The cake needs to be completely cool before the whipped marshmallow filling goes on, or the cream will melt and lose its fluffy texture.
- It’s important to chill the cake for 1 hour before frosting it with the chocolate buttercream, frosting a chilled cake is much easier.
- Do not substitute the heavy whipping cream! Nothing else will make homemade whipped cream with a soft & fluffy texture.
- This cake is a great make-ahead dessert. Once frosted with the chocolate buttercream, the cake can be refrigerated up to 18-24 hours before slicing and serving. I actually prefer this cake very chilled, as the flavors have time to deepen, and the cake becomes less sweet the more chilled it is.
More Must Try 9×13 Sheet Cake Recipes
- Easy Dr Pepper Cake Recipe
- Earthquake Cake Recipe (German Chocolate Cake Mix)
- Orange Pineapple Cake
- Pineapple Poke Cake (EASY Cake Mix Dessert)
- Easy Pineapple Pistachio Cake
- Chocolate Tres Leches Cake
- PERFECT Twinkie Cake Recipe (9×13 Cake Dessert)
- Raspberry Poke Cake
- Easy Mississippi Mud Cake Recipe

Devil’s Food Zingers Cake
Equipment
Ingredients
Devils Food Cake
- 1 box (15.25 oz) devil's food cake mix
- 1 cup whole milk
- ½ cup vegetable oil
- 3 large eggs
- 2 teaspoons pure vanilla extract
Whipped Marshmallow Cream Filling
- 1 cup heavy whipping cream
- ½ cup powdered sugar
- 1 teaspoon pure vanilla extract
- ¼ teaspoon salt
- 1 jar (7 oz) marshmallow fluff
Chocolate Buttercream
- 1 cup (2 sticks) butter softened
- 4 cups powdered sugar
- ½ cup unsweetened cocoa powder
- ½ cup heavy whipping cream (plus more as needed)
- 2 teaspoons pure vanilla extract
- ¼ teaspoon salt
Instructions
- Preheat the oven to 350°F. Spray a 9×13-inch cake pan with nonstick cooking spray and/or line with parchment paper.
Devil's Food Chocolate Cake
- In a large bowl, add the devil's food cake mix, whole milk, vegetable oil, large eggs, and pure vanilla extract. Using an electric hand mixer, beat at medium speed for 2 minutes, until the batter looks smooth and glossy.*Scrape down the sides and bottom of the bowl as needed with a rubber spatula.1 box (15.25 oz) devil's food cake mix, 1 cup whole milk, ½ cup vegetable oil, 3 large eggs, 2 teaspoons pure vanilla extract
- Pour the chocolate cake batter evenly into the prepared cake pan and smooth out the top. Bake for 22-30 minutes, or until a toothpick inserted into the middle comes out clean or with a few crumbs.
- Remove the cake from the oven and let it cool for 20 minutes, then use the handle of a wooden spoon to poke holes, evenly in rows, all across the cake, spacing them about 1-inch apart.
- Let the cake cool completely before adding the filling.
Whipped Marshmallow Cream Filling
- In a large bowl, add the heavy whipping cream, powdered sugar, vanilla extract, and salt. Using an electric hand mixer, or hand mixer, beat at medium-high speed until stiff soft peaks form (which means the whipped cream should hold its shape but still look creamy and soft).1 cup heavy whipping cream, ½ cup powdered sugar, 1 teaspoon pure vanilla extract, ¼ teaspoon salt
- Add the marshmallow fluff to the whipped cream mixture and beat on low speed just until combined, smooth, and fluffy.1 jar (7 oz) marshmallow fluff
- Pipe or spoon the filling into the holes and over the top of the cooled cake. Then smooth it out with an offset spatula.*I like to put some filling into a Ziploc bag with the corner snipped, and then use that to fill each hole, that way I know each hole is fully filled.
- Cover the cake pan with a lid or plastic wrap, and refrigerate for at least 1 hour (or up to 6-8 hours if needed) so the cream filling can settle into the cake and firm slightly before frosting.
Chocolate Buttercream
- In a large mixing bowl, or the bowl of a stand mixer, beat the butter on medium speed for 2-3 minutes, until very smooth, creamy, and whipped.1 cup (2 sticks) butter
- Add the powdered sugar and cocoa powder, then beat on low speed just until the dry ingredients are incorporated.4 cups powdered sugar, ½ cup unsweetened cocoa powder
- Add in the heavy whipping cream, vanilla extract, and kosher salt. Beat on medium speed for 2-3 minutes, until the chocolate buttercream is smooth, fluffy, and easy to spread.*If the frosting is still too stiff, add additional heavy whipping cream, 1 tablespoon at a time, until you reach the desired consistency.½ cup heavy whipping cream, 2 teaspoons pure vanilla extract, ¼ teaspoon salt
- Evenly spread the buttercream over the chilled cake, over the marshmallow layer, and spread it out using an offset spatula using light pressure.
- Use a fork or the tip of an offset spatula to make soft lengthwise lines through the chocolate buttercream, similar to the ridged chocolate top on a Devil's Food Zinger.
- Cover the cake and refrigerate for at least 1 hour, or up to 8 hours, before serving.
- Slice the cake chilled from the fridge, and let each slice sit at room temperature for about 5-10 minutes before serving, for the softest texture. Enjoy!
Notes
- The cake needs to be completely cool before the whipped marshmallow filling goes on, or the cream will melt and lose its fluffy texture.
- It’s important to chill the cake for 1 hour before frosting it with the chocolate buttercream, frosting a chilled cake is much easier.
- Do not substitute the heavy whipping cream! Nothing else will make homemade whipped cream with a soft & fluffy texture.
- This cake is a great make-ahead dessert. Once frosted with the chocolate buttercream, the cake can be refrigerated up to 18-24 hours before slicing and serving. I actually prefer this cake very chilled, as the flavors have time to deepen, and the cake becomes less sweet the more chilled it is.
Nutrition
Did You Make This Recipe?
I’d love to see it! You can share it with me on @togetherasfamilyblog and follow on Pinterest @together-as-family-blog-recipes or Facebook @togetherasfamilyblog for more!


Did you love this recipe?
Make sure to comment below so we can chat about it! Or follow on your favorite social network for even more family recipes.