
This post may contain affiliate links, view our disclosure policy.
If you’re looking for a quick & easy Halloween treat to make this year, then these Witch Hat Cookies are it. So simple to make that you can even get the kids involved with the easy ingredients like store-bought cookies, frosting, and Hershey Kisses.

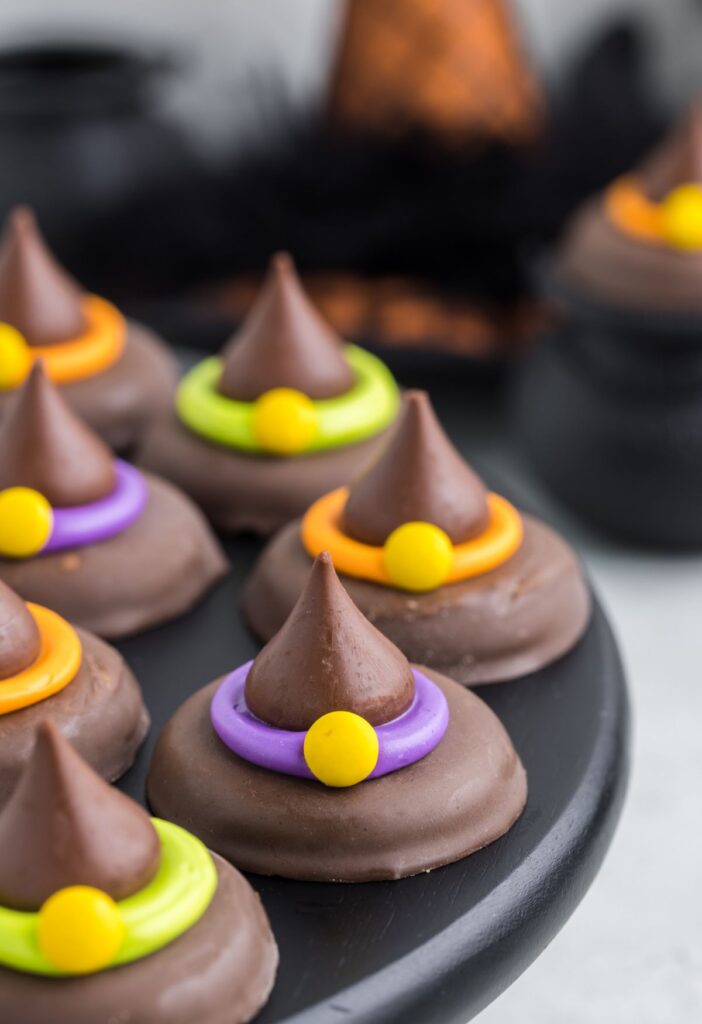
Witch Hat Cookies Recipe (Kid Favorite Halloween Recipe)
These witch hat cookies are a kid-favorite Halloween treat for classroom parties, gatherings, or a fun treat to make with the kids. Simple to make with store-bought fudge covered cookies, Hershey Kisses, purchased frosting, and mini yellow M&M’s for the belt buckle.
I recommend using the three different colors of frosting to make them really stand out on the dessert table and it allows for all the festive neon Halloween colors to show!
Another brightly colored and totally festive treat is this Halloween Bundt Cake – swirls of Halloween neon colors like purple, green, and orange create this impressive looking bundt cake.

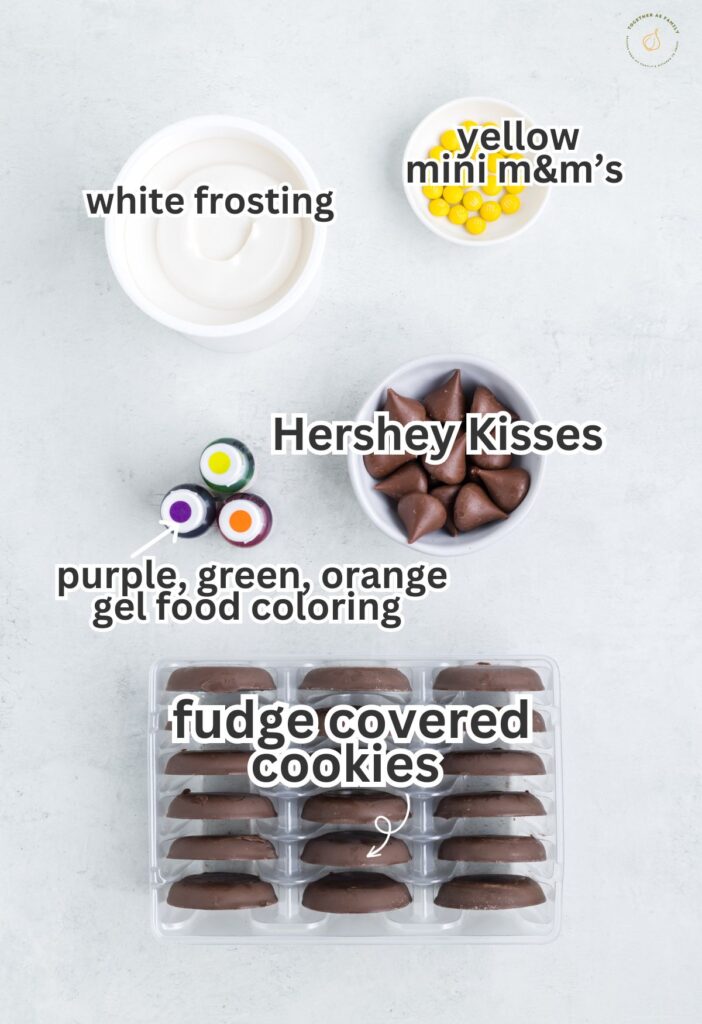
Ingredients Needed
- Fudge Covered Cookies : Use any round shaped fudge covered cookie from the store. In the photos, we used the peanut butter fudge covered cookies but other great options are Fudge Stripes (turn them upside down to show the fudge covered side) or fudge covered Grasshopper mint cookies. Fudge covered Oreos are another option that would work well.
- White Frosting : The white frosting will be dyed with different colors.
- Gel Food Coloring : Some great color options are the neon food coloring pack with green, blue, purple, and orange.
- Hershey’s Chocolate Kisses
- Mini Yellow and/or Orange M&M’s : These create the buckle for the hats. You can use any color but the more Halloween type colors would be yellow and orange.
How To Make Witch Hat Cookies For Halloween With Fudge Stripe Cookies
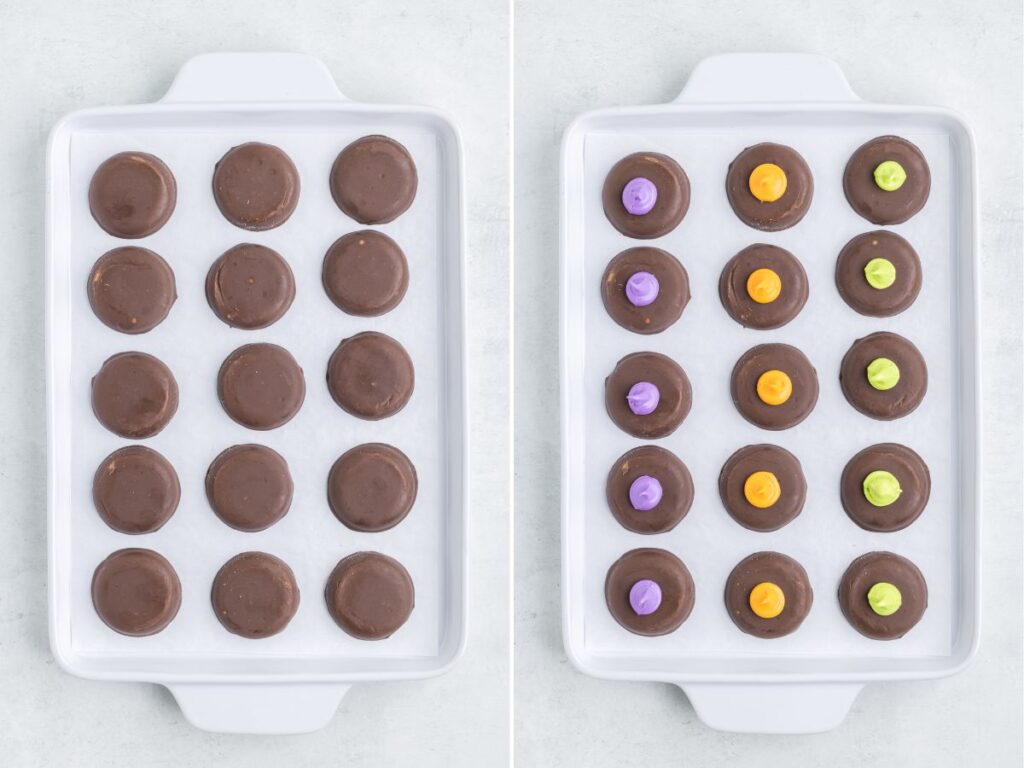
Arrange the cookies on a single layer on a cookie sheet. I like to line the cookie sheet with parchment paper for easy clean-up.
Divide the white frosting into small bowls, one bowl for each color you plan to use. Add the food coloring to the frosting (one color per bowl) and stir well until desired color is achieved.
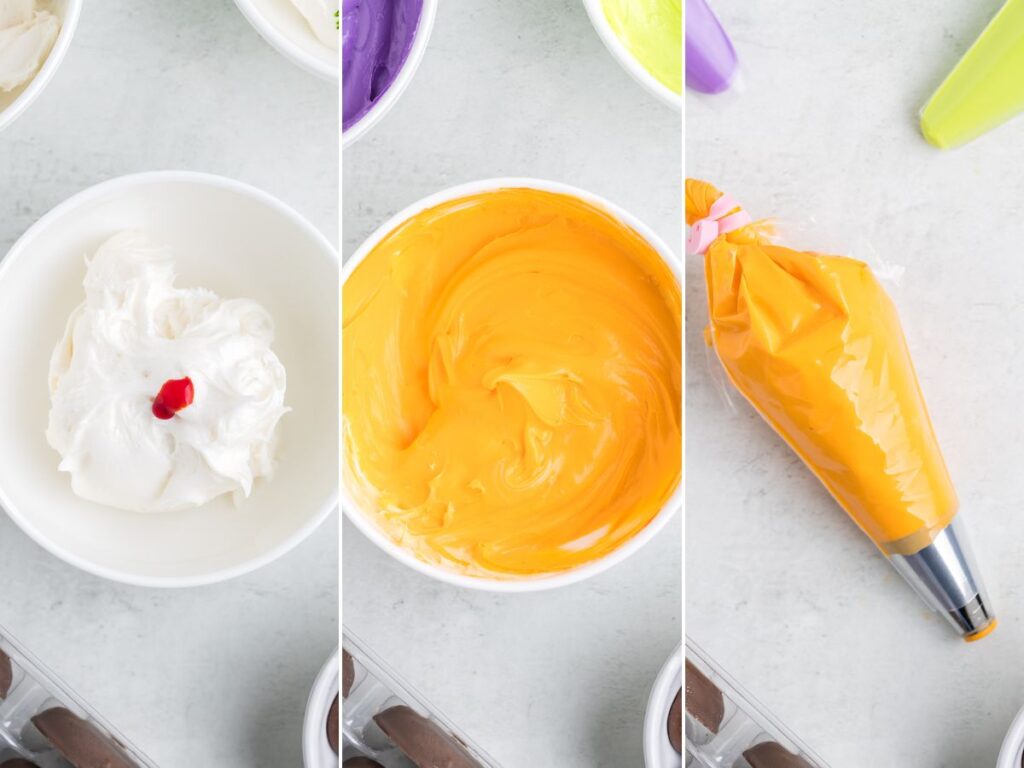
Add each frosting color into a piping bag (with a really small tip) or a sandwich Ziploc bag with the bottom corner snipped off.
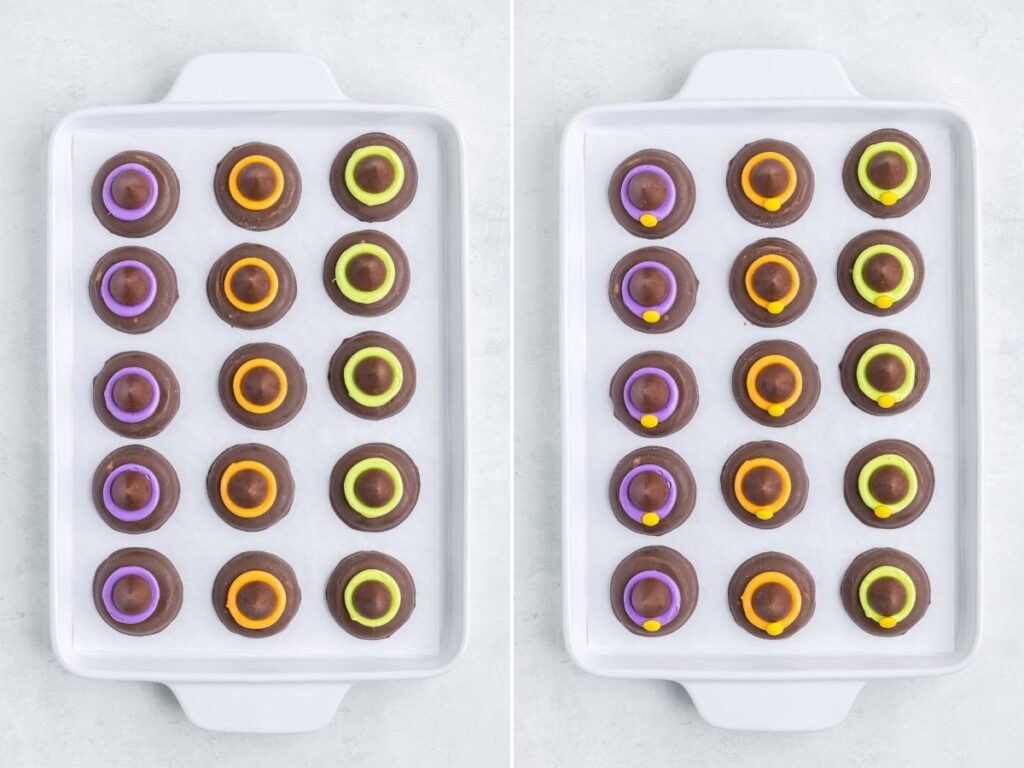
Place a dollop of frosting that is about the size of the bottom of a Hershey Kiss into the center of each cookie. Press one chocolate kiss on top of the frosting and press down slowly. As you press down, the frosting will create a ring around the Kiss.
Add one mini m&m to the band of frosting on each cookie to create the buckle.
Allow the frosting to set for 20 minutes at room temperature before serving.

Storage Instructions
Store any leftovers inside an airtight container, at room temperature, for up to 1 week. Ensure the cookies are stored in a cool dark place away from direct sunlight so the chocolate and frosting do not melt.

Can I Use A Different Cookie?
There are several option of fudge covered cookies to use if you want to switch it up. Try using any round shaped cookie like fudge covered Oreos, fudge covered peanut butter cookies, Fudge Stripe cookies (make sure to turn them upside down so the fudge covered side is facing up) or grasshopper mint cookies.

Tips For Making These Cute & Adorable Halloween Cookies
- Recipe Yield : Make as many, or as little, witch hat cookies that you need! If you’re wanting to double the recipe then just make sure you use two packs of Fudge Stripe cookies and that you have enough Hershey Kisses and mini M&M’s for all of them. The recipe is written so you have enough ingredients for the one pack of Fudge Stripe cookies. You will probably have enough frosting (from the can of it) to do both packs of cookies if doubling the recipe. When I make a single batch with one pack of cookies, there is always leftover frosting in the container.
- Gel Coloring : It’s best to use the neon gel food coloring. The gel colors create brighter and more vibrant colors and you don’t need as much of it as the liquid food coloring. You can do all one color or use several colors; I love using the neon purple, neon green, and neon orange colors.
- Hershey Kisses : Although the plain milk chocolate Kisses look the best for these witch hat cookies, you can use any type of Hershey Kiss you want. Dark Chocolate, Hugs, or even some of the fun Halloween ones.
- Shortcut Tip : Instead of using a tub of white frosting and adding the gel food colors – try using tubes of pre-colored frosting instead. Around the Holidays they make them in all sorts of colors or you can find them in the baking aisle by the other ready-to-use tubes of frosting.
More Cute Halloween Recipes


Witch Hat Halloween Cookies
Ingredients
- 1 package (10-12 oz) fudge covered cookies (see notes)
- 1 container (16 oz) white frosting
- neon gel food coloring (purple, green, orange)
- Hershey Kisses (unwrapped)
- mini M&M's (orange & yellow)
Instructions
- Arrange the cookies on a single layer on a cookie sheet.*I like to line the cookie sheet with parchment paper for easy clean-up.1 package (10-12 oz) fudge covered cookies
- Divide the white frosting into small bowls, one bowl for each color you plan to use. Add the food coloring to the frosting (one color per bowl) and stir well until desired color is achieved.1 container (16 oz) white frosting, neon gel food coloring
- Add each frosting color into a piping bag (with a really small tip) or a sandwich Ziploc bag with the bottom corner snipped off.
- Place a dollop of frosting that is about the size of the bottom of a Hershey Kiss into the center of each cookie. Press one chocolate kiss on top of the frosting and press down slowly. As you press down, the frosting will create a ring around the Kiss.Hershey Kisses
- Add one mini m&m to the band of frosting on each cookie to create the buckle.mini M&M's
- Allow the frosting to set for 20 minutes at room temperature before serving.
Notes
Did You Make This Recipe?
I’d love to see it! You can share it with me on @togetherasfamilyblog and follow on Pinterest @together-as-family-blog-recipes or Facebook @togetherasfamilyblog for more!


Did you love this recipe?
Make sure to comment below so we can chat about it! Or follow on your favorite social network for even more family recipes.