
This post may contain affiliate links, view our disclosure policy.
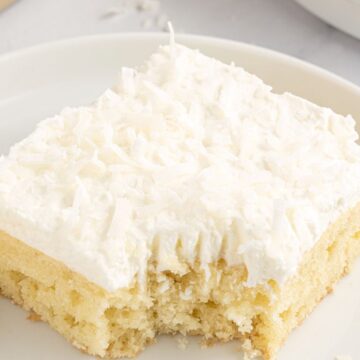
Making a homemade Coconut Cream Cake is easier than you think! So much coconut flavor thanks to canned coconut milk, coconut extract, and coconut flakes. This cake is super moist, so light & fluffy, and bursting with fresh and bright coconut flavor. It’s always a favorite dessert.
A Delicious Coconut Cake with Coconut Milk
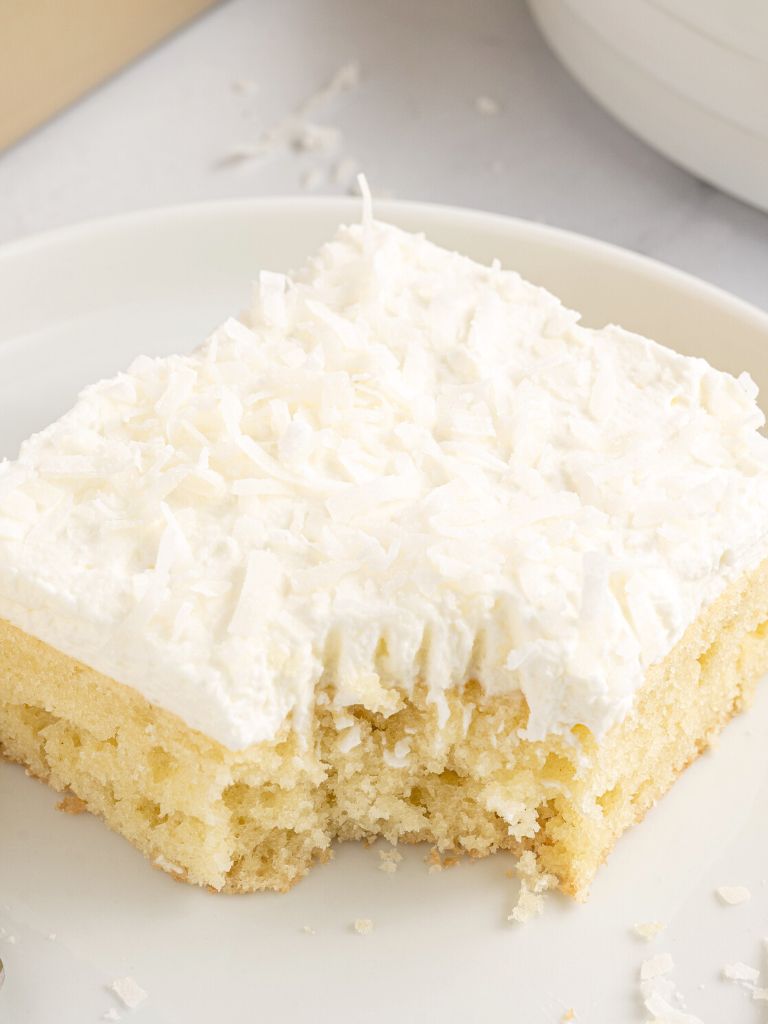
This coconut cream cake has such a light & delicate flavor! It’s the prettiest pale cream colored and perfect for a springtime, summertime, or an Easter dessert.
It’s completely homemade, no cake mixes involved, and it is easier to make than you think with simple pantry baking ingredients.
The secret is the trio of coconut flavor with canned coconut milk, coconut extract, and coconut flakes. It’s a light and spongy cake topped with a soft and pillowy homemade coconut whipped cream topping.
Ingredients Needed
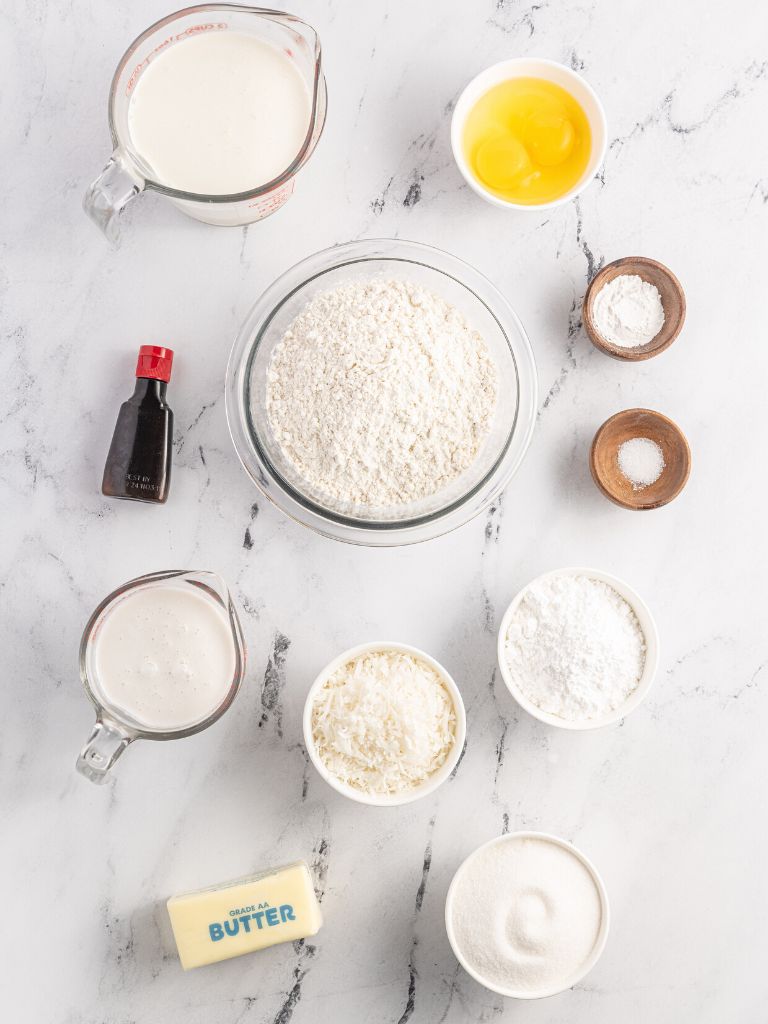
- All-Purpose Flour – I use unbleached all-purpose flour for all my baking and cooking.
- Baking Powder
- Salt – Kosher salt, sea salt, or regular iodized salt are all great options.
- Butter – You can use salted butter or unsalted butter, whichever you prefer. I use salted butter for all my baking so that’s what I keep in my fridge.
- Granulated Sugar
- Large Eggs – It’s best if these are room temperature. Place them out on the counter about 20 minutes before beginning the recipe. If you don’t remember to do this it’s not a huge deal if they’re used cold from the fridge.
- Coconut Extract
- Canned Coconut Milk – This is not the coconut milk that you will find by the cow’s milk and almond milks at the store. It’s canned coconut milk that is shelf stable. You can use the sweetened or unsweetened coconut milk, whichever you prefer. I use sweetened canned coconut milk.
- Heavy Whipping Cream – No substitutes for this! Make sure it is chilled well and that you whip it straight from the fridge. Don’t let it sit out before whipping it into cream.
- Coconut Flakes – You can use sweetened or unsweetened flakes.
How To Make Homemade Coconut Cream Cake
Learn how to make this cake recipe with these easy-to-follow steps. Make sure and read to the bottom of the page where there is a detailed recipe card, a printable option, and a pin it button so you can save the recipe for later.
- Prep : Preheat the oven to 350 degrees F. Grease the bottom of a 9×13 baking pan with butter or shortening. It’s best to not spray it will cooking spray. The cooking spray can give the cake an extra oily flavor and cooking spray tends to make the sides and bottom of the cake darker in color as it cooks.
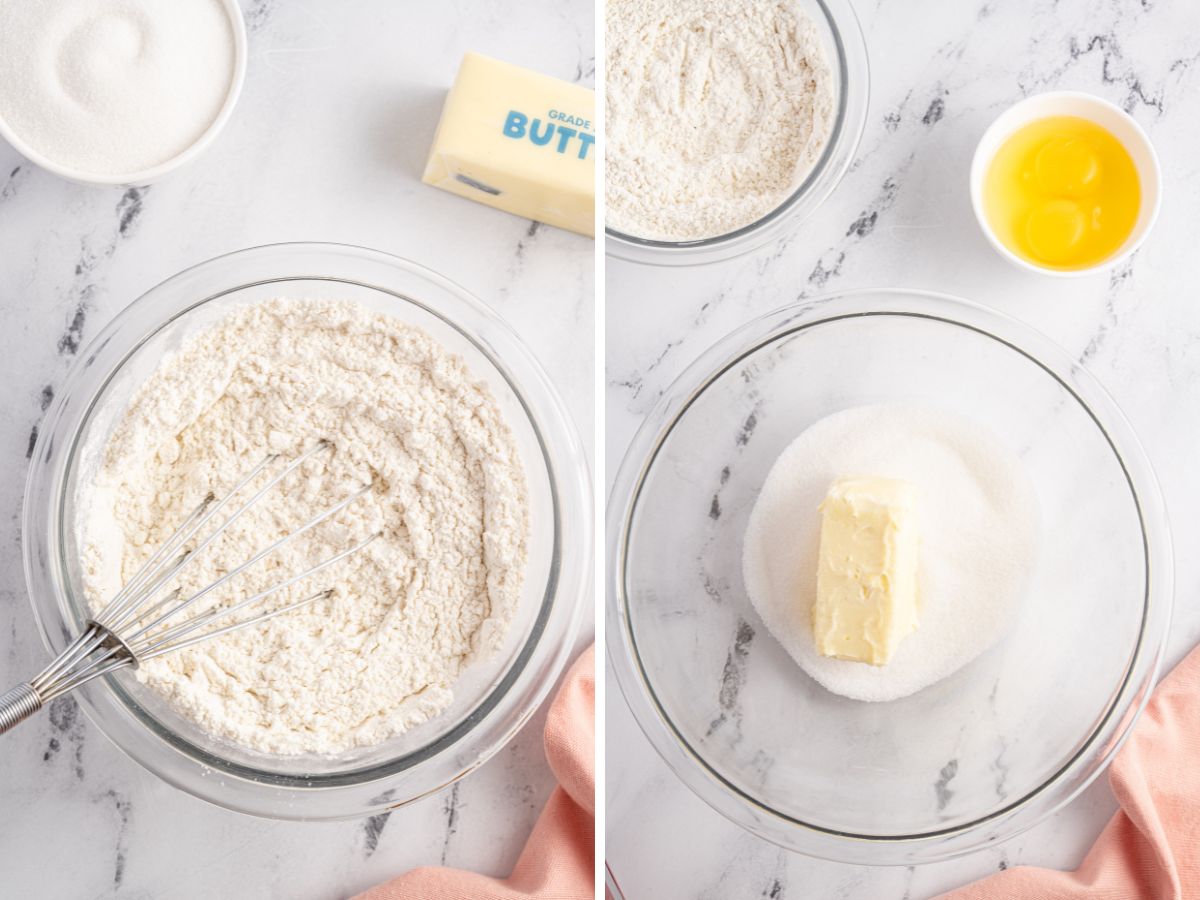
- Dry Ingredients : Whisk the dry ingredients for the cake in a small mixing bowl; flour, baking powder, and salt.
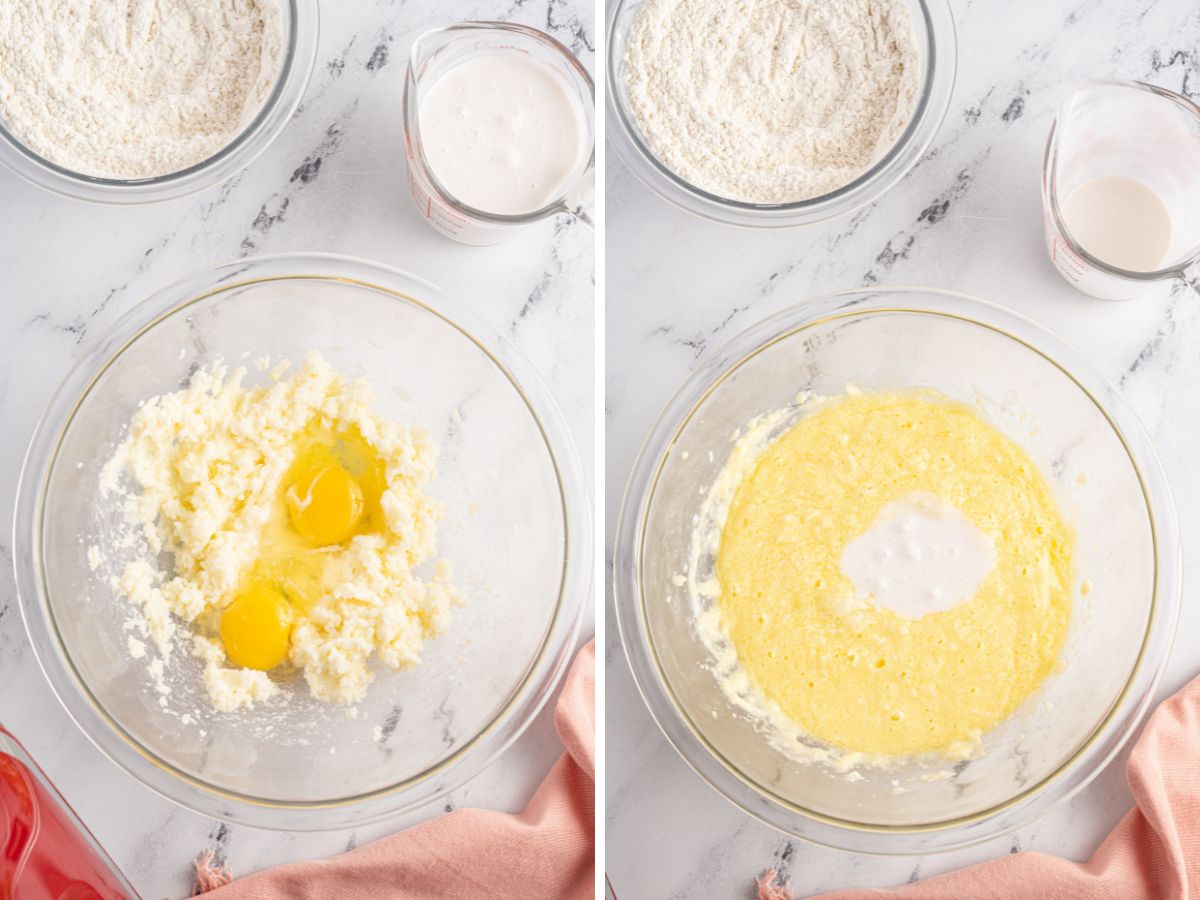
- Wet Ingredients : In a separate bowl, cream together the butter and sugar until light in color and fluffy. About 1-2 minutes. Add the eggs and coconut extract and beat just until the eggs are combined in. Mix in the coconut milk.
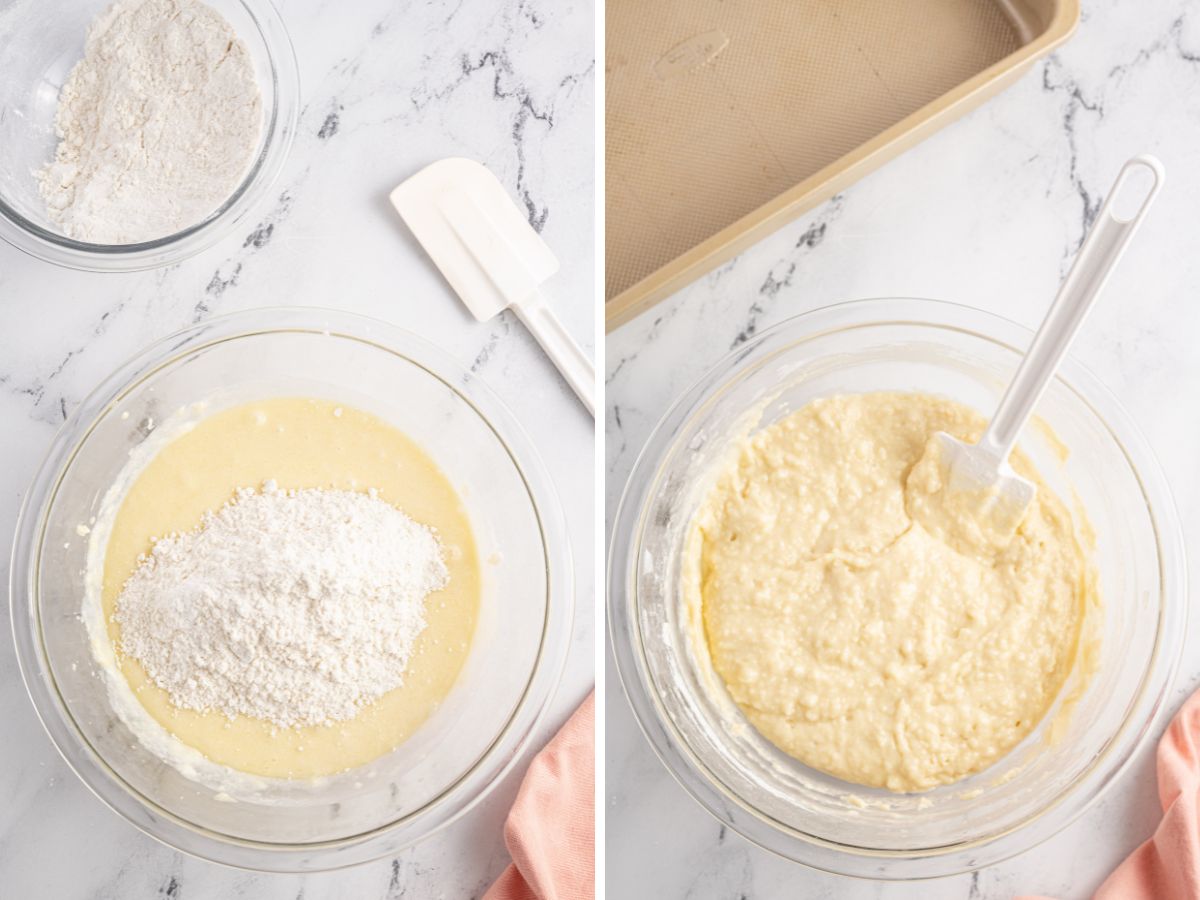
- Coconut Cake Batter : Add the dry ingredients into the wet ingredients and mix on low speed just until combined. Make sure to scrape the sides and bottom of the mixing bowl to ensure that everything is mixed together well. Careful to not over-mix but you still want to make sure that there are no flour pockets or streaks inside the batter.
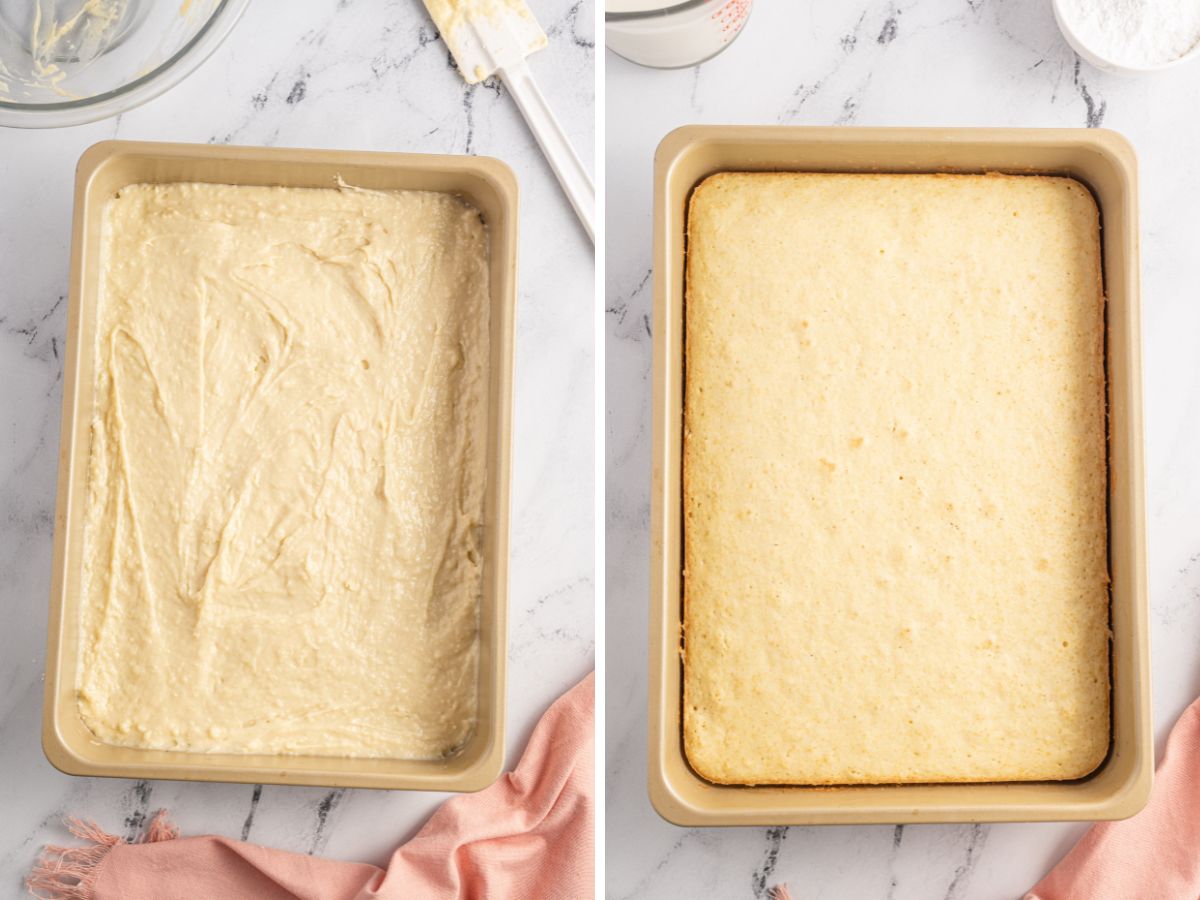
- Cake : Pour the cake batter into the prepared pan and bake for 20-25 minutes or until a toothpick inserted into the middle comes out clean or with moist crumbs (if it’s wet batter you need to cook it longer). Allow the cake, inside the pan, to cool on a cooling rack before frosting it.
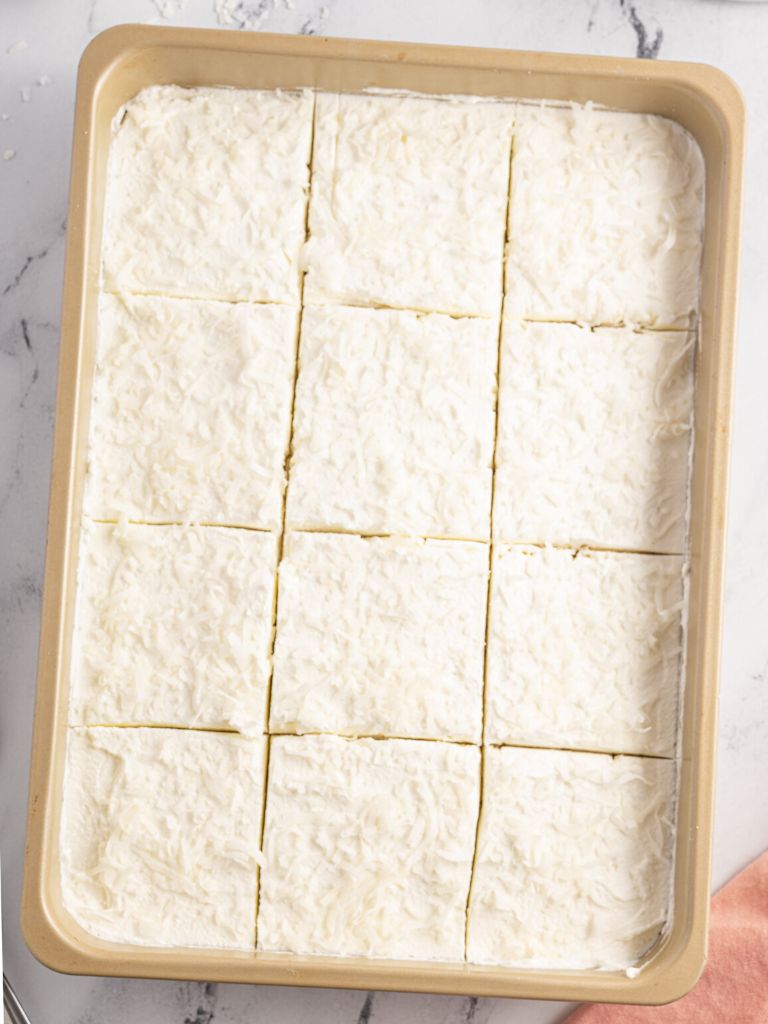
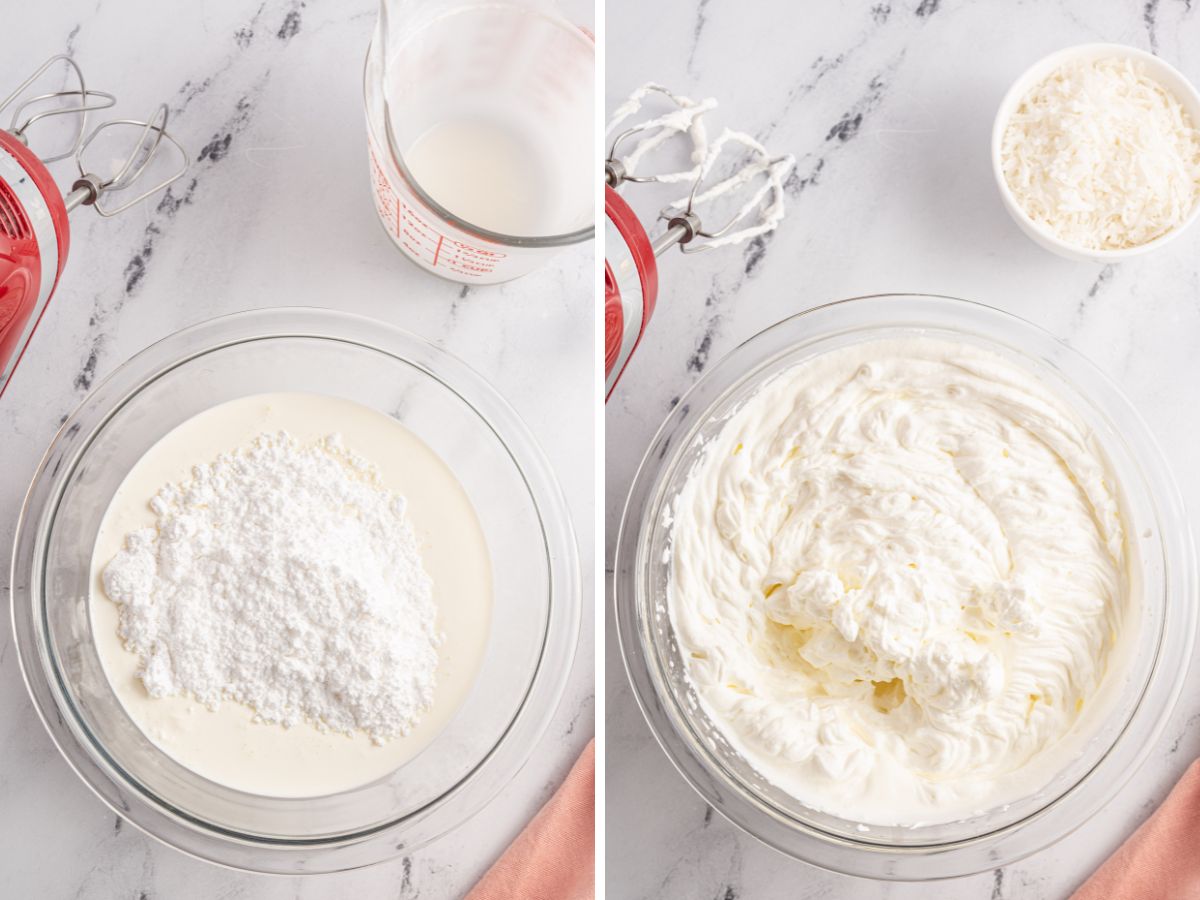
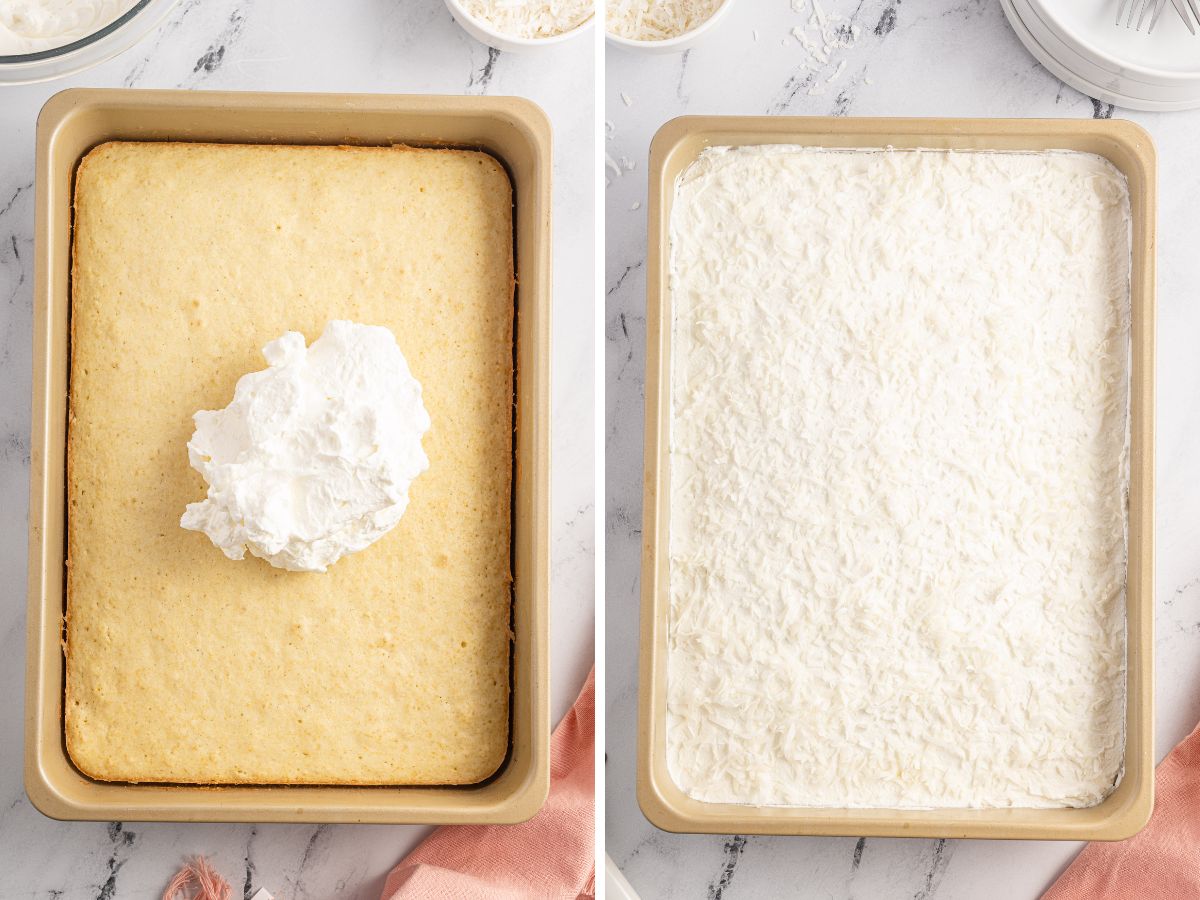
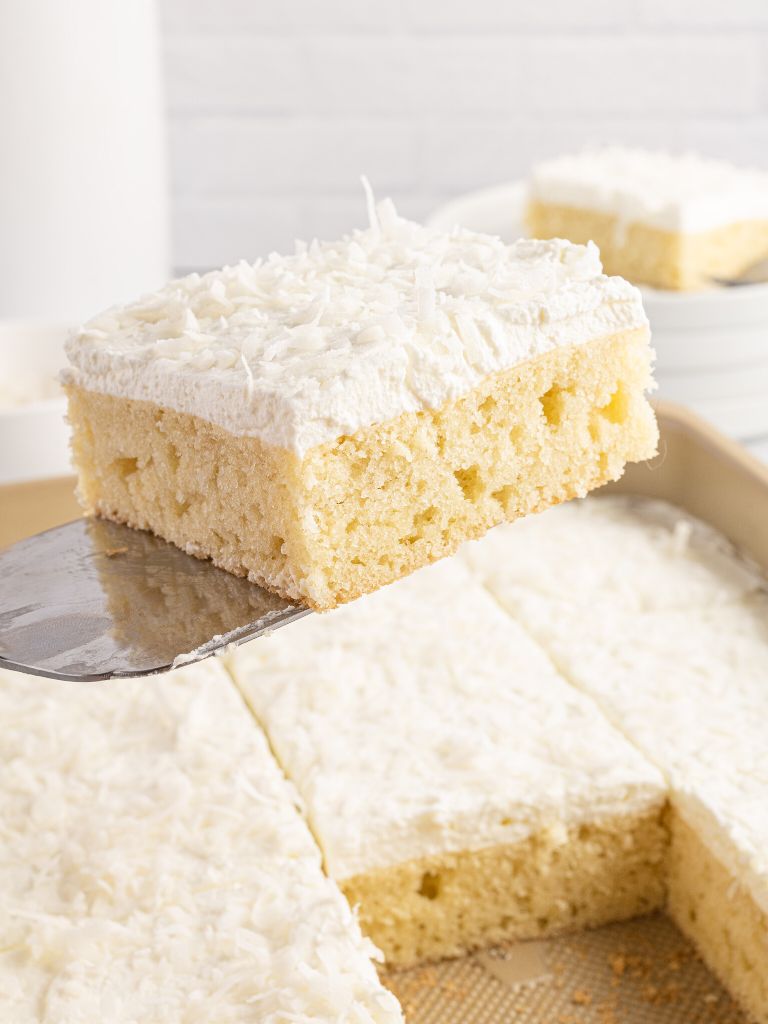
- Whipped Topping : Beat the heavy whipping cream, powdered sugar, and coconut extract until stiff peaks form. This takes several minutes (about 5-6 minutes). You can use a stand mixer to make it easier or a mixing bowl with a handheld electric mixer. Frost the cooled cake with the whipped topping, garnish with coconut flakes, and cut into squares. The cake can be served right away or cover it with plastic wrap for several hours before serving it.
Coconut Cream Cake FAQ’s
-
Storage Instructions
- I don’t recommend storing this cake at room temperature for longer than 2 hours. This is usually enough time for you to serve the cake, but then you will need to refrigerate it because of the heavy cream in the whipped cream topping.
- Store the cake, and any leftovers, inside the fridge for up to 5 days. I actually think it tastes better and better the longer it’s in the fridge. Yum! I think it’s easiest to use a 9×13 baking pan that comes with a lid for easy storage. You can also cover the baking pan with plastic wrap or foil, or store individual slices in a Tupperware type container. Enjoy the cake chilled from the fridge or allow it to come to room temperature before serving. Again, don’t leave it out for longer than 2 hours.
- You can also freeze the unfrosted cake for up to 2 months. I don’t recommend freezing this cake frosted because the whipped topping will separate and give off lots of liquid as it thaws. Double wrap the cake in plastic wrap and then foil and store it in the freezer. Allow the cake to thaw in the fridge before making the frosting and serving.
-
Texture, Flavor, and Consistency For Coconut Cream Cake
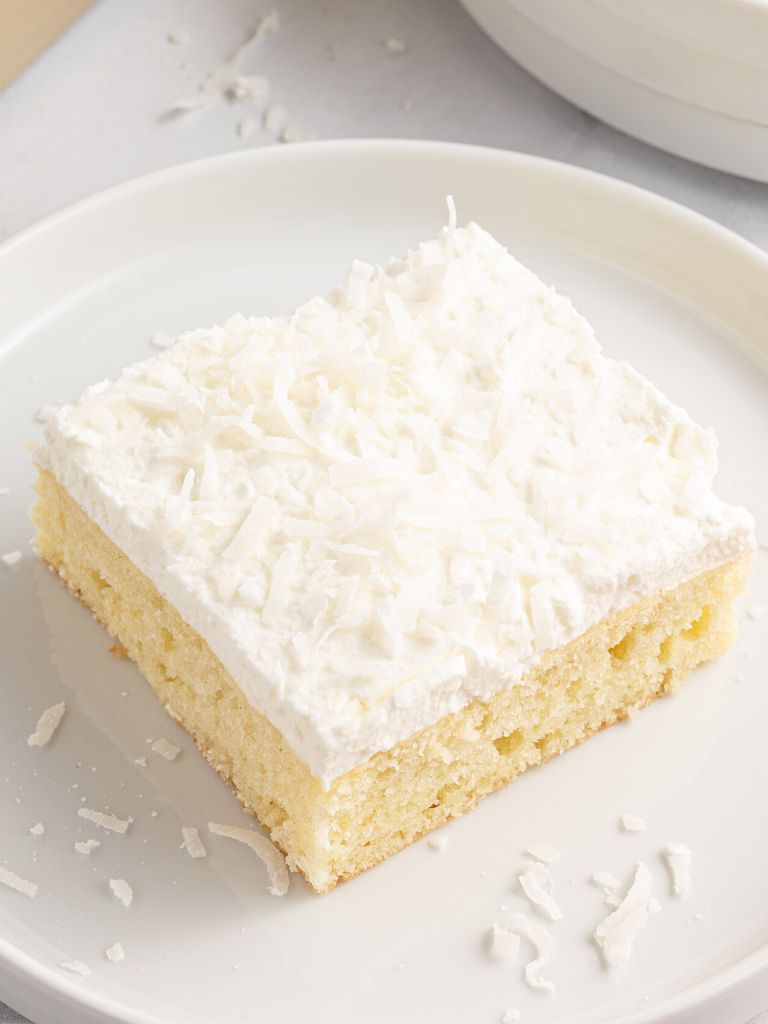
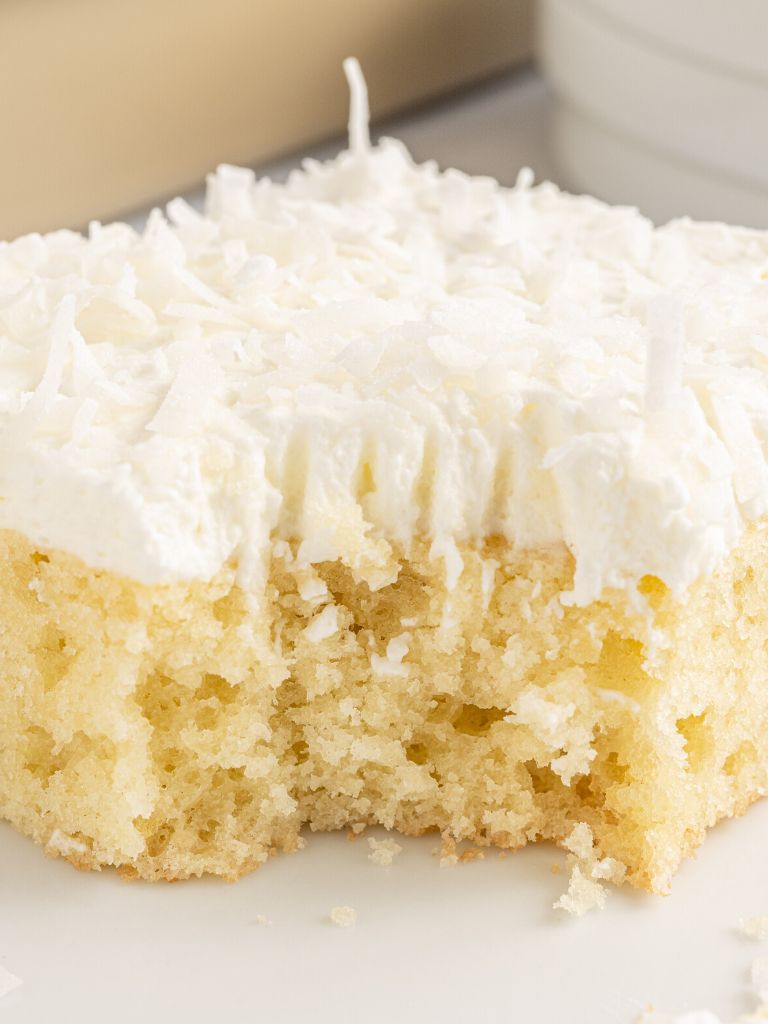
- Texture : A light and creamy whipped coconut topping over a soft and moist coconut cake with the added texture and sweetness from coconut flakes on top as a garnish.
- Color : This coconut cake is a pretty pale cream color.
- Flavor : Coconut! Coconut extract, canned coconut milk, and coconut flakes are the star of this cake.
Recipe Tips
Here are a few of my helpful tips so that you can have success recreating this coconut cream cake recipe in your own kitchen ♥
- Baking Time : Because this is a thinner cake you will want to pay attention to it as it bakes so you don’t over-bake it. The cake will turn out quite dry if it’s over baked. The cake should not be browned when you pull it out of the oven (maybe slightly on the edges but not in the middle). Doing the toothpick test is the best way to ensure that the cake is fully cooked without over-baking it. Stick a toothpick into the center of the cake and make sure it comes out clean. Moist crumbs are ok but it should not be wet batter.
- Don’t Use Cooking Spray In The Cake Pan : Using cooking spray can add an extra oily flavor and it darkens the edges and bottom of cakes. This cake is so pale to begin with that you really want to grease the cake pan with butter or shortening, not cooking spray. I keep a small tub of all-vegetable shortening in my pantry for greasing cake pans. It’s easiest to spread it into the cake pan with clean hands.
- Coconut Flake Garnish : Toast the coconut or use it as is. Toasting the coconut will give it a deeper flavor but it also makes it darker in color, which might not pair well with the light colored cake. I prefer using un-toasted coconut flakes on top as the garnish.
- Canned Coconut Milk : Make sure you are using canned coconut milk and not the chilled coconut milk that you find alongside the cows milk and almond milks. Canned coconut milk can be found in the baking aisle or in the asian cooking aisle, it is shelf stable and not refrigerated. Be sure and shake the can of give the coconut milk inside a good stir before measuring out the amount needed. Usually the liquid separates from the coconut inside the can, so it does need to be shaken or stirred before using.
More Coconut Recipes You’ll Love
- Coconut Cream Fruit Dip : Words can’t describe this amazing fruit dip! So good.
- Coconut Lemon Poppyseed Muffins : Coconut oil, coconut extract, and fresh lemon are the star ingredients for these muffins with a simple glaze on them.
- No Bake Coconut Cream Pie : So easy to make with a prepared crumb crust, coconut cream instant pudding, and Cool Whip.
- Thai Coconut Grilled Chicken : A simple marinade with coconut milk and other ingredients for chicken breasts. Grill it for a juicy and super flavorful grilled chicken recipe.
- Coconut Rice Recipe : Make coconut rice (with canned coconut milk) in the rice cooker with this easy recipe.
- Slow Cooker Coconut Curry Chicken : Easy to make and the slow cooker does all the work!
More Cake Recipes To Try
- Lemon Lover’s Layered Cake with Lemon Pudding Frosting – Lemon cake mix + fresh lemon + lemon pudding are the stars of this deliciously moist layered cake.
- Banana Bread Cake – The best! Use up those ripe bananas.
- Dr. Pepper Texas Sheet Cake – America’s favorite soda in a delicious homemade cake with pecans.
- Cake Mix Recipe – An easy to follow recipe for how to doctor up a boxed cake mix.
- Oreo Poke Cake – A chocolate cake filled with Oreo cookie chunks and pudding. Topped with oreo Cool Whip.
- Orange Pineapple Cake – The famous ‘pig pickin’ cake with pineapple and mandarin oranges inside the cake.

Coconut Cream Cake
Equipment
Ingredients
Coconut Cream Cake
- 2¼ cups all-purpose flour
- 2 teaspoons baking powder
- ¼ teaspoon salt
- 1/2 cup (1 stick) butter softened
- 3/4 cup granulated sugar
- 2 large eggs room temperature
- 2 teaspoons coconut extract
- 1 cup canned coconut milk (full-fat not lite)
Coconut Whipped Cream
- 2 cups heavy whipping cream
- 1/2 cup powdered sugar
- 1 teaspoon coconut extract
- 1/2 cup sweetened coconut flakes (optional garnish)
Instructions
- Preheat the oven to 350° F. Grease the bottom of a 9x13 baking dish with softened butter or shortening. Set aside. * It's best not to spray the pan with cooking spray because it leaves an oily taste and it makes the bottom and sides of the cake darker in color.
- In a small mixing bowl whisk together the flour, baking powder, and salt. Set aside for later.
- In a separate mixing bowl, using an electric hand mixer, beat the butter and sugar together until fluffy and light in color. This takes about 1-2 minutes.
- Add the eggs and coconut extract and beat just until the eggs are mixed in.
- Mix in the coconut milk.
- Add the dry ingredients and mix on low speed just until combined and no flour streaks or pockets remain. The batter might be slightly lumpy and that's ok. You don't want to over-mix it. * Use a spatula to scrape the sides and bottom of the mixing bowl to make sure all the batter and ingredients are combined.
- Pour the coconut cake batter into the prepared pan and spread it out evenly. Bake for 20-25 minutes or until a toothpick inserted into the center comes out clean. * Moist crumbs are ok on the toothpick. If it has wet batter it needs to cook longer. The cake should still be pale in color while the edges might be slightly golden browned.
- Allow the cake to cool on a cooling rack to room temperature before adding the whipped topping.
Make Coconut Whipped Cream
- Combine the heavy whipping cream, powdered sugar, and coconut extract into a mixing bowl. Beat for about 5 minutes or until stiff peaks form. Start on low speed and increase speed as needed.
- Spread the whipped cream on top of the cooked cake. Sprinkle with the optional coconut flake garnish (if using) and cut into squares. The cake can be served immediately OR for best results cover the pan with plastic wrap and allow it to refrigerate before serving. Up to 8 hours is fine or overnight.
Notes
-
- I don't recommend storing this cake at room temperature for longer than 2 hours. This is usually enough time for you to serve the cake, but then you will need to refrigerate it because of the heavy cream in the whipped cream topping.
- Store the cake, and any leftovers, inside the fridge for up to 5 days. I actually think it tastes better and better the longer it's in the fridge. Yum! I think it's easiest to use a 9x13 baking pan that comes with a lid for easy storage. You can also cover the baking pan with plastic wrap or foil, or store individual slices in a Tupperware type container. Enjoy the cake chilled from the fridge or allow it to come to room temperature before serving. Again, don't leave it out for longer than 2 hours.
- You can also freeze the unfrosted cake for up to 2 months. I don't recommend freezing this cake frosted because the whipped topping will separate and give off lots of liquid as it thaws. Double wrap the cake in plastic wrap and then foil and store it in the freezer. Allow the cake to thaw in the fridge before making the frosting and serving.
Nutrition
Did You Make This Recipe?
I'd love to see it! You can share it with me on @togetherasfamilyblog and follow on Pinterest @together-as-family-blog-recipes or Facebook @togetherasfamilyblog for more!


Did you love this recipe?
Make sure to comment below so we can chat about it! Or follow on your favorite social network for even more family recipes.