
This post may contain affiliate links, view our disclosure policy.
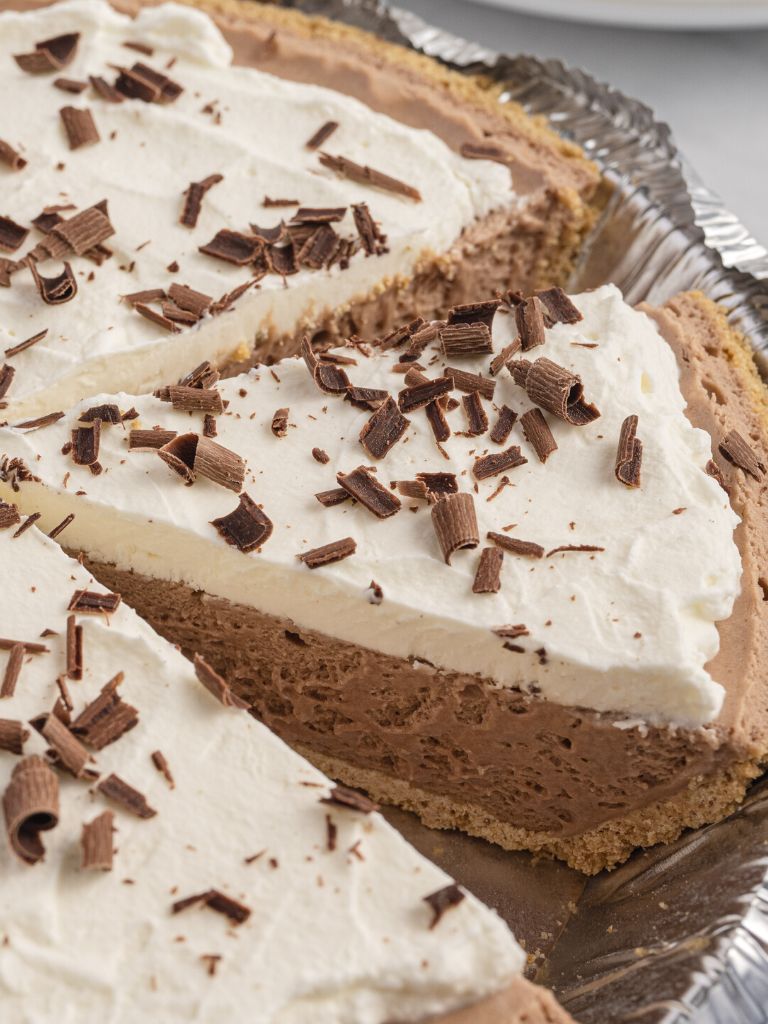
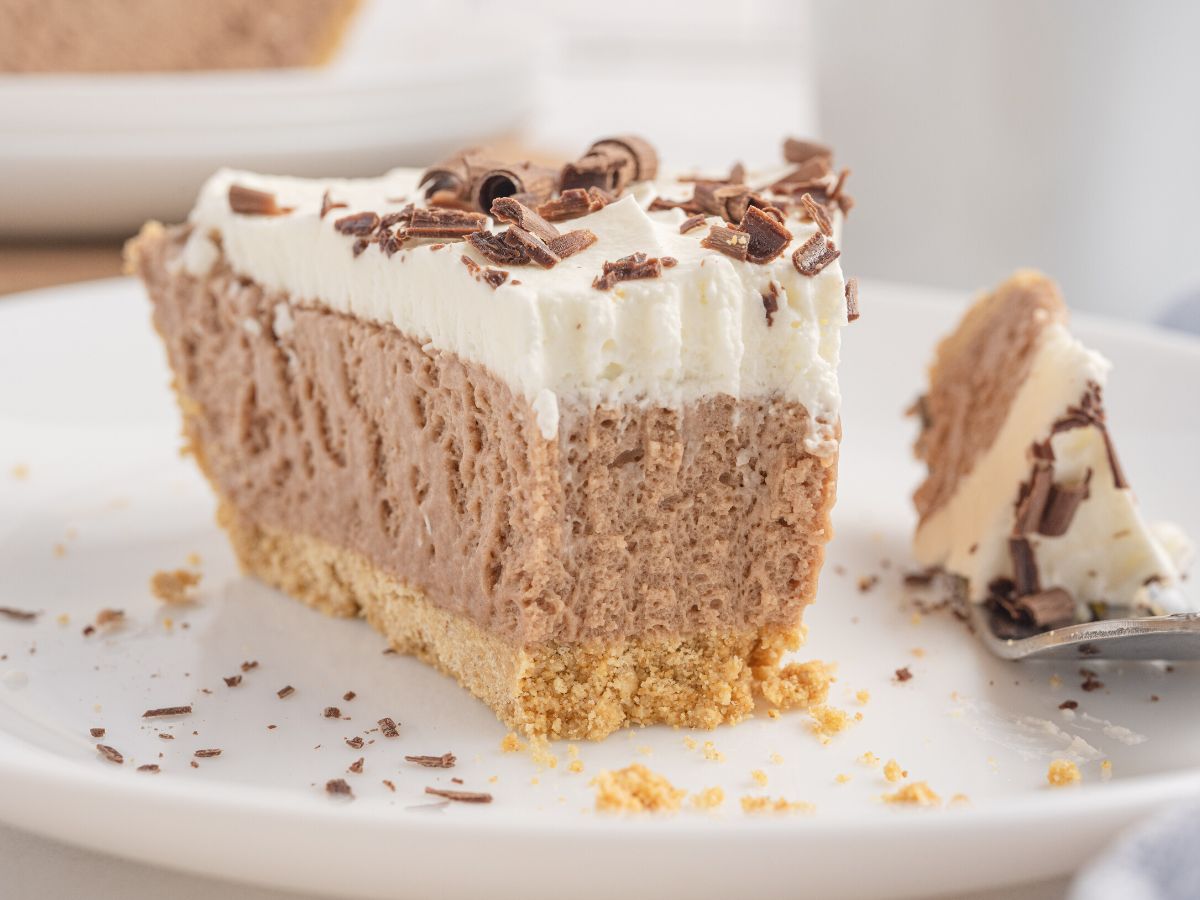
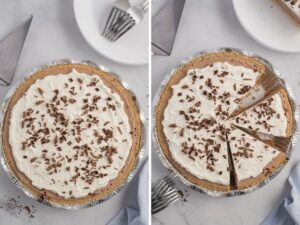
Milk Chocolate Marshmallow Pie is a fluffy & creamy pie with milk chocolate bars, Cool Whip, and melted marshmallows inside a graham cracker crust. This chocolate dessert is simple enough for a weeknight dessert or fancy enough for the Holiday table.
Chocolate Marshmallow Pie Recipe
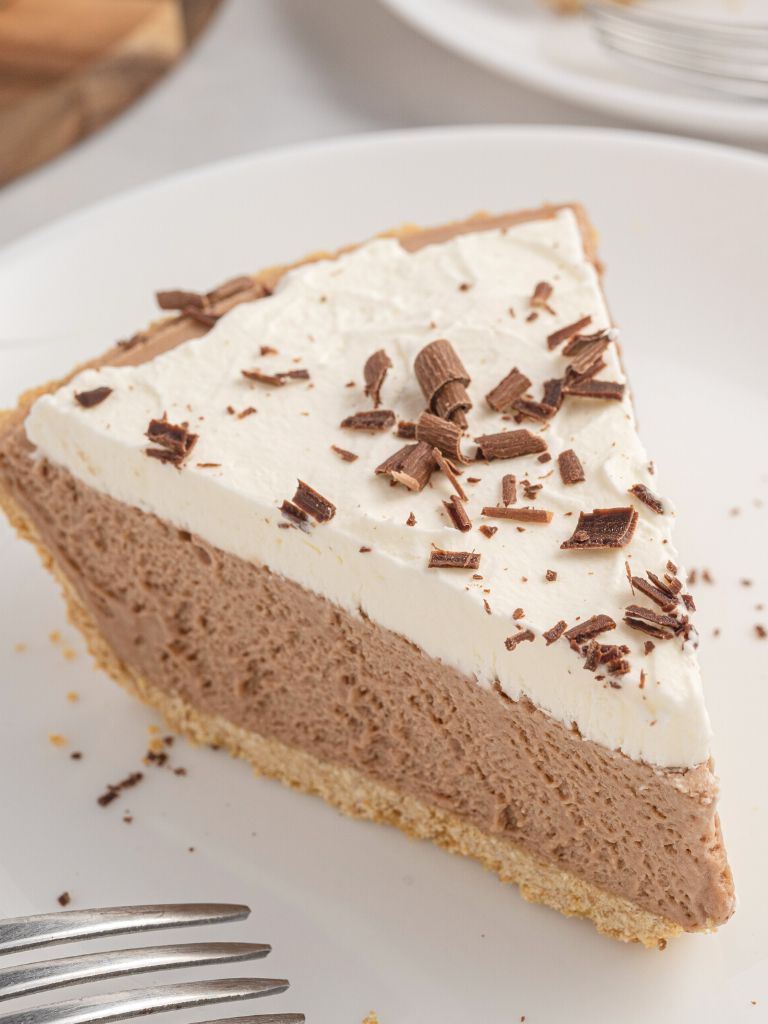
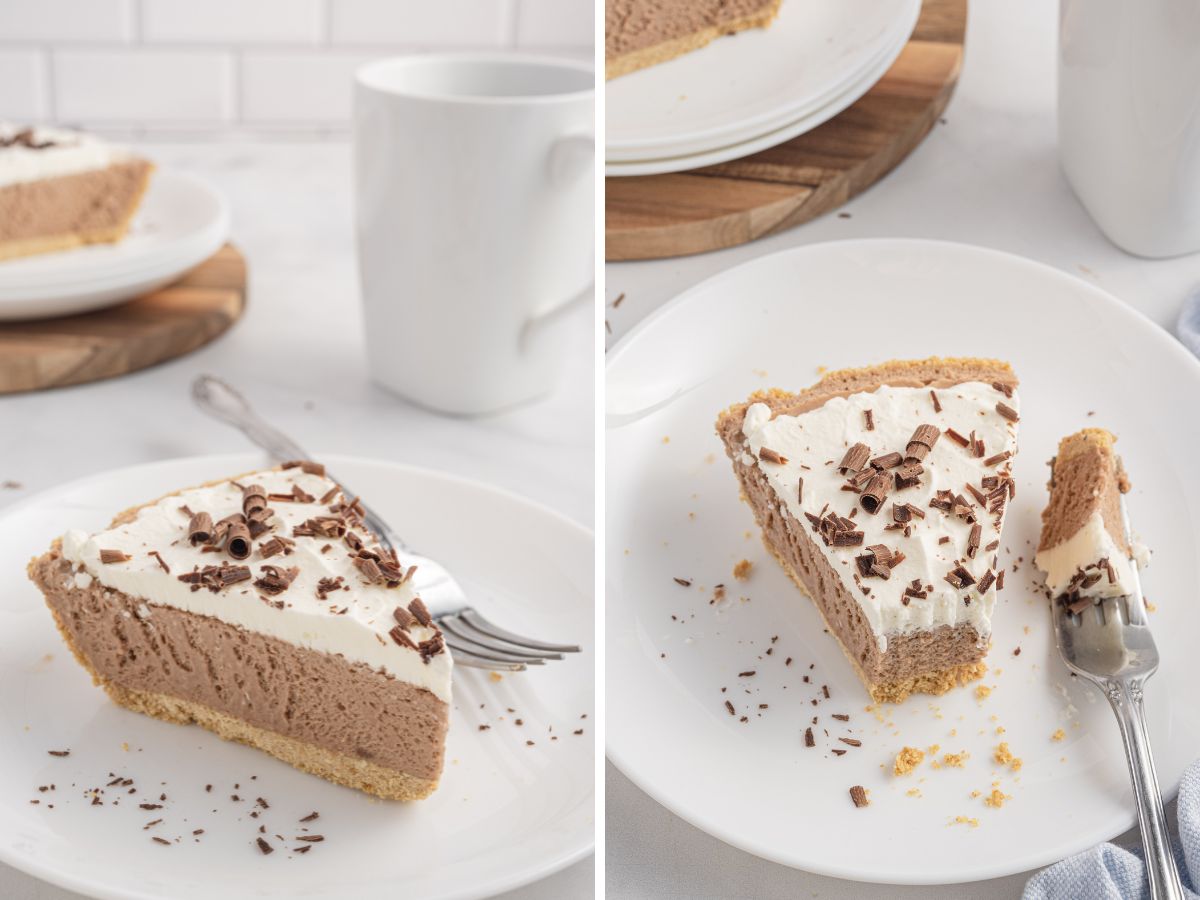
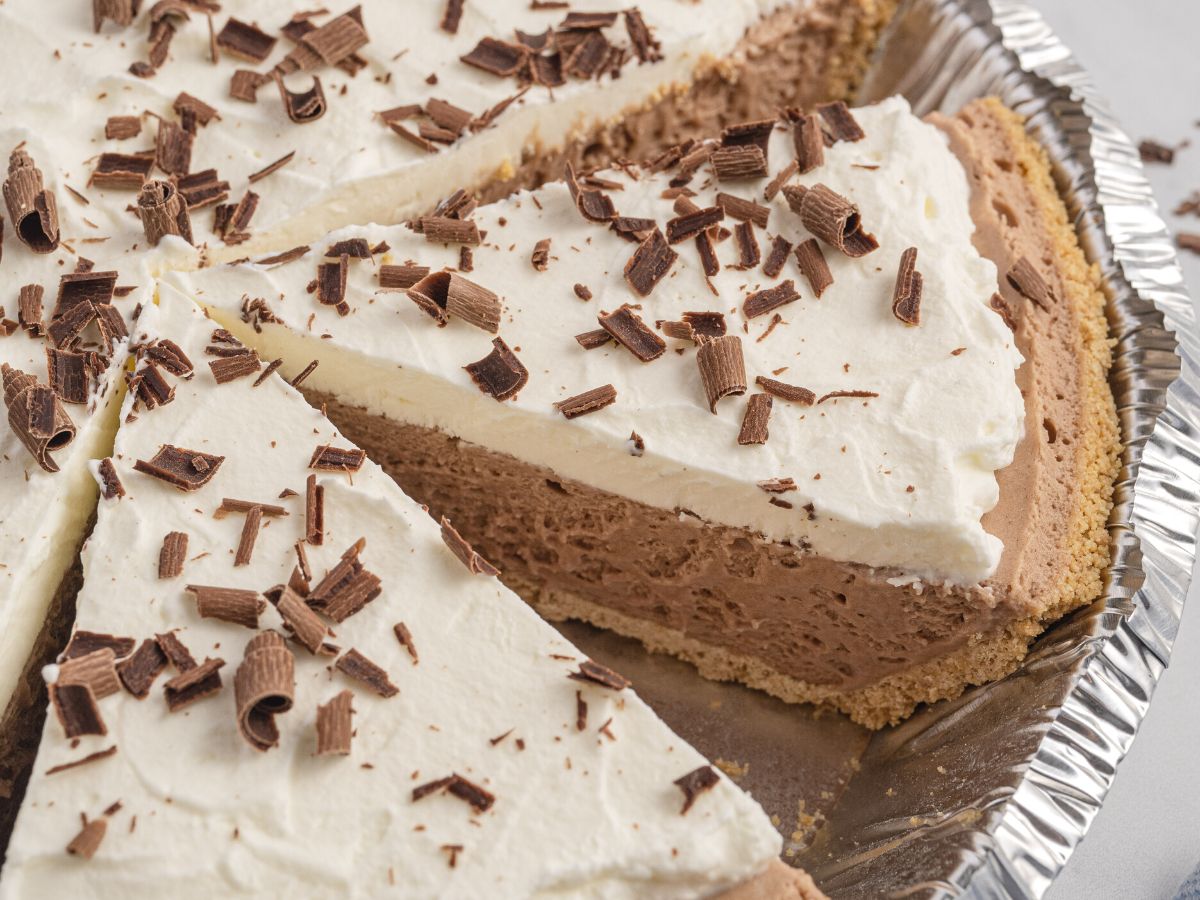
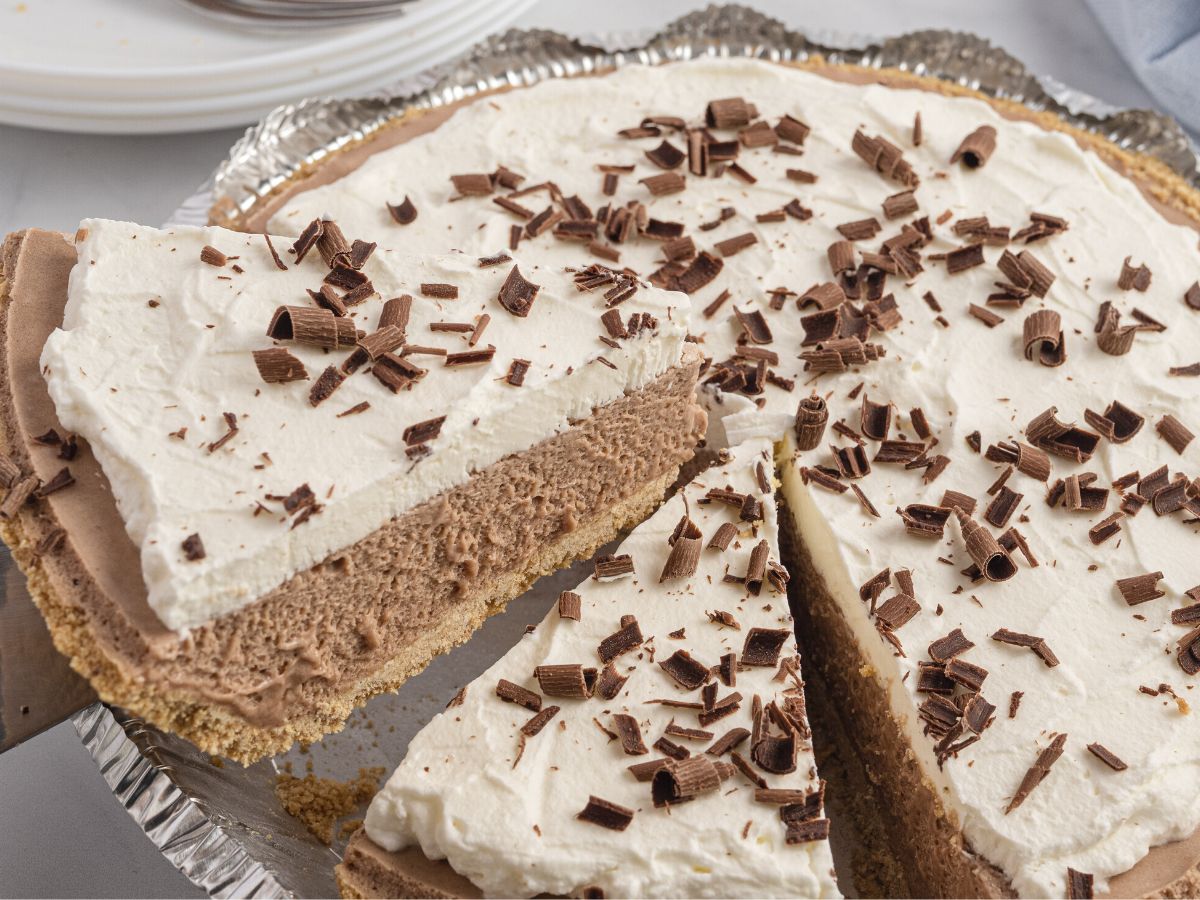
This milk chocolate marshmallow pie is a deliciously fluffy twist to classic Chocolate Cream Pie! Nestled inside a graham cracker crust is a thick, sweet, and fluffy milk chocolate marshmallow mixture and then it’s topped off with homemade whipped cream and chocolate curls.
I love using marshmallows in pie because it makes the pie filling so light & fluffy and it’s so simple to make. Melt the marshmallows + milk chocolate + milk in a saucepan and then add some Cool Whip. Anyone can make this chocolate marshmallow pie.
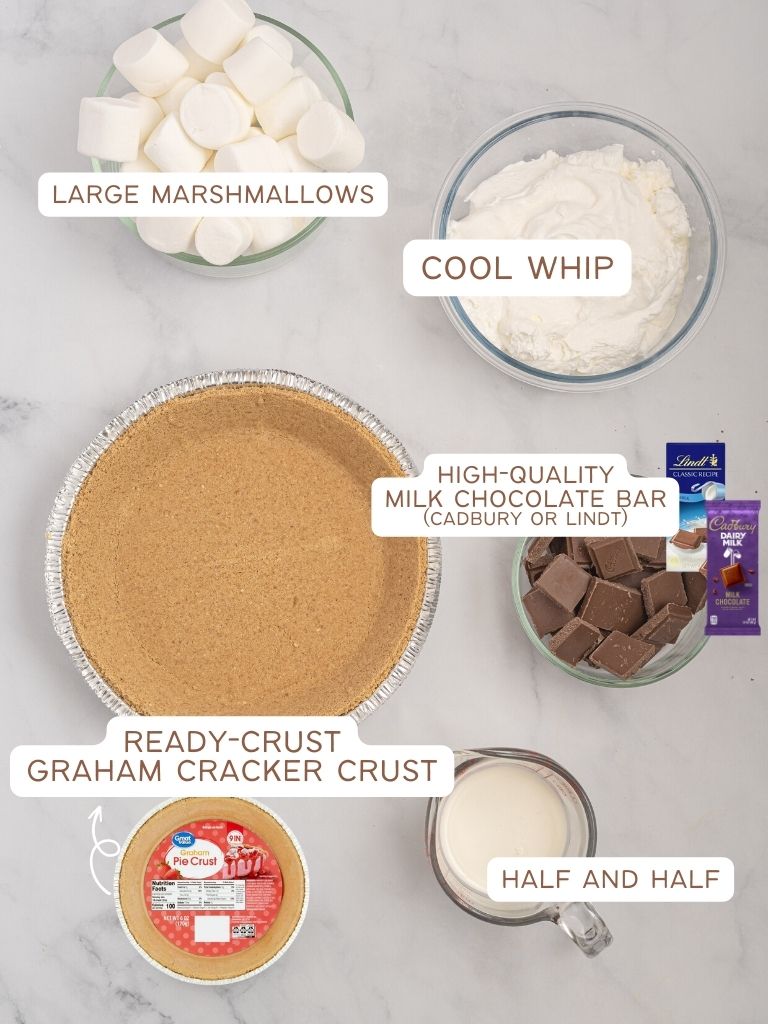
Ingredients Needed
- Half & Half – This is half milk + half cream and you’ll find it by the other milks.
- Large Marshmallows – If you have a scale then I recommend using it as you will get a more accurate measurement. If not, just measure out 4.5 cups for this pie. I have tried this recipe using mini marshmallows and they just don’t melt as well and mix in good for some reason.
- High Quality Milk Chocolate Bars – I highly recommend going to the candy aisle and using some high-quality chocolate like Cadbury milk chocolate or Lindt milk chocolate. Hershey’s milk chocolate bar is yummy but for this recipe we want something a little “fancier”.
- Cool Whip
- Graham Cracker Crust – These are the ‘ready crusts’ that you will find in the baking aisle. Feel free to use a chocolate graham cracker crust instead of even an Oreo crust.
How To Make Milk Chocolate Marshmallow Pie with a Graham Cracker Crust
Learn how to make this pie with milk chocolate and large marshmallow with the easy steps below. Be sure and read to the bottom of the post where there is a printable recipe card with all the details and a pin it button so you can save this pie recipe for later.
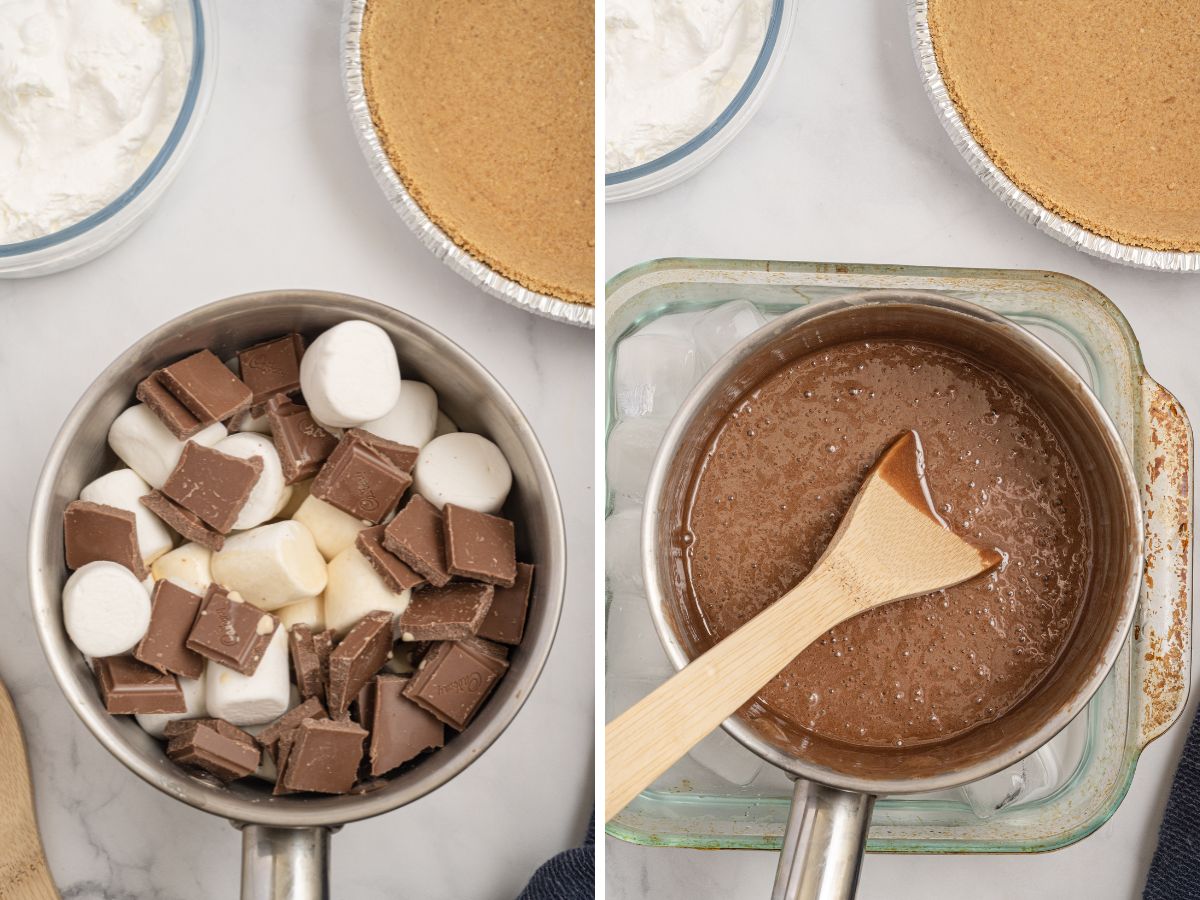
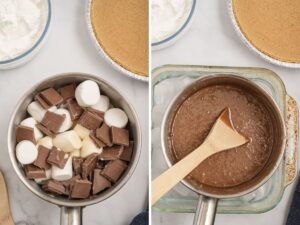
- Milk Chocolate Stove Top : In a medium saucepan, over low heat, add the half and half, marshmallows, and milk chocolate squares. Stir constantly to avoid scorching and heat until the marshmallows have completely melted and the mixture is smooth. This takes about 8-10 minutes.
- Ice Bath Cooling Time : Fill a large shallow bowl or shallow baking dish (like a 9×13 pan) halfway with cold water and some ice to create an ice bath. Place the saucepan into the ice bath, and stir quickly & constantly, until the mixture is cool to the touch. About 5 minutes. You will know it’s cooled enough when the mixture gets thick and starts to stick to the bottom and sides of the pan as you stir it.
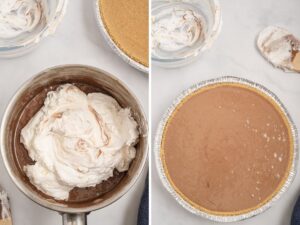
- Cool Whip : Remove the pan from the ice bath and stir in the thawed Cool Whip until it’s combined well.
- Pie : Pour the filling into the graham cracker crust and cover the pie tin with the enclosed plastic lid.
- Fridge : Let the pie refrigerate for at least 6 hours or up to overnight.
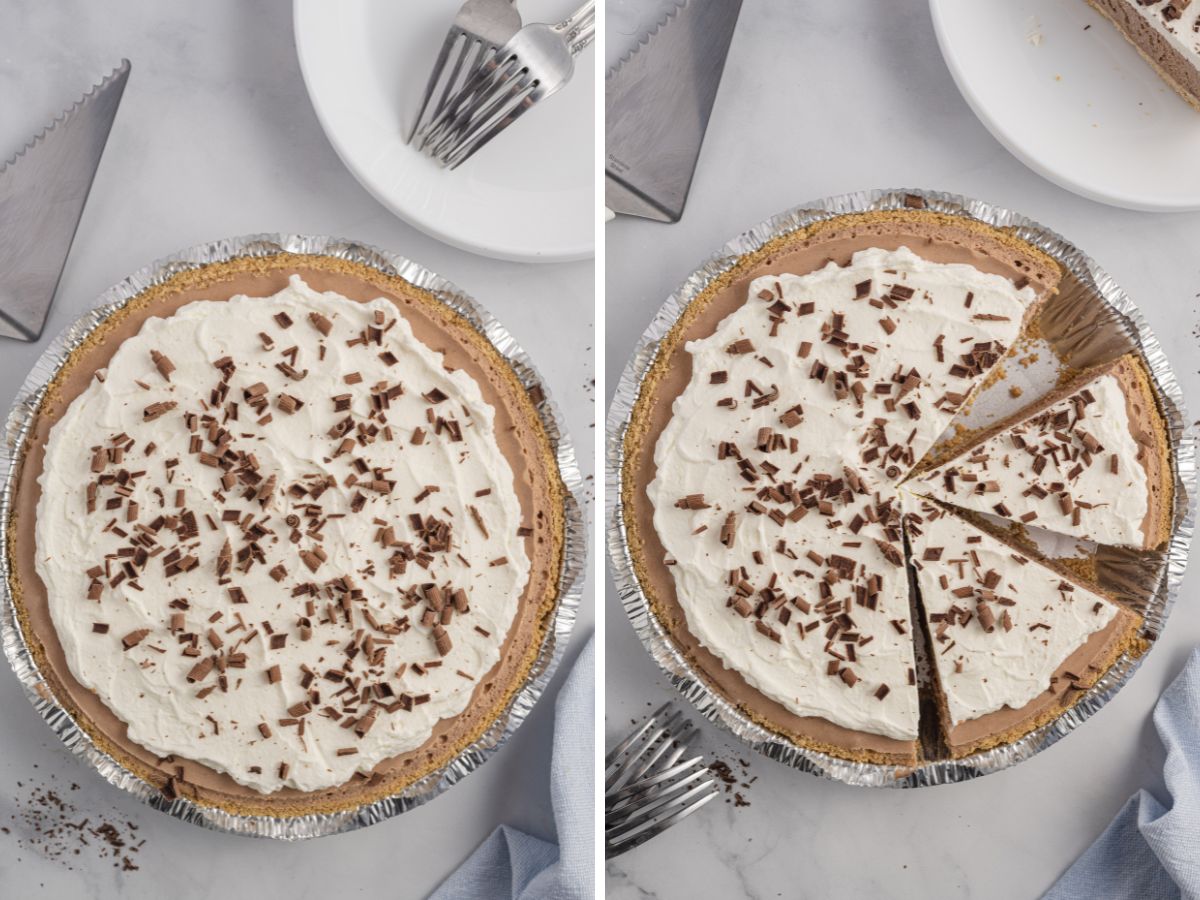
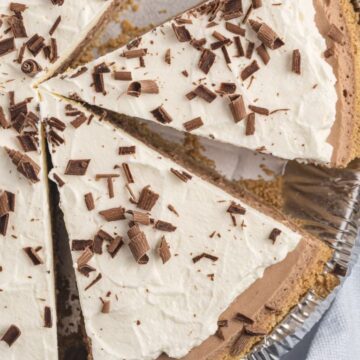
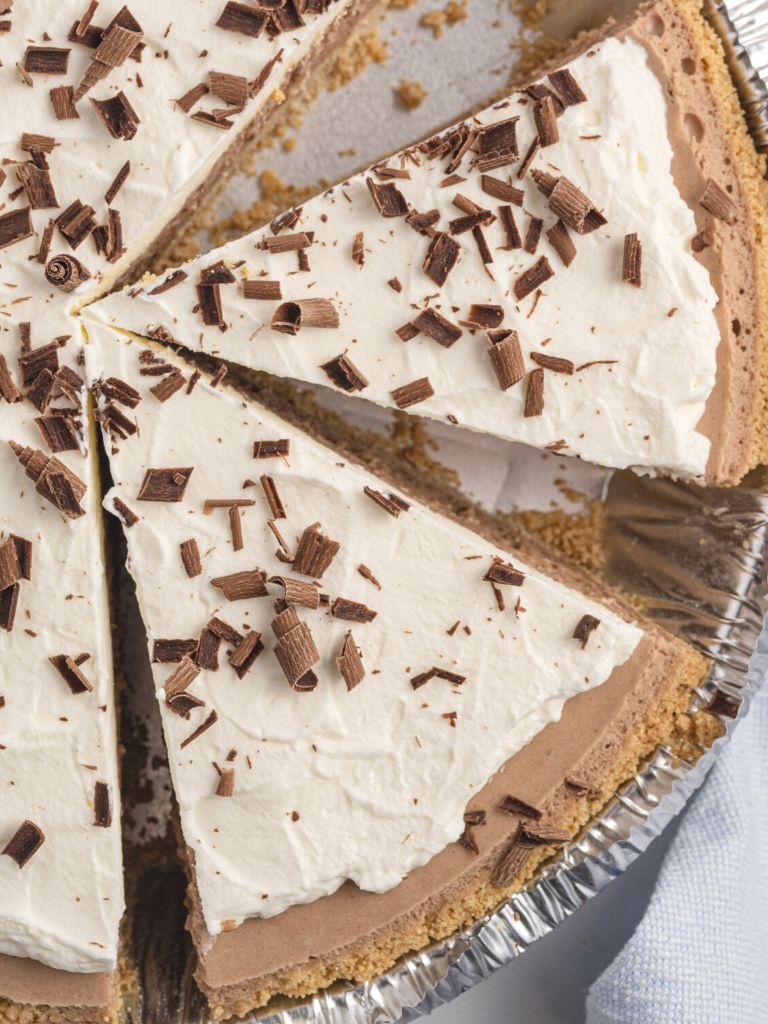
- Garnish : Prepare some homemade whipped cream (1 cup heavy cream + 1/4 powdered sugar beaten until stiff) and spread it over top the chocolate layer. Use a vegetable peeler and a milk chocolate bar to make the chocolate curls.

How To Store Leftovers
Store any leftover chocolate marshmallow pie inside the refrigerator for up to 5 days. I keep the pie inside the foil tin and then use the plastic lid (that comes with the ready crust) to store it in the fridge. You can also remove leftover slices and just place them inside a Tupperware type container. Eat chilled straight from the fridge.
Variation & Substitution Ideas
There are a few ways that you can switch up this recipe if wanted. Here are some ideas!
- Crust : Use a chocolate graham cracker crust or an Oreo crust. I have also seen a shortbread crust at the stores and that would work as well.
- Chocolate Bar : I have only ever made this pie using milk chocolate but you can change it up and use a semi-sweet chocolate or even dark chocolate if that’s your thing. Or try using a milk chocolate bar with peanuts or almonds in it. And if needed, a Hershey’s bar can be used just fine if that’s what you have access to.
- Garnish : I make homemade whipped cream for that top layer you see in the photos. Use a vegetable peeler to “peel” chocolate curls from a milk chocolate bar. To offset the sweetness you could also make the chocolate curls with semi-sweet chocolate instead. You can also buy another tub of Cool Whip and use about half of it for that top layer of whipped cream. I don’t recommend using a spray can of whipped cream as that will melt very quickly and get all over the beautiful pie.
- Add Coffee : I don’t drink coffee but I do know that lots of people love coffee + chocolate! If wanted, add 1/2 teaspoon of instant espresso powder into the half and half and mix it well, before adding the half and half into the saucepan with the marshmallows and chocolate. You just want to dissolve the espresso powder into a liquid (half and half) before putting it into the saucepan.
- Reduced- Fat/ Lite : Use a reduced-fat graham cracker crust and/or lite Cool Whip in this recipe. You could also use sugar-free milk chocolate if wanted. I have never done these changes but if you have dietary restrictions then those are things you can try.
- Half and Half : If you don’t have half and half you can use half milk + half heavy cream. Simply use 1/4 cup of each to equal the 1/2 cup of half and half called for in the recipe.
Recipe Tips
Here are some of my helpful tips so that you can have success recreating this recipe in your own kitchen ♥
- Ice Bath : Don’t skip this part! The chocolate + marshmallow mixture needs to cool down to the point where it’s thicker. If you place the warm mixture directly into the crust it will be too thin and spill all over. Use anything for an ice bath. A 9×13 baking pan or 9×9 baking pan is usually what works the easiest. Just anything that will fit your saucepan in it.
- Quality Milk Chocolate : I highly recommend using Cadbury or Lindt milk chocolate bars. They taste so much better in this pie compared to milk chocolate chips or a Hershey’s milk chocolate bar. You will find the milk chocolate candy bars in the candy aisle at the store and not the baking aisle.
- Fridge Time : Plan ahead and make sure this pie gets plenty of refrigeration time before slicing and serving. You can even make it the night before and let it refrigerate overnight.
- Chocolate Curls + Whipped Cream Topping : I make my own whipped cream for that layer on top of the chocolate marshmallow pie. You could also use an additional tub of Cool Whip (although you would only need about half of it). I highly suggest adding that whipped cream layer and some chocolate curls, which are so easy to make, just grab a chocolate bar and a vegetable peeler. You can use semi-sweet chocolate or milk chocolate for the curls or even dark chocolate if you prefer.
Try These Other Chocolate Desserts
- Chocolate Brownie Bundt Cake – Rich, moist, and so chocolatey! Easy to make with a brownie mix + a chocolate cake mix.
- Chocolate Chip Brownies – If you’re wanting to fix that chocolate craving fast then these are it. Soft baked brownies that are half brownie + half cake like brownies and filled with milk chocolate chips.
- Chocolate Sheet Cake – Made in a sheet pan and topped with a warm chocolate fudge frosting.
- Hot Fudge Cake – So amazing! The cake makes its own fudge sauce as it bakes in the oven. It’s like magic and so yummy served with chocolate chip ice cream.
- Dr. Pepper Texas Sheet Cake – So rich and made with my favorite soda! Topped with a rich pecan chocolate fudge.

Milk Chocolate Marshmallow Pie
Ingredients
Milk Chocolate Marshmallow Pie
- 1 (6 oz) 'ready crust' graham cracker crust
- 4½ cups large marshmallows
- 1/2 cup half and half
- 2 bars (3.5 oz each) high quality milk chocolate bars (broken into squares)
- 8 ounces Cool Whip thawed
Whipped Cream & Chocolate Curls
- 1 cup heavy cream
- 1/4 cup powdered sugar
- milk chocolate bar
Instructions
Milk Chocolate Marshmallow Pie
- In a medium saucepan, over low heat, add the large marshmallows, half and half, and milk chocolate squares. Stir constantly, to avoid scorching, and heat until the marshmallows have completely melted and the mixture is smooth. This takes about 8-10 minutes. Remove from the heat as soon as the marshmallows have melted completely. No need to cook longer. * It's best to use a silicone whisk, silicone heat-resistant spatula, or a wooden spoon to stir.

- Fill a large shallow bowl or shallow baking dish (like a 9x13 pan) halfway with cold water, and add some ice to create an ice bath.
- Place the sauce pan into the ice bath and stir quickly & constantly until the mixture is cool to the touch, about 4-5 minutes. It will start to get thick and stick to the sides and bottom of the pan, letting you know that it's ready.
- Add the Cool Whip into the saucepan and stir until it's mixed in well.
- Pour the filling into the graham cracker crust. Cover the pie with the enclosed plastic lid (from the crust packaging) and let it refrigerate for at least 6 hours, or up to overnight.
Whipped Cream Topping & Chocolate Curls
- Add the heavy cream and powdered sugar into a medium sized mixing bowl, use an electric hand mixer to beat until stiff peaks form. * This takes about 4-5 minutes. Start at low speed and increase speed as the mixture thickens. * You can also do this in a stand mixer with the whisk attachment.
- Spread it onto the top of the chocolate pie (after the refrigeration time needed for the pie) into an even layer. Use a vegetable peeler to 'peel' the chocolate curls along the long side of the chocolate bar. Allow the curls to fall onto the whipped cream layer.
- Cut into slices and serve cold.

Notes
- Crust : Use a chocolate graham cracker crust or an Oreo crust. I have also seen a shortbread crust at the stores and that would work as well.
- Chocolate Bar : I have only ever made this pie using milk chocolate but you can change it up and use a semi-sweet chocolate or even dark chocolate if that's your thing. Or try using a milk chocolate bar with peanuts or almonds in it. And if needed, a Hershey's bar can be used just fine if that's what you have access to.
- Garnish : I make homemade whipped cream for that top layer you see in the photos. Use a vegetable peeler to "peel" chocolate curls from a milk chocolate bar. To offset the sweetness you could also make the chocolate curls with semi-sweet chocolate instead. You can also buy another tub of Cool Whip and use about half of it for that top layer of whipped cream. I don't recommend using a spray can of whipped cream as that will melt very quickly and get all over the beautiful pie.
- Add Coffee : I don't drink coffee but I do know that lots of people love coffee + chocolate! If wanted, add 1/2 teaspoon of instant espresso powder into the half and half and mix it well, before adding the half and half into the saucepan with the marshmallows and chocolate. You just want to dissolve the espresso powder into a liquid (half and half) before putting it into the saucepan.
- Reduced- Fat/ Lite : Use a reduced-fat graham cracker crust and/or lite Cool Whip in this recipe. You could also use sugar-free milk chocolate if wanted. I have never done these changes but if you have dietary restrictions then those are things you can try.
- Half and Half : If you don't have half and half you can use half milk + half heavy cream. Simply use 1/4 cup of each to equal the 1/2 cup of half and half called for in the recipe.
Nutrition
Did You Make This Recipe?
I'd love to see it! You can share it with me on @togetherasfamilyblog and follow on Pinterest @together-as-family-blog-recipes or Facebook @togetherasfamilyblog for more!


Did you love this recipe?
Make sure to comment below so we can chat about it! Or follow on your favorite social network for even more family recipes.