
This post may contain affiliate links, view our disclosure policy.
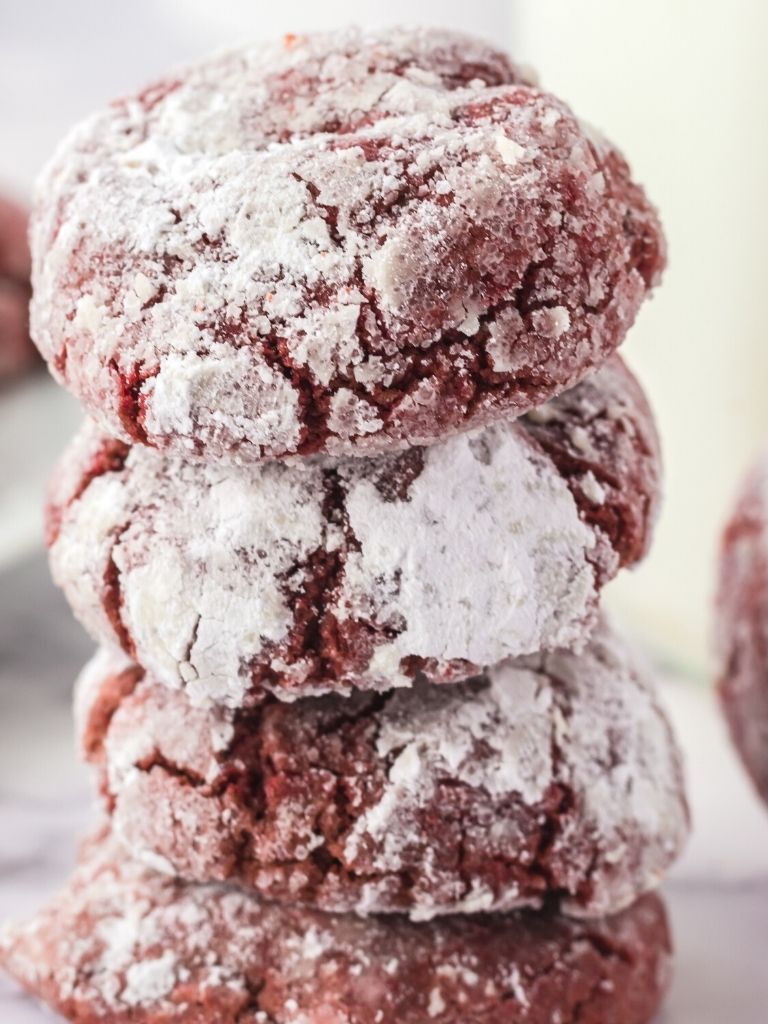
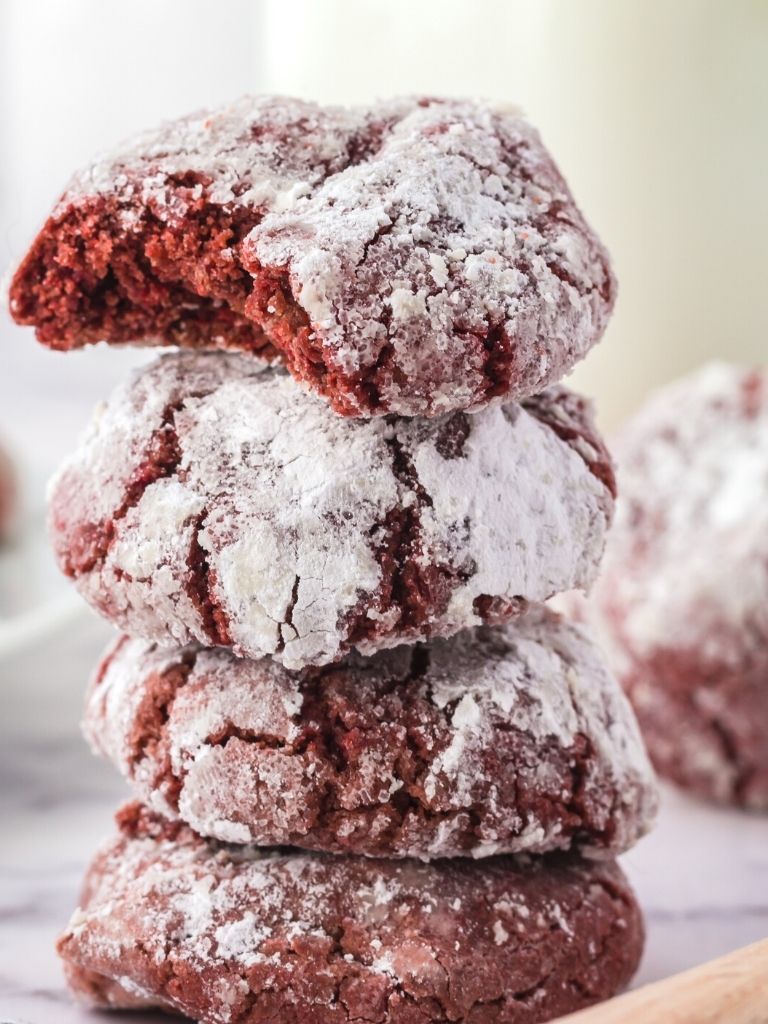
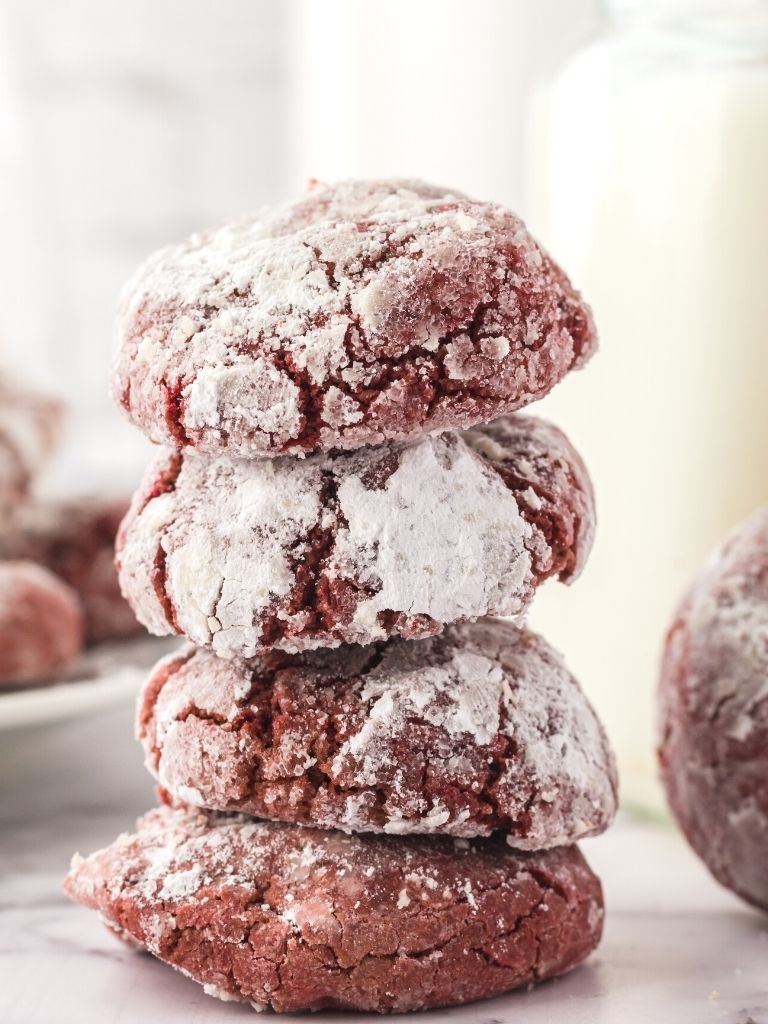
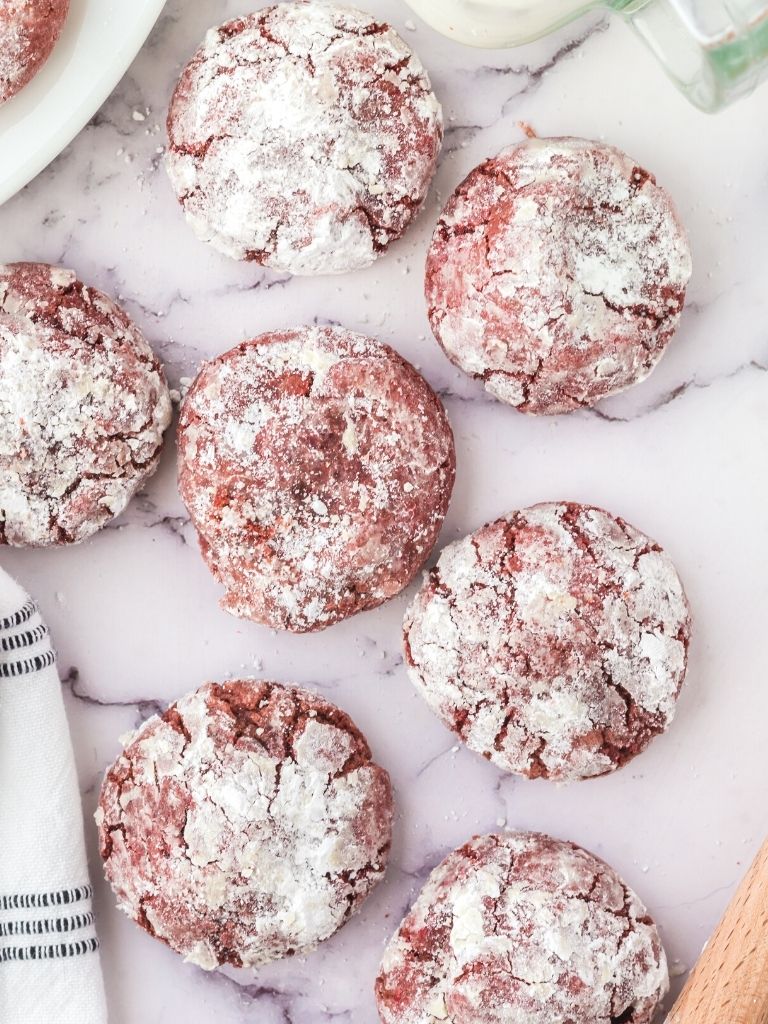
Red Velvet Crinkle Cookies are easy to make and have a light & fluffy soft-baked texture with a sweet crinkle outside. Crinkle cookies get their unique look and texture from the powdered sugar + sugar that they’re rolled in before baking!
Red Velvet Crinkles Recipe
Classic crinkle cookies are a soft-baked cookie with a crinkle exterior rolled in sugar. Because of the powdered sugar coating, as the cookies bake, they form cracks on top of the cookies with the red velvet showing through. Thus the name ‘crinkle’ cookies.
Red velvet is perfect for Valentine’s Day and even Christmas because of its rich red color. With its mild chocolate flavor and sweet sugar coating on the outside, these cookies will be loved by all.
What Does Red Velvet Taste Like?
Red velvet is known for it’s rich red color. The taste is like a very mild cocoa flavor and it’s usually combined with a tart cream cheese. These crinkle cookies have two coatings of sugar on the outside which gives them that classic crinkle look.
Red velvet topped with cream cheese is a classic recipe with it’s mild chocolate flavor, rich color, and that tangy cream cheese topping. This Red Velvet Sheet Cake is an easy version of the classic recipe that starts with a cake mix.
What You’ll Need
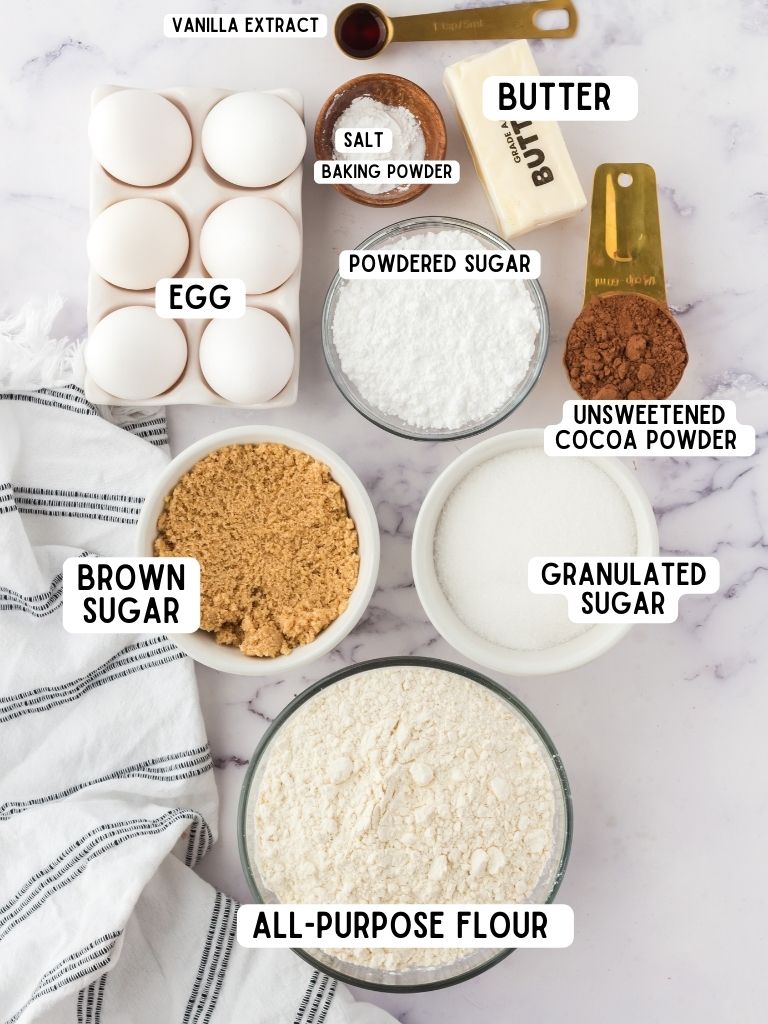
Read below for the simple baking ingredients that are needed for this cookie recipe. Most of these are probably in your kitchen right now, just be sure you have some red gel food coloring!
- Salted Butter – Unsalted butter can be used if wanted. Depending on taste you may have to add additional salt.
- Brown Sugar
- Granulated Sugar – This recipe calls for sugar in the cookie dough and some additional sugar for rolling the cookie dough balls in.
- Large Eggs
- Vanilla Extract – When baking, for best flavor use pure vanilla extract.
- Red Food Coloring – For the best rich color, use red gel food coloring. I like to get the gel coloring from the cake decorating aisle. The Wilton brand is what I use.
- All-Purpose Flour
- Unsweetened Cocoa Powder
- Baking Powder
- Salt – For best flavor use regular table salt when baking.
- Powdered Sugar + Granulated Sugar – The cookie dough balls get rolled in the granulated sugar and then rolled again in powdered sugar.
How To Make Red Velvet Crinkle Cookies
Learn how to make Red Velvet Crinkle Cookies from scratch. This easy to follow recipe gives you the perfect soft-baked red velvet cookie center with that sugar dusted crinkle outside.
- Step 1 : Preparation
- Heat oven to 350 degrees F. Prepare two cookie sheets by lining with parchment paper, using a silpat liner, or use cooking spray.
- Step 2 : Wet Batter
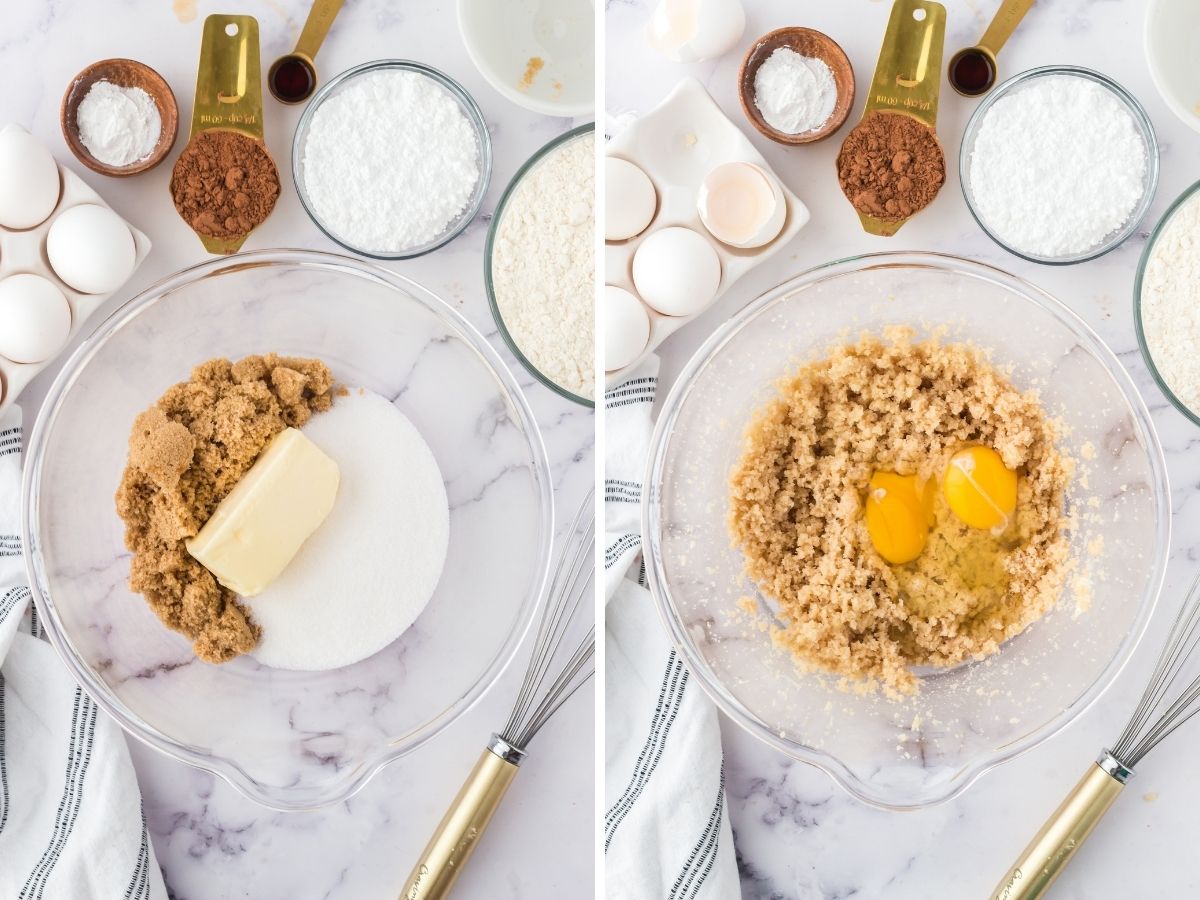
- In a mixing bowl with a hand mixer, or you can use a stand mixer, cream together the butter, sugar, and brown sugar. Once creamy and combined, add the egg and vanilla extract. Mix again until combined and creamy.
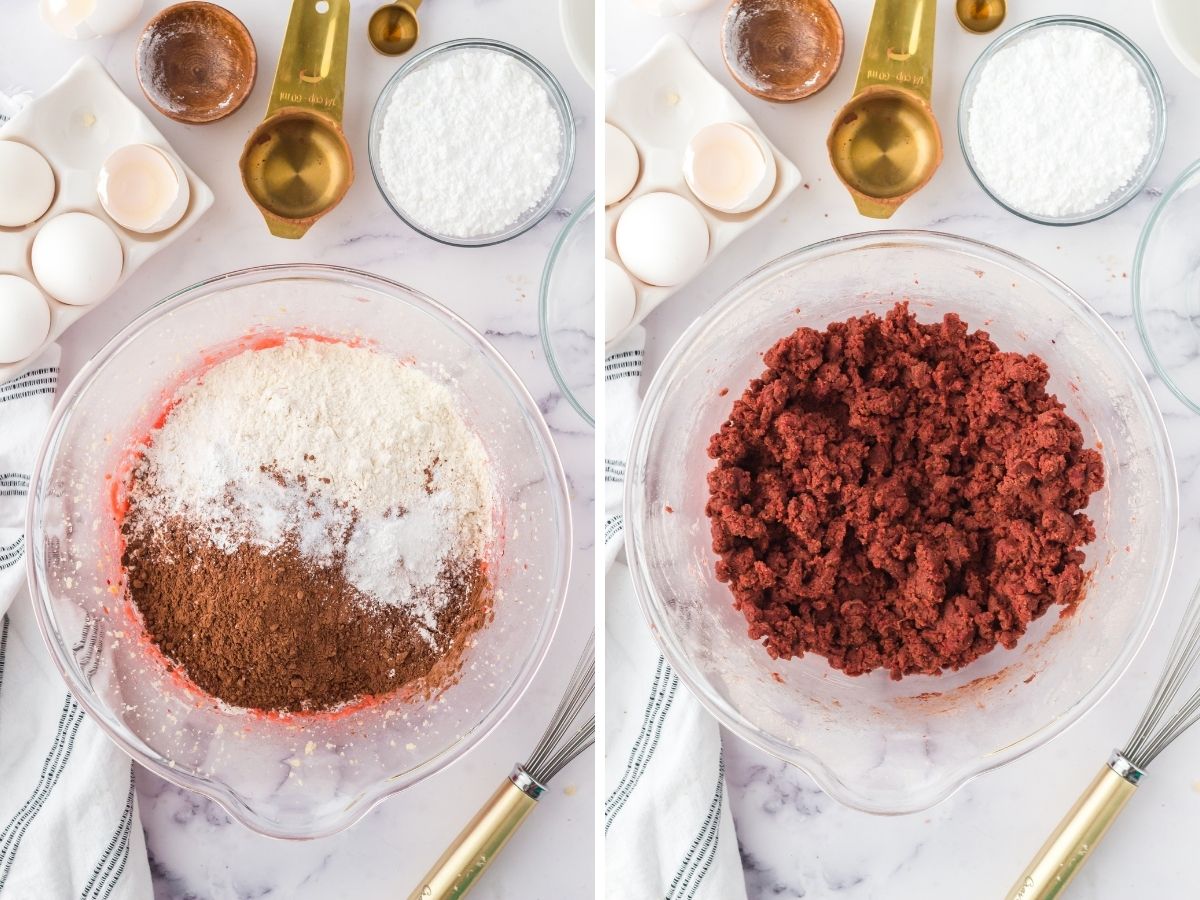
- Step 3 : Dry Ingredients + Food Coloring
- Add the red food coloring, flour, cocoa powder, baking powder, and salt. Mix on low speed until it resembles a cookie dough. The cookie dough will end up looking like thick crumbles.
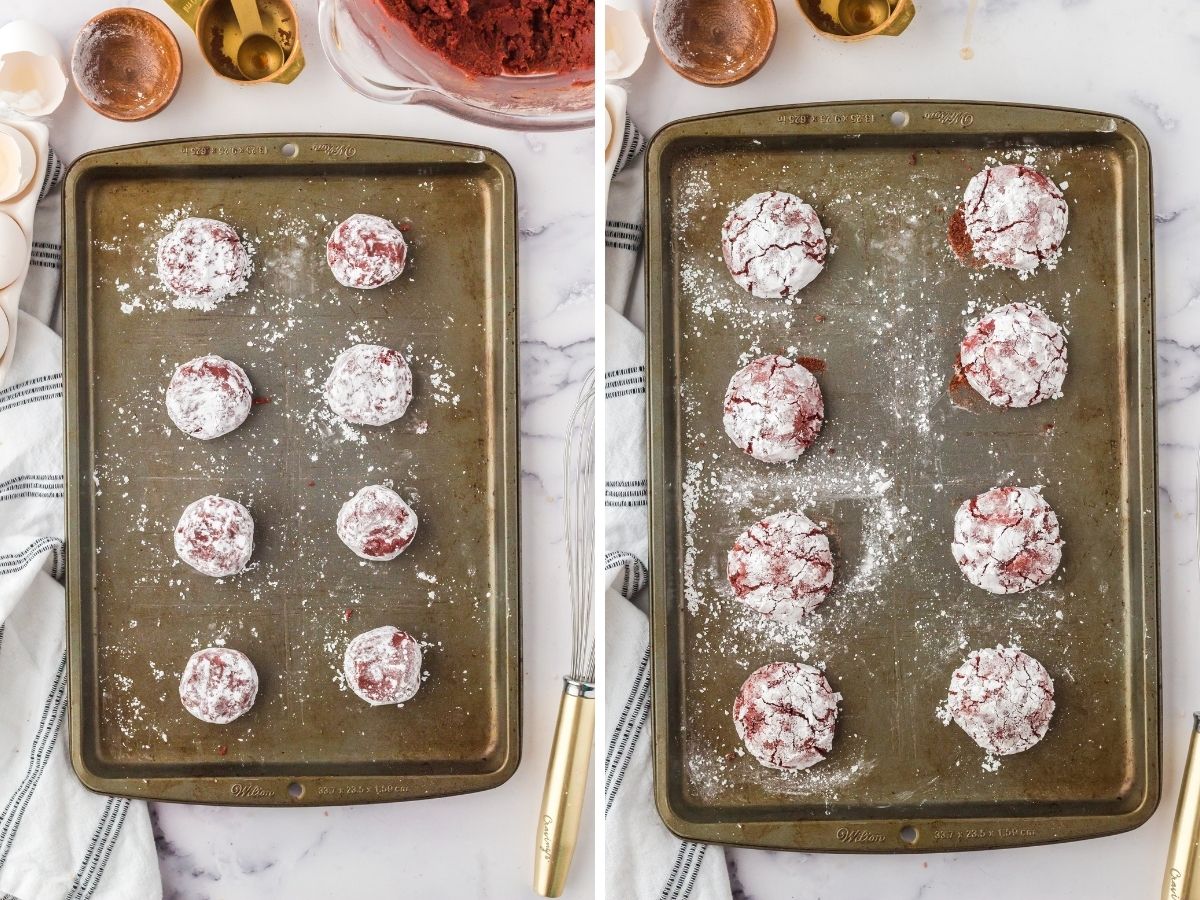
- Step 4 : Dough Balls
- Take about 2 tablespoons of cookie dough and roll into a ball. Roll the dough ball in the granulated sugar, making sure that it’s completely covered. Then roll the dough ball in the powdered sugar until it’s completely coated. Place on the prepared cookie sheet and repeat with the remaining dough. Each cookie sheet can hold 12 cookies.
- Step 5 : Bake
- Bake the cookies for 8-10 minutes. The cookies will look puffy and the tops will have cracked slightly. Take the cookies out and let them cool on the cookie sheet for about 15 minutes before removing them to a cooling rack to cool completely.
Tips For Success
There is one tip for this recipe that will make all the difference in how the crinkle cookies turn out. Read below for all my tips so this recipe can be a success in your own kitchen.
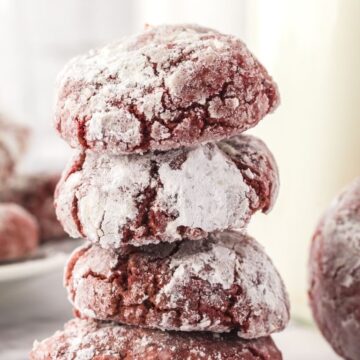
- Double Sugar Coating : Lots of recipes for these cookies call for the cookie dough ball to only be rolled in powdered sugar and then baked. When you do this, the powdered sugar tends to melt into the cookie, which won’t give you that really well coated exterior (like in the pictures). If you roll the cookie dough ball in granulated sugar first, it provides something for the powdered sugar to hold on to while baking, thus creating a really nice thick coating of that sugary outside that we all love about crinkle cookies.
- Red Food Coloring : This is necessary because it’s what makes red velvet what it is, with that deep rich red color. You can use any red food coloring like liquid or gel. I like to use the gel food colorings that can be found in the cake decorating aisle at Walmart or craft stores.
- Use Parchment Paper : Using parchment paper for making cookies is the best thing you can do. The parchment paper helps the bottoms of the cookies not brown and the cooked bake up more puffy and evenly. I could not live without these pre-cut parchment paper sheets (affiliate link).
Variation & Substitution Ideas
There are few ways to switch up this recipe if wanted.
- Add Chocolate Chips : This is not necessary, but if you want to amp up the chocolate flavor then add some semi-sweet or milk chocolate chips into the cookie dough batter. I’ve never done this, but if you want that extra chocolate flavor, then this is a good way to get it.
- Powdered Sugar Coating : After the cookies are baked and cooled (or you can do this while they’re cooling on the cookie sheet) you can dust some additional powdered sugar over the cookies to create a really pretty white look to the exterior and give it a thick coating of the sugar.
Red Velvet Crinkle Cookies FAQ’s
- Why Do I Have to Roll The Cookies Twice?
- It’s important to roll these cookies in granulated sugar and powdered sugar. Normally, crinkle cookies are only rolled in powdered sugar, but this makes the powdered sugar melt into the cookie during the bake time, which means you also won’t get that classic crinkle pattern.
- The granulated sugar helps form a barrier to keep the powdered sugar in place.
- Can I Freeze Crinkle Cookies?
- Yes you can freeze these cookies with a few changes.
- Freeze the cookie dough balls, without the double sugar coating on them, in a freezer-safe container for up to 1 month.
- Roll the dough balls in the sugar before baking. Not before freezing.
- How To Store Crinkle Cookies
- These cookies keep well, at room temperature, in an air-tight container for up to 5 days.
More Cookie Recipes You’ll Love
- Cream Cheese Sugar Cookies
- S’mores Cookies
- No Flour Monster Cookies
- Peanut Butter Butterfinger Cookies
- Best M&M Cookies

Red Velvet Crinkle Cookies
Ingredients
- 1/2 cup (1 stick) salted butter softened
- 3/4 cup granulated sugar
- 3/4 cup light brown sugar
- 2 large eggs
- 1 teaspoon vanilla extract
- 1 teaspoon red food coloring gel or liquid
- 2 cups all-purpose flour
- 1/4 cup unsweetened cocoa powder
- 2 teaspoons baking powder
- ¼ teaspoon table salt
Topping
- 1/2 cup powdered sugar
- 1/4 cup granulated sugar
Instructions
- Preheat oven to 350° F. Prepare two cookie sheets by lining with parchment paper (my preferred method), silpat liner, or cooking spray.
- In a large mixing bowl with a hand mixer, or use a stand mixer, beat together the butter, sugar, and brown sugar until it is a crumbly looking mixture.
- Add the eggs and beat until combined.
- Add the vanilla, red food coloring, flour, cocoa powder, baking powder, and salt. Beat on low speed just until combined.
- Place the powdered sugar (for the topping) in a small bowl, and the granulated sugar in a separate small bowl.
- Roll 2 tablespoons of cookie dough into a ball. Roll the ball completely in the granulated sugar. Roll it again in the powdered sugar. Put 12 cookies per cookie sheet.
- Bake for 8-10 minutes. Cookies will look puffy and the tops will be slightly cracked. Let the cookies cool on the cookie sheet for about 15 minutes. Move them to a cooling rack to let them cool completely.
Notes
Nutrition
Did You Make This Recipe?
I'd love to see it! You can share it with me on @togetherasfamilyblog and follow on Pinterest @together-as-family-blog-recipes or Facebook @togetherasfamilyblog for more!


Did you love this recipe?
Make sure to comment below so we can chat about it! Or follow on your favorite social network for even more family recipes.