
This post may contain affiliate links, view our disclosure policy.
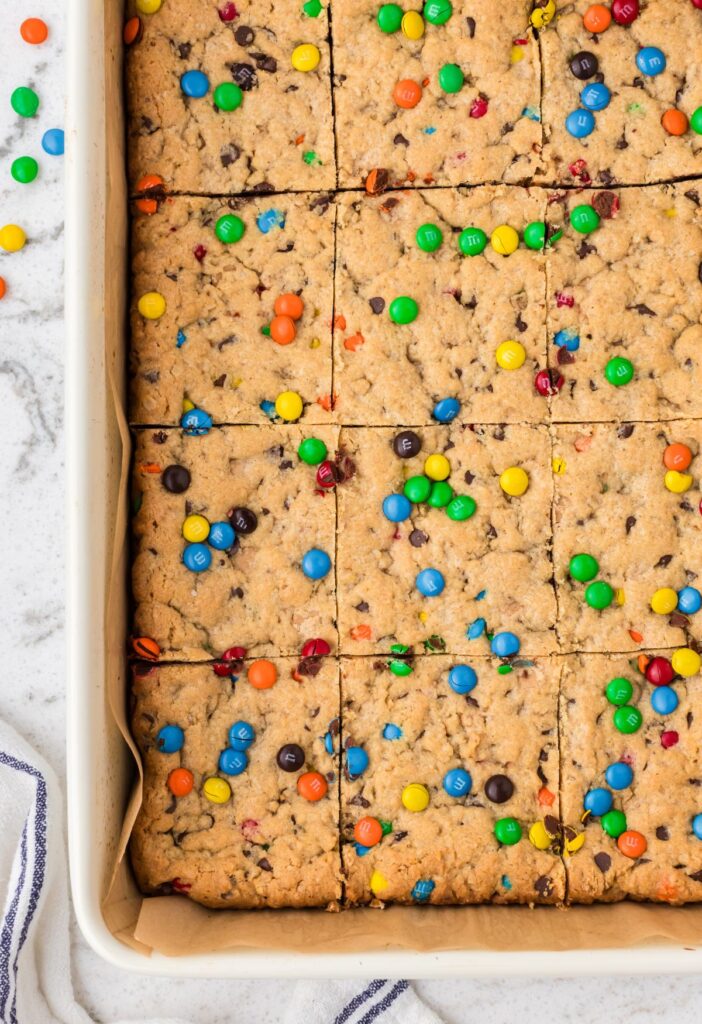
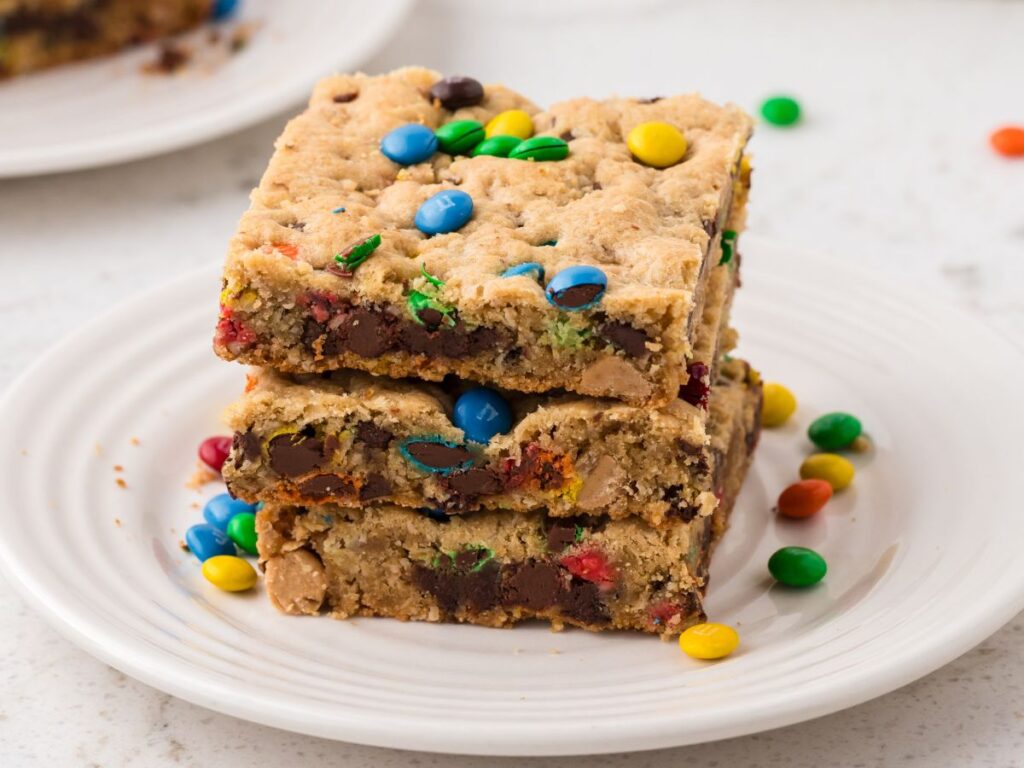
Soft-baked, thick, and chewy Monster Cookie Bars are an easy dessert recipe made in a 9×13 baking pan. Monster cookie bars are loaded with oats, peanut butter, chocolate chips, peanut butter chips, and m&m’s for the best cookie bars ever!
For a gluten-free version of these bars (be sure and use gluten-free oats) try my No Flour Monster Cookie Bars that are made in a sheet pan.
Monster Cookie Bars (Made In A 9×13 Pan)
If you’ve been around here for any amount of time then you know my family is obsessed with all things monster cookie – monster cookie is traditionally a loaded cookie or cookie bar, that has oats, peanut butter, chocolate, and m&m’s. It’s basically the best dessert combination ever.
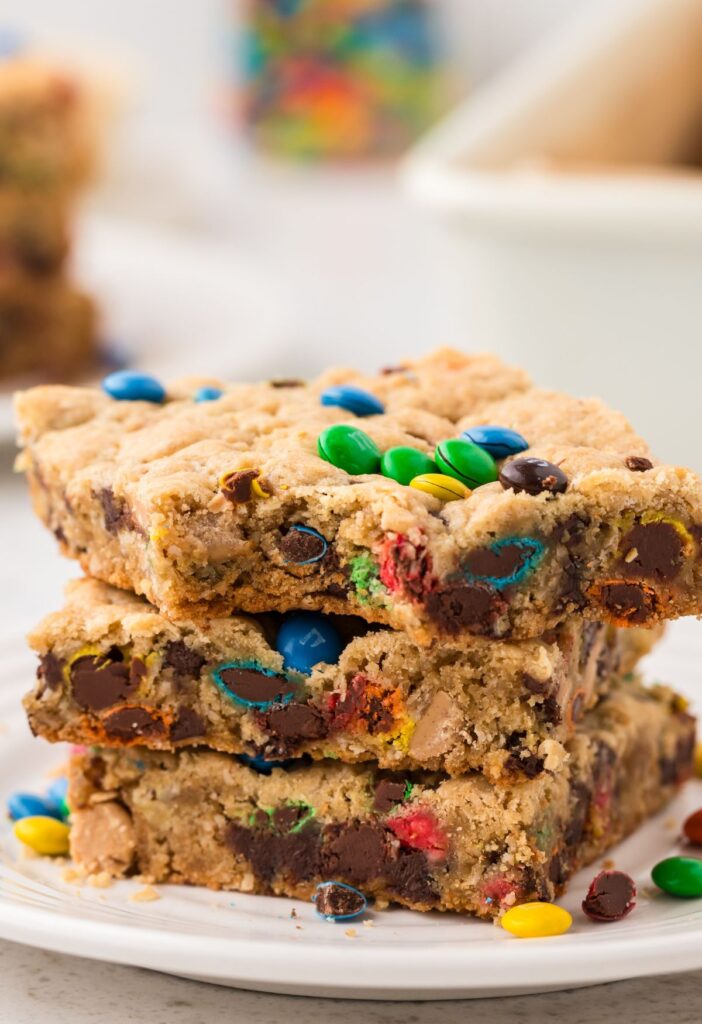
These bars are so soft, thick, chewy, and loaded with texture thanks to the oats, creamy peanut butter, and mix-ins like m&m’s, mini chocolate chips, and peanut butter chips.

The trick to getting perfectly, soft-baked cookie bars is to take them out when they still look somewhat soft and still pale. The edges can be lightly golden brown, but the center should still be pale in color and look soft.
As they cool down inside the warm pan, these bars set up perfectly soft, and the texture is out-of-this-world. So make sure you don’t over-bake these cookie bars!

Ingredients Needed
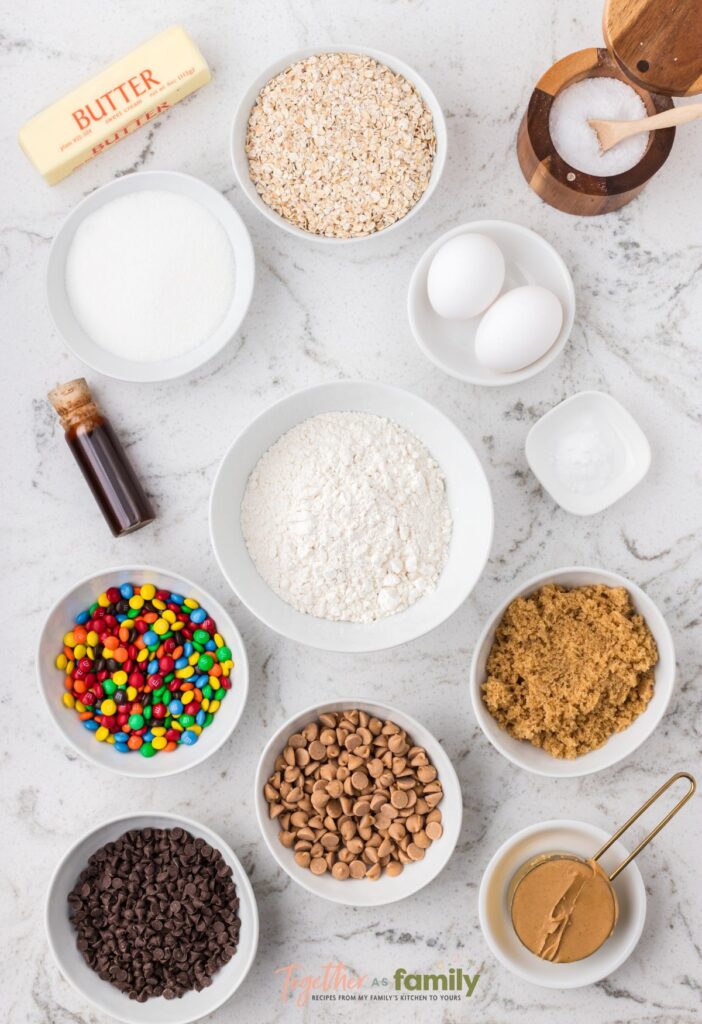
- All-Purpose Flour : I prefer using unbleached all-purpose flour in baking recipes.
- Quick Oats : These are the quick cook, 1-minute oats that have a finer and smaller texture.
- Baking Soda
- Salt : I use sea salt in baking recipes, but kosher salt or regular iodized table salt is great also.
- Butter
- Creamy Peanut Butter : I recommend using classic creamy peanut butter for the best texture. Avoid the all-natural peanut butter or any peanut butter that has that thick oil layer on top that needs to be stirred in.
- Granulated Sugar
- Light Brown Sugar
- Vanilla Extract
- Large Egg
- Large Egg Yolk : Discard the egg whites and only add the yolk.
- Peanut Butter Chips
- Miniature Semi-Sweet Chocolate Chips
- Mini M&M’s : For a different variation try using peanut butter mini m&m’s, or stick to the classic chocolate m&m’s.
How To Make Monster Cookie Bars With M&M’s and Peanut Butter (Printable Recipe Card)
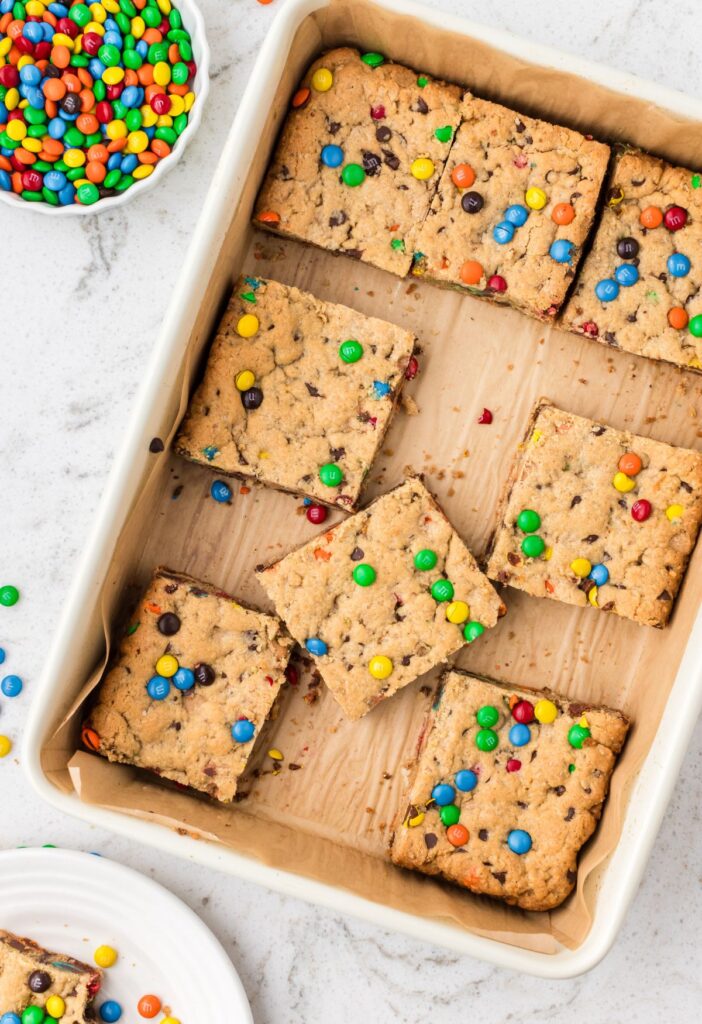
Preheat the oven to 350 degrees F. Lightly spray a 9×13-inch baking pan with cooking spray or line with parchment paper. I prefer using parchment paper because then you can lift the bars out for even cutting and slicing.
In a small mixing bowl, whisk together the all-purpose flour, quick oats, baking soda, and salt. Set aside.
In a separate larger bowl using a hand mixer, or use a stand mixer with the paddle attachment, beat together the butter, peanut butter, sugar, and brown sugar until it’s fluffy, combined well, and much lighter in color; about 2 minutes of beating on medium speed.
Add in the vanilla extract, egg, and egg yolk. Beat just until combined.
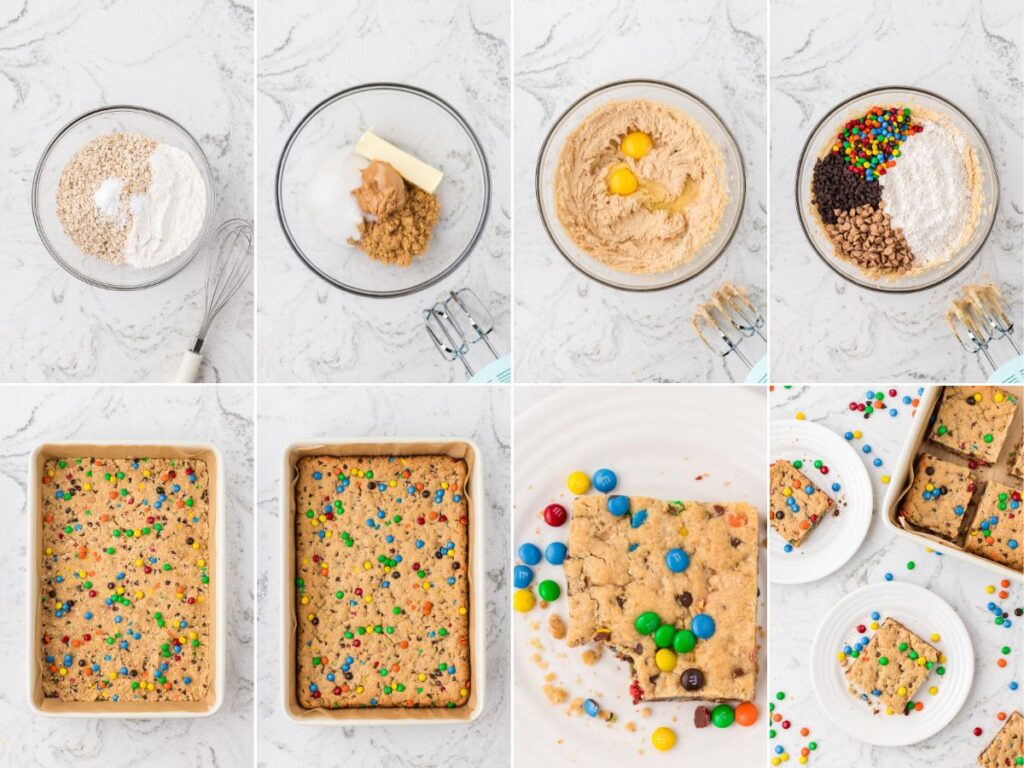
Add the dry ingredients, peanut butter chips, mini chocolate chips, and mini m&m’s into the larger bowl of wet ingredients. Beat on low speed just until combined well.
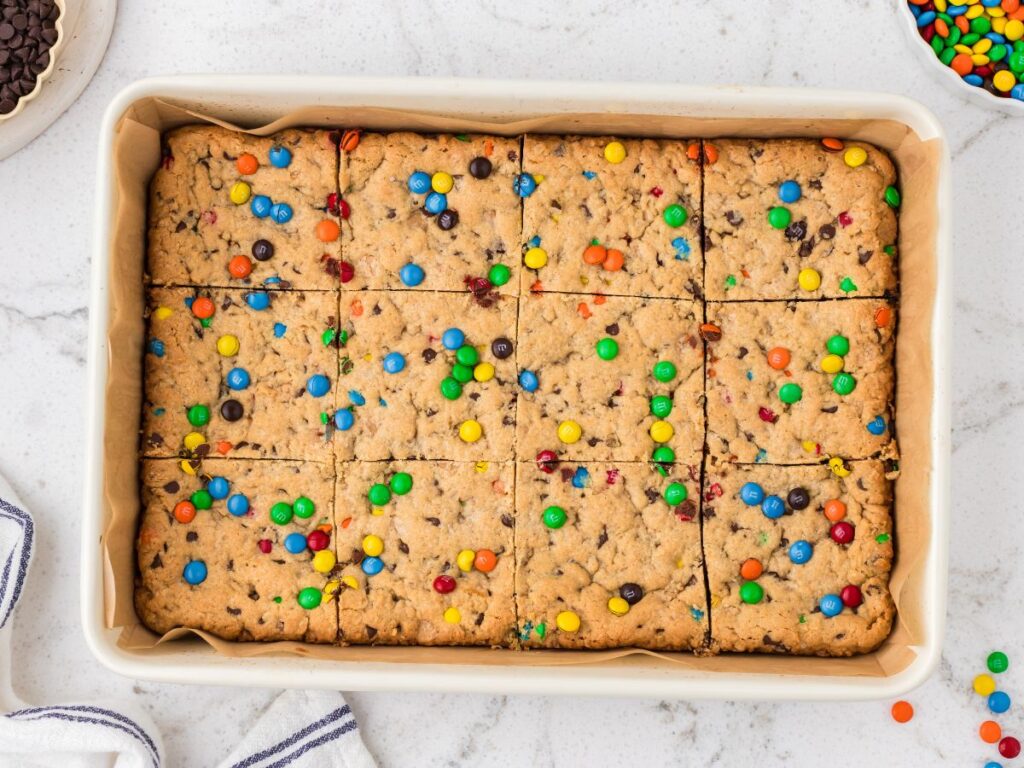
Dump the monster cookie bar dough into the prepared pan and gently press it into the pan in an even layer. If wanted, add a few extra mini m&m’s and mini chocolate chips on top of the bars for a pretty look.
Bake for 12-17 minutes. The bars should be very lightly pale brown on the edges, while the center should still be pale and look slightly underdone. It’s important to not over-bake the bars because as they cool in the warm pan, they will continue baking and set up perfectly soft.
Let the bars cool, inside the warm pan at room temperature, for about 20 minutes. Cut into squares and enjoy warm or at room temperature.
How To Store Monster Cookie Bars
Monster cookie bars should be stored in an airtight container, or Ziploc bag, at room temperature for up to 3 days. They can be eaten at room temperature, but for best results, I recommend heating it up in the microwave for a few seconds before enjoying.
To freeze the bars, I like to wrap each bar individually in plastic wrap and then in tin foil. Place the wrapped bars inside a freezer-safe bag, and store in the freezer for up to 3 months. Let the bar(s) thaw at room temperature or overnight in the fridge.
My Kitchen Tip For Success
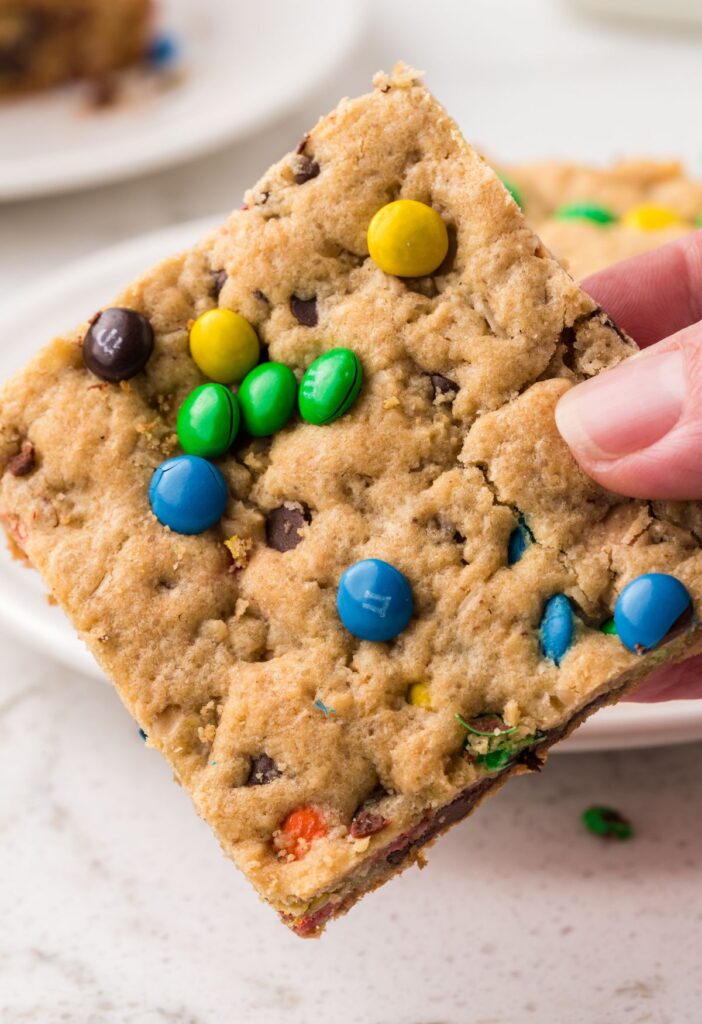
- Use Mini Chocolate Chips & Mini M&M’s : I know it may not seem important, but using the mini sized chips and m&m’s allows for them to be more evenly dispersed in the cookie bars; which means you get everything in each bite. The mini version of chocolate chips are easy to find at most grocery stores.
- Eat Warm : My family prefers eating these bars warm from the pan after they have cooled down for about 20 minutes. This way they are warm, super soft-baked, and just the perfect texture. But don’t try to eat one too quickly, or else it will crumble and fall apart. The bars do need at least 20 minutes of resting time so they can come together and set up.
- Don’t Over-Bake : This may seem obvious, but for this recipe in particular, it’s so easy to think they’re not done baking so you leave them in the oven longer than you should. I have never cooked these bars for longer than 13 minutes! Only the edges should have a very pale lightly golden brown color to them, while the center should still look pale and somewhat not fully cooked yet. I promise, as the bars set and cool down at room temperature, they will finish baking perfectly for that ultra soft-baked texture. When you take the bars out of the oven, there should be no golden brown color on them at all (just the very outer edges if anything). If the top of the bars are golden brown or lightly golden brown, chances are they have been over baked.
Substitutions & Variation Ideas
- Chocolate Chips : Use all peanut butter chips. Or try using dark chocolate, milk chocolate, or even white chocolate.
- Peanut Butter Chips : If you don’t have these, no worries, try substituting with additional chocolate chips or more m&m’s.
- Mini M&M’s : I also love using the peanut butter version of the mini m&m’s. So good in this peanut butter recipe!
- Butter : I always cook with salted butter, but if you prefer unsalted butter, then that works great. You may want to add just a pinch of additional salt if using unsalted.
- Quick Oats : You can try using whole, old-fashioned oats but I don’t recommend it. Regular oats have a larger texture to them, which is fine if that’s what you prefer, but for these cookie bars the quick oats do a better job and helping the bars set properly with a smaller texture from the quick oats.
More Monster Cookie Recipes
- Monster Cookie Energy Balls
- Monster Cookie Brownies
- Giant Monster Cookie
- Reese’s Stuffed Monster Cookies
- Triple Peanut Butter Monster Cookie Bars
- Triple Peanut Butter Monster Cookies
- Monster Cookie Dough Cheeseball Dip


Soft-Baked Monster Cookie Bars
Equipment
Ingredients
- 1½ cups all-purpose flour
- 1 cup quick oats
- ¾ teaspoon baking soda
- ¼ teaspoon salt
- 1/2 cup butter softened
- 1/3 cup creamy peanut butter not all natural
- 1/2 cup granulated sugar
- 1/2 cup packed light brown sugar
- 1 teaspoon vanilla extract
- 1 large egg
- 1 large egg yolk (discard the whites, only use the yolk)
- 1/2 cup peanut butter chips
- 1/2 cup miniature semi-sweet chocolate chips
- 1/2 cup mini m&m’s
Instructions
- Preheat the oven to 350℉. Lightly spray a 9×13-inch baking pan with cooking spray or line with parchment paper.*I prefer using parchment paper because then you can lift the bars out for even cutting and slicing.
- In a small mixing bowl, whisk together the all-purpose flour, quick oats, baking soda, and salt. Set aside.1½ cups all-purpose flour, 1 cup quick oats, ¾ teaspoon baking soda, ¼ teaspoon salt
- In a separate larger bowl using a hand mixer, or use a stand mixer with the paddle attachment, beat together the butter, peanut butter, sugar, and brown sugar until it's fluffy, combined well, and much lighter in color; about 2 minutes of beating on medium speed.1/2 cup butter, 1/3 cup creamy peanut butter, 1/2 cup granulated sugar, 1/2 cup packed light brown sugar
- Add in the vanilla extract, egg, and egg yolk. Beat just until combined.1 teaspoon vanilla extract, 1 large egg, 1 large egg yolk
- Add the dry ingredients, peanut butter chips, mini chocolate chips, and mini m&m's into the larger bowl of wet ingredients. Beat on low speed just until combined well.1/2 cup peanut butter chips, 1/2 cup miniature semi-sweet chocolate chips, 1/2 cup mini m&m’s
- Dump the monster cookie bar dough into the prepared pan and gently press it into the pan in an even layer; don't pack it too firmly into the pan, use a gently hand to spread it out evenly. *If wanted, add a few extra mini m&m's and mini chocolate chips on top of the bars for a pretty look.
- Bake for 12-16 minutes. The bars should be very lightly pale brown on the edges, while the center should still be pale and look slightly underdone.*It's important to not over-bake the bars because as they cool in the warm pan, they will continue baking and set up perfectly soft.
- Let the bars cool, inside the warm pan at room temperature, for about 20 minutes. Cut into squares and enjoy warm or at room temperature.
Notes
Nutrition
Did You Make This Recipe?
I’d love to see it! You can share it with me on @togetherasfamilyblog and follow on Pinterest @together-as-family-blog-recipes or Facebook @togetherasfamilyblog for more!


Delicious!! I haven’t baked in FOREVER but have made this twice this week. Kids LOVED them just as much as I did!
If I wanted to make this nut free do I need to sub anything in or just omit the peanut butter? Thanks! Looks delish.
You would need to replace the peanut butter with something. I have seen (and heard from others who have made this recipe nut free) that sun butter is a good substitute. I have never personally done it, but I have heard it has worked great for others.
Delicious, soft and overall a really good treat!
These turned out so good! Thank you for sharing this recipe!
You’re welcome! 🤗
WAY GOOD! I even used slightly less than called for on the sugars, mini choc chips and M & M’s. Baked 14 mins-perfecto:)
Delicious!!
Made these for a potluck and they were a hit! I used 1 cup gluten free all purpose flour & 1/2 cup oat flour. Baked for 14 minutes and they were perfect.