This post may contain affiliate links, view our disclosure policy.
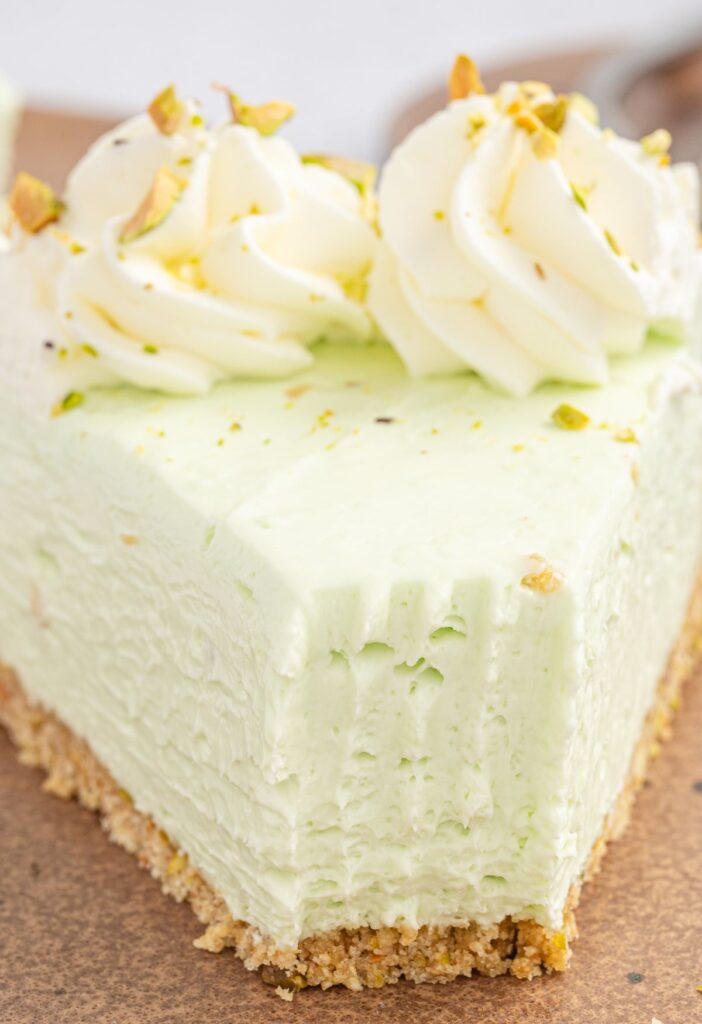
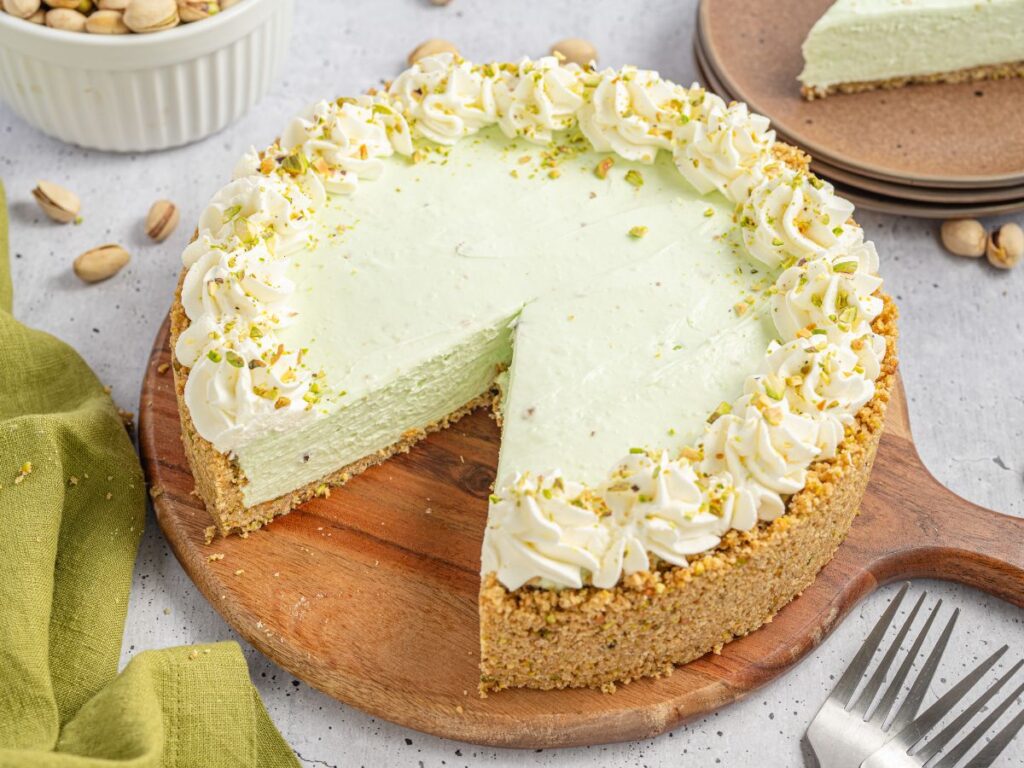
The pistachio nut is the star of the show in this easy No Bake Pistachio Cheesecake – complete with a pistachio graham cracker crust, the creamiest cheesecake filling ever, and topped off with whipped cream and finely crushed pistachios. No water bath needed with this no bake cheesecake!
Are you a pistachio lover? Then be sure and also make my Pineapple Pistachio Cake, Pistachio Pudding Dessert, and Pistachio Pie.

Perfect Pistachio Cheesecake (No Bake Pistachio Cheesecake Recipe)
Pistachio desserts just happen to be one of my very favorite dessert flavors! Something about that cool and creamy taste just gets me every single time. I also love using instant pudding mixes in desserts – it’s an easy, convenient ingredient that packs a flavor punch.
Like in this no bake pistachio cheesecake! A packet of pistachio instant pudding mix is the “secret ingredient” for the cool and creamy flavor, and of course the beautiful green pastel color.
This may look like a million dollar dessert but I promise, it’s so easy anyone can make it. This no bake cheesecake requires just a little bit of prep time (like 20 minutes) and then the fridge does all the work to set, chill, and firm up the cheesecake for serving.

Ingredients Needed
Ingredients For Buttery Graham Cracker Crust
- Graham Crackers : You need 12 whole graham cracker sheets for this creamy cheesecake recipe.
- Shelled Real Pistachios : Make sure you are buying the pistachios with the shells already off of them, or you can use shelled pistachios and take off the shell yourself. No need for chopped pistachios as the food processor will do all the crushing for us.
- Light Brown Sugar
- Unsalted Butter : We use unsalted because the pistachios themselves will add salt flavor to the crust. If you prefer more sweet & salty then go ahead of use salted butter. It won’t make a huge difference between the two – either using salted butter or unsalted butter.
Ingredients For Pistachio Cheesecake Filling
- Cream Cheese : I highly recommend only using full-fat cream cheese and a name brand cream cheese (Philadelphia brand) when making any cheesecake. The full fat cream cheese will provide a creamier, richer, and better tasting cheesecake. And the name brand cream cheese tastes so much better than store-brand! It’s worth the extra cost.
- Powdered Sugar
- Sour Cream : Full fat is always best to use especially in cheesecake for the best rich flavor and thick creamy texture.
- Instant Pistachio Pudding Mix : I use the Jell-O brand. Make sure you are using instant pudding mix and not the cook n’ serve pudding.
- Vanilla Extract
- Cool Whip
- Chopped or Crushed Pistachios & Whipped Cream : This is for the garnishes to add on right before serving. You can use spray whipped cream (it melts and softens fairly quickly so be careful), make homemade whipped cream, or use additional Cool Whip as topping.

How To Make Perfect Creamy Pistachio Cheesecake (Printable Recipe Card)
Grease a 9-inch spring form pan with butter or shortening. Set it aside.
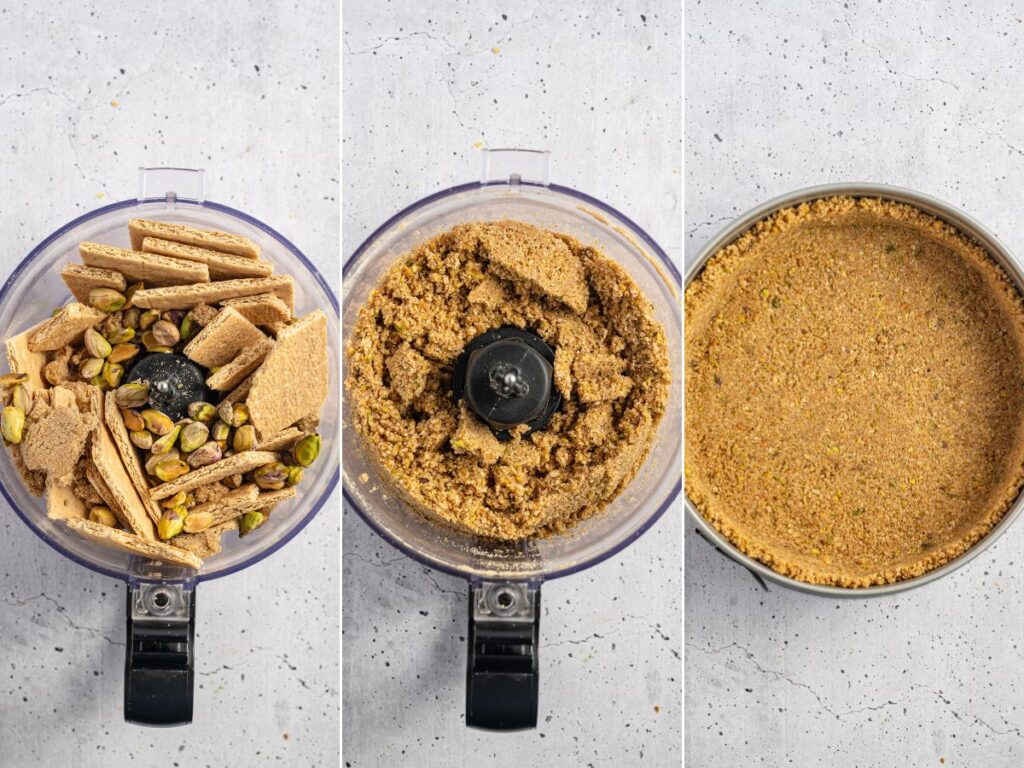
Break up the graham crackers and place them into a food processor, along with the pistachios and brown sugar. Process at high speed until the graham crackers have become fine crumbs and the pistachios are chopped into small pieces.
Reduce the speed to low and slowly add the melted butter into the crumb mixture and process until everything is evenly coated in the butter.
Press the graham cracker crust mixture firmly into the base of the greased springform pan and up the sides. Use a flat-bottomed glass or measuring cup to firmly press the crumbs together tightly. Cover the springform pan with plastic wrap or aluminum foil and place it in the freezer for 15 minutes.

In a large bowl using an electric hand mixer, or use a stand mixer with the paddle attachment, beat the cream cheese and powdered sugar until creamy and smooth. Mix in the sour cream, instant pistachio pudding mix, and vanilla extract until smooth. Add in the Cool Whip and beat on low speed until thoroughly combined.
Spoon the pistachio filling into the crust and smooth out the top. Cover the cheesecake with plastic wrap, and reforge it for at least 8 hours but preferably overnight (12-24 hours).

When you are ready to serve, carefully remove the outer ring of the springform pan and transfer the cheesecake to a large plate, platter, or cake stand. Add the whipped cream and crushed pistachios to the top of the cheesecake before serving. Serve the cheesecake chilled.


How To Store Leftover No Bake Cheesecake
- Refrigerator : Cover the cheesecake with plastic wrap, or remove individual slices to an airtight container, and store in the fridge for up to 4-5 days. Eat the cheesecake chilled straight from the fridge.
- Freezer : Although I personally don’t love freezing no bake cheesecakes, you can do it if wanted. Wrap the cheesecake in plastic wrap and then wrap it again in aluminum foil. Freeze for up to 2 months. Thaw it overnight in the fridge before serving. Add the garnishes on right before serving.

Can I Make Any Substitutions?
- Butter : Salted or unsalted butter can be used. I use salted butter for everything and I only keep salted butter in my fridge.
- Cool Whip : Make homemade whipped cream if you prefer not using Cool Whip. Beat 1.5 cups heavy whipping cream + 1/2 cup powdered sugar in a mixing bowl until stiff peaks form. Start at low speed and increase the speed as needed. Use this in place of the Cool Whip in the recipe. I always like to beat a full 2 cups of heavy whipping cream and then use the extra for the whipped cream garnish on top. One container of Cool Whip has 3 cups of whipped topping, so use 3 cups of the homemade whipped cream and reserve the rest for garnish.
- Sour Cream : To reduce the fat you could use plain greek yogurt but take note that the overall flavor and taste of the cheesecake will be slightly different if using the Greek yogurt.

Recipe Tips
- Make sure the cream cheese is well softened to room temperature to avoid lumps in the mixture. Set the cream cheese out at room temperature for up to 2 hours before you need it. Or you can unwrap the cream cheese and set it on a microwave-safe plate. Microwave for about 20-30 seconds to soften it. You don’t want it hot and melted, but rather room temperature and easily touched/indented with a finger.
- Use a name brand cream cheese for the best results. Store brands or off brands tend to have more water content which results in a softer cheesecake that takes longer to set. I love using Philadelphia cream cheese. It may seem like it doesn’t matter, but using a name brand cream cheese is the most important thing when making cheesecake – it will make a big different. Promise.
- For the pictures, I used a 1A piping tip + a piping bag to pipe the whipped cream around the outer edges of the cheesecake. Then, I sprinkled on some finely crushed pistachios around the top.
- Serve the cheesecake as is or try garnishing with some additional whipped cream. You can use spray whipped cream but keep in mind that it softens and melts fairly quickly. You can use Cool Whip (I like the creamy version of Cool Whip for pie garnishes). Or make your own homemade whipped cream by beating 1/2 cup heavy whipping cream + 2 tablespoons powdered sugar until stiff peaks form. Spread it over top as a final layer, pipe it around the edges or dollop it on each slice before serving.

More Cheesecake Recipes
- No Bake Black Forest Cheesecake
- Pumpkin Cheesecake
- Key Lime Cheesecake
- No Bake Strawberry Cheesecake
- No Bake Lemon Cheesecake
- Perfect Cheesecake Recipe
- No Bake Orange Creamsicle Cheesecake


No Bake Pistachio Cheesecake
Equipment
Ingredients
Pistachio Graham Cracker Crust
- 12 whole graham cracker sheets
- 1/2 cup shelled pistachios
- 3 tablespoons packed light brown sugar
- 1/2 cup (1 stick) butter melted
Pistachio Cheesecake Filling
- 3 bars (8 oz each) full-fat cream cheese
- 3/4 cup powdered sugar
- 1 box (3.4 oz) instant pistachio pudding mix
- 1/4 cup sour cream
- 1 teaspoon vanilla extract
- 8 ounces Cool Whip thawed
- whipped cream & crushed pistachios (for garnish)
Instructions
- Grease a 9-inch spring form pan with butter or shortening. Set it aside.
Make The Pistachio Graham Cracker Crust
- Break up the graham crackers and place them into a food processor, along with the pistachios and brown sugar. Process at high speed until the graham crackers have become fine crumbs and the pistachios are chopped into small pieces.12 whole graham cracker sheets, 1/2 cup shelled pistachios, 3 tablespoons packed light brown sugar
- Reduce the speed to low and slowly add the melted butter into the crumb mixture and process until everything is evenly coated in the butter.1/2 cup (1 stick) butter
- Press the graham cracker crust mixture firmly into the base of the greased springform pan and up the sides. Use a flat-bottomed glass or measuring cup to firmly press the crumbs together tightly. Cover the springform pan with plastic wrap or aluminum foil and place it in the freezer for 15 minutes.
Make The Pistachio Cheesecake Filling
- In a large bowl using an electric hand mixer, or use a stand mixer with the paddle attachment, beat the cream cheese and powdered sugar until creamy and smooth.3 bars (8 oz each) full-fat cream cheese, 3/4 cup powdered sugar
- Add the instant pistachio pudding mix, sour cream, and vanilla extract and beat until smooth.1 box (3.4 oz) instant pistachio pudding mix, 1/4 cup sour cream, 1 teaspoon vanilla extract
- Add in the Cool Whip and beat on low speed until thoroughly combined.8 ounces Cool Whip
- Spoon the pistachio filling into the crust and smooth out the top. Cover the cheesecake with plastic wrap, and refrigerate for at least 8 hours but preferably overnight.* You can make the cheesecake ahead of time and refrigerate for up to 24 hours before serving.
- When you are ready to serve, carefully remove the outer ring of the springform pan and transfer the cheesecake to a large plate, platter, or cake stand. Add the whipped cream and crushed pistachios to the top of the cheesecake before serving. Serve the cheesecake chilled.whipped cream & crushed pistachios
Video
Notes
Nutrition
Did You Make This Recipe?
I’d love to see it! You can share it with me on @togetherasfamilyblog and follow on Pinterest @together-as-family-blog-recipes or Facebook @togetherasfamilyblog for more!


Did you love this recipe?
Make sure to comment below so we can chat about it! Or follow on your favorite social network for even more family recipes.