
This post may contain affiliate links, view our disclosure policy.
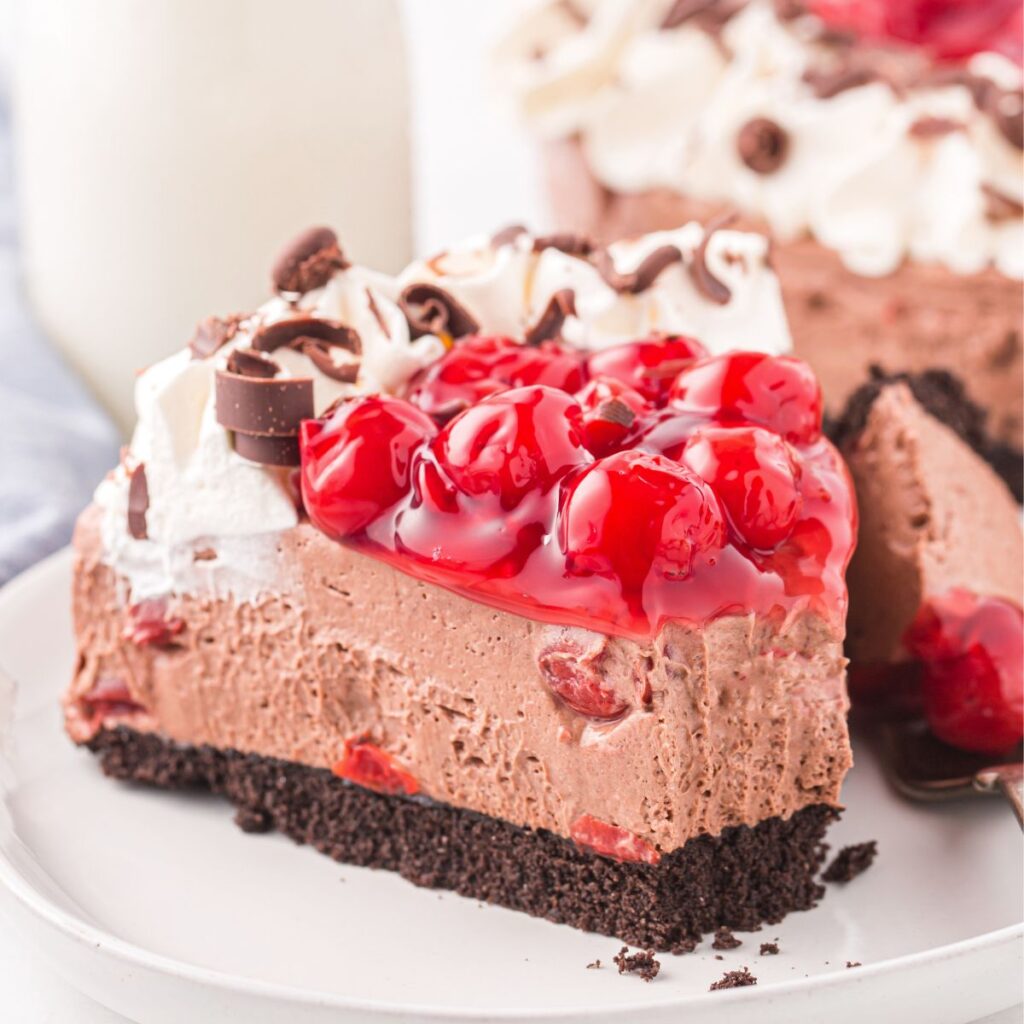
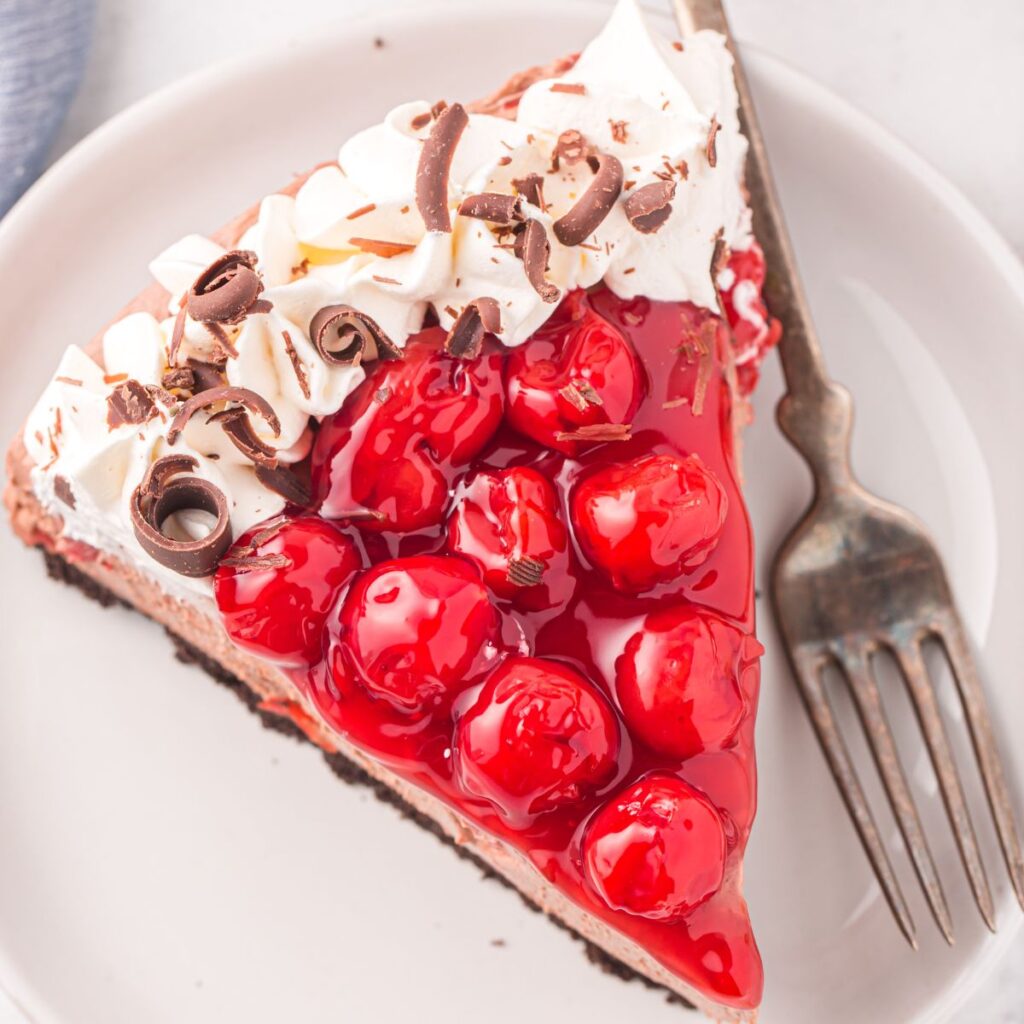
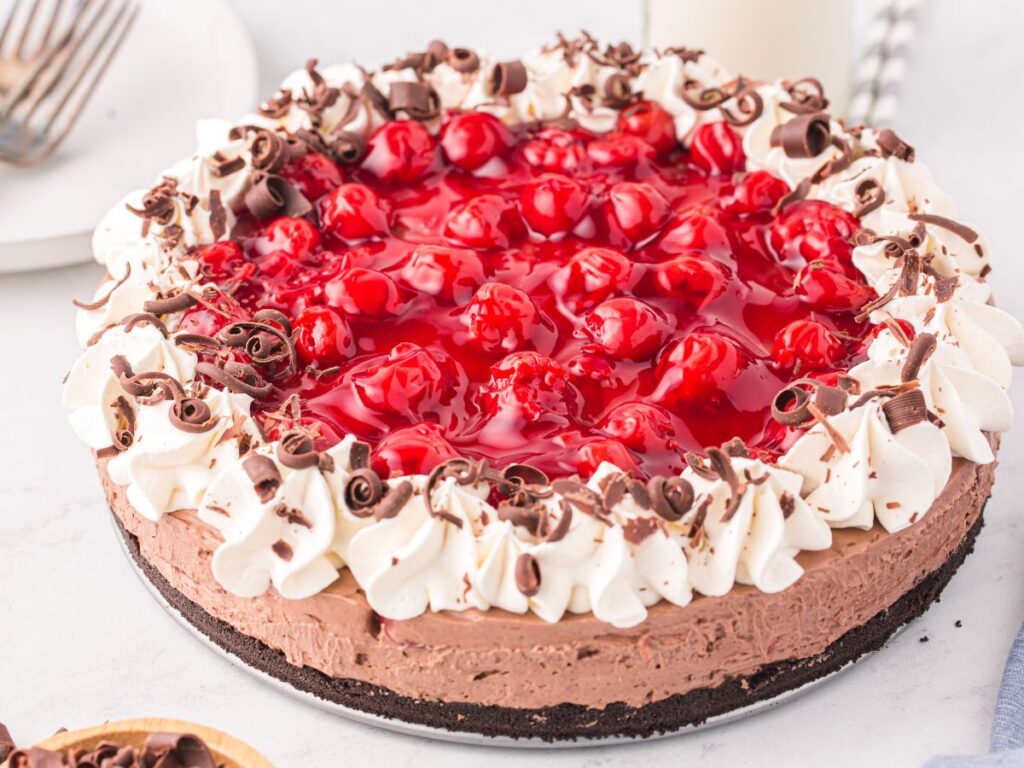
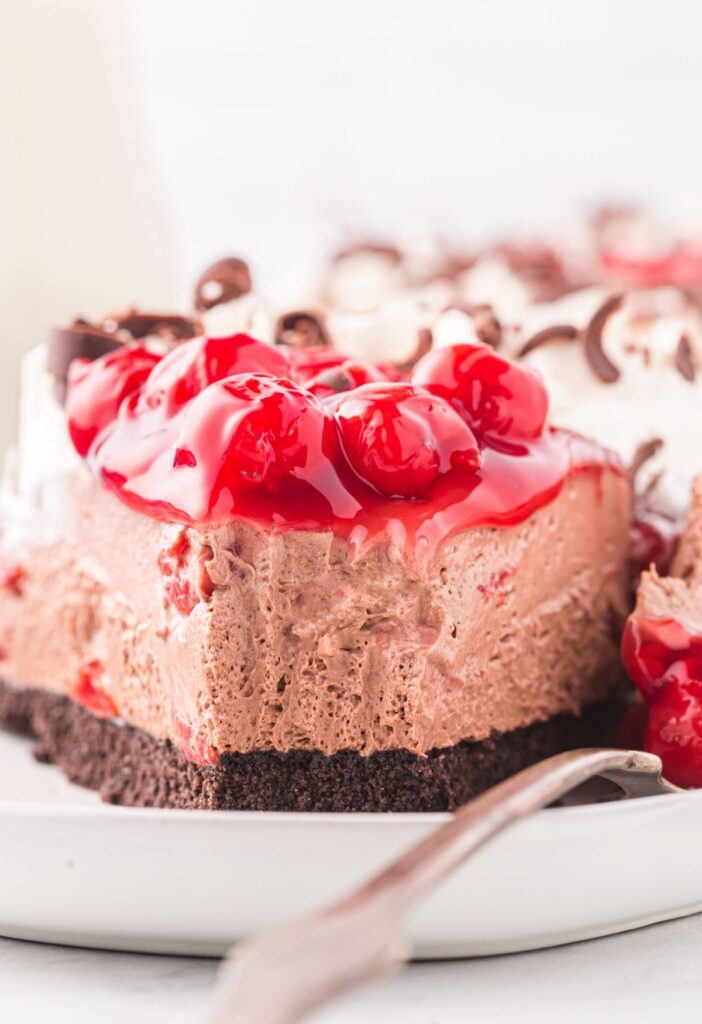
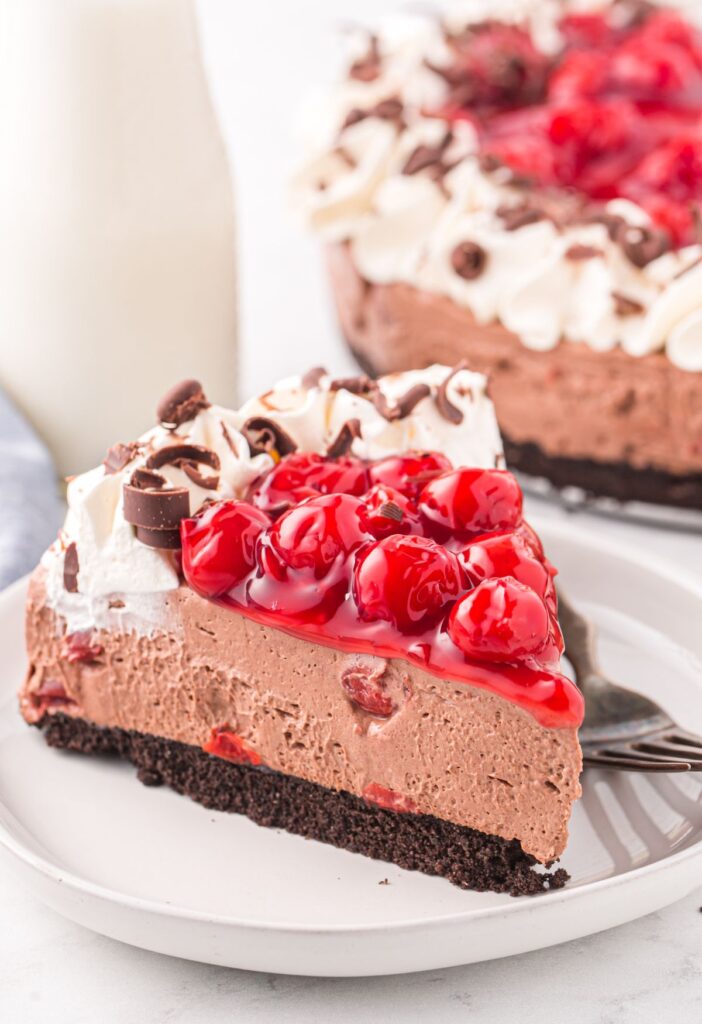
This easy to make No Bake Black Forest Cheesecake is the ultimate rich & decadent dessert with layers of an Oreo cookie crust, no bake cheesecake filling, no bake chocolate cheesecake filling, and topped with canned cherry pie filling.
For an even easier version that uses a store-bought Oreo cookie crust be sure and make my No Bake Black Forest Pie.
Black Forest Cheesecake Pie Recipe (No Bake Dessert)
If you’re wanting a show-stopper dessert that is equally impressive as it is delicious, then this no bake Black Forest cheesecake is a must make!
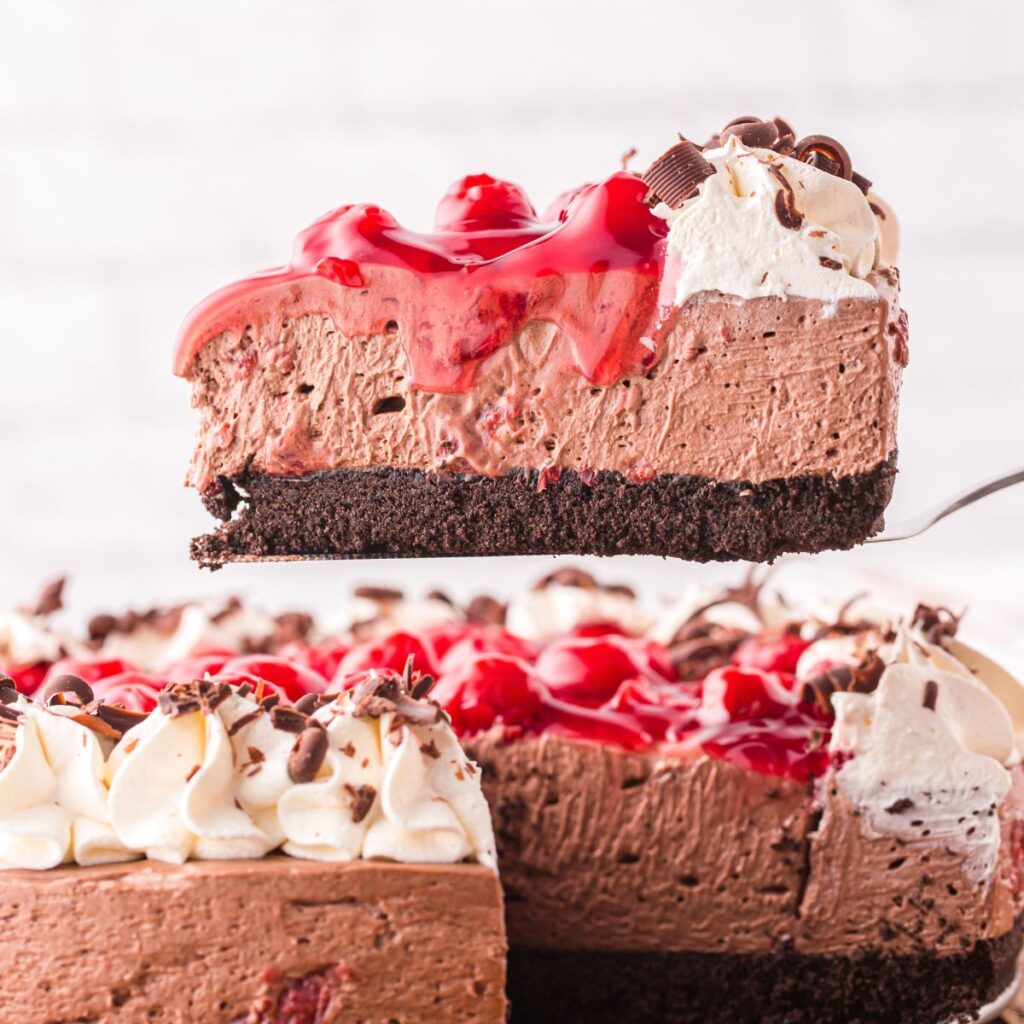
With only about 25 minutes of prep time this impressive dessert could not be simpler to make. A sweet Oreo cookie crust, filled with a no bake chocolate + cherry cheesecake, and topped with whipped cream, more cherry pie filling, and chocolate shavings.
You won’t believe how yummy this cheesecake is! Let’s dive right in and learn how to make it.
Why We Love This No Bake Dessert
- It’s no bake! I love having a big collection of no bake desserts. Not only are they simple to make but they require at least 8 hours of fridge time, which makes it’s the perfect thing to prep ahead of time.
- Chocolate + Cheesecake + Cherry! The ultimate combo and it’s so delicious together. This is what creates the ‘Black Forest’ aspect of this recipe. Black Forest is a dessert that combines chocolate and cherries.
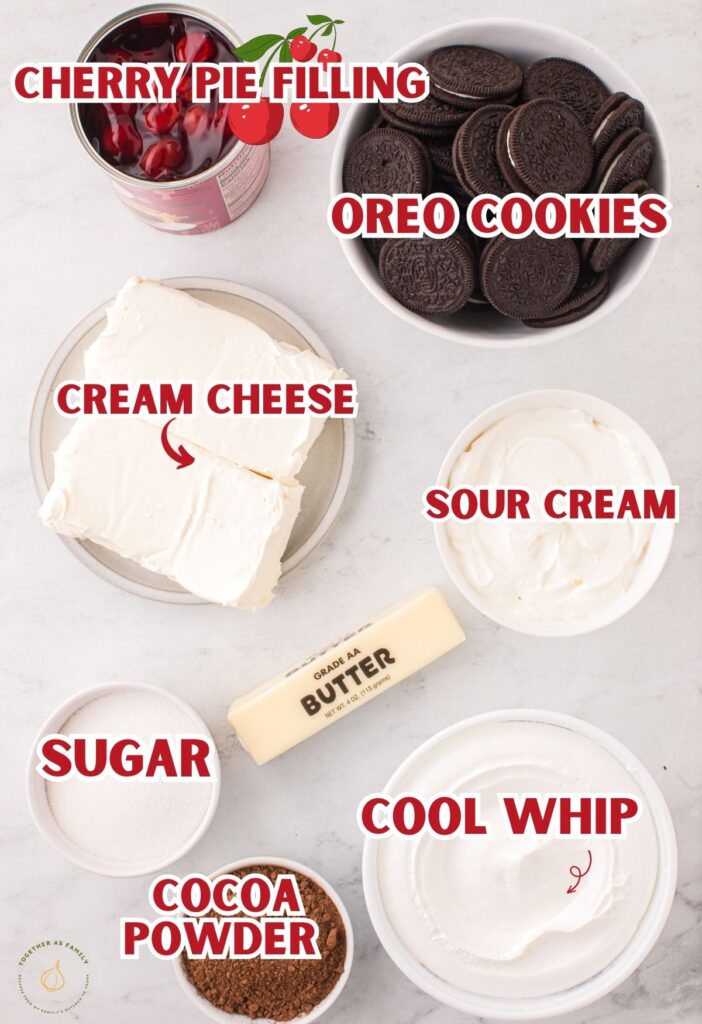
Ingredients Needed
- Oreo Cookies – This forms the crust of this no bake cheesecake. We use the original (no double stuf) Oreos in this recipe.
- Salted Butter – This is melted so that it can combine with the Oreo cookie crumbs to form a thick crust.
- Cream Cheese – For the best results, texture and flavor, only use full fat cream cheese. Make sure it’s well softened so it incorporates smoothly without little lumps.
- Granulated Sugar
- Unsweetened Cocoa Powder
- Sour Cream – Again, for the best texture and taste use full fat sour cream. This helps make the no bake cheesecake super creamy and rich, and helps to offset some sweetness.
- Cherry Pie Filling – One can (21 oz) of cherry pie filling is the perfect amount for this recipe. You will use 1 cup in the cheesecake + 1 cup for the topping.
- Cool Whip
- Garnishes – Additional cherry pie filling (there will be some extra from the can), whipped cream, and chocolate shavings.
Make sure that you put the cream cheese out at room temperature, on the counter top, for no more than 2 hours prior to making this cheesecake. To avoid lumps in the batter the cream cheese needs to be room temperature and slightly softened.
How To Make No Bake Black Forest Cheesecake
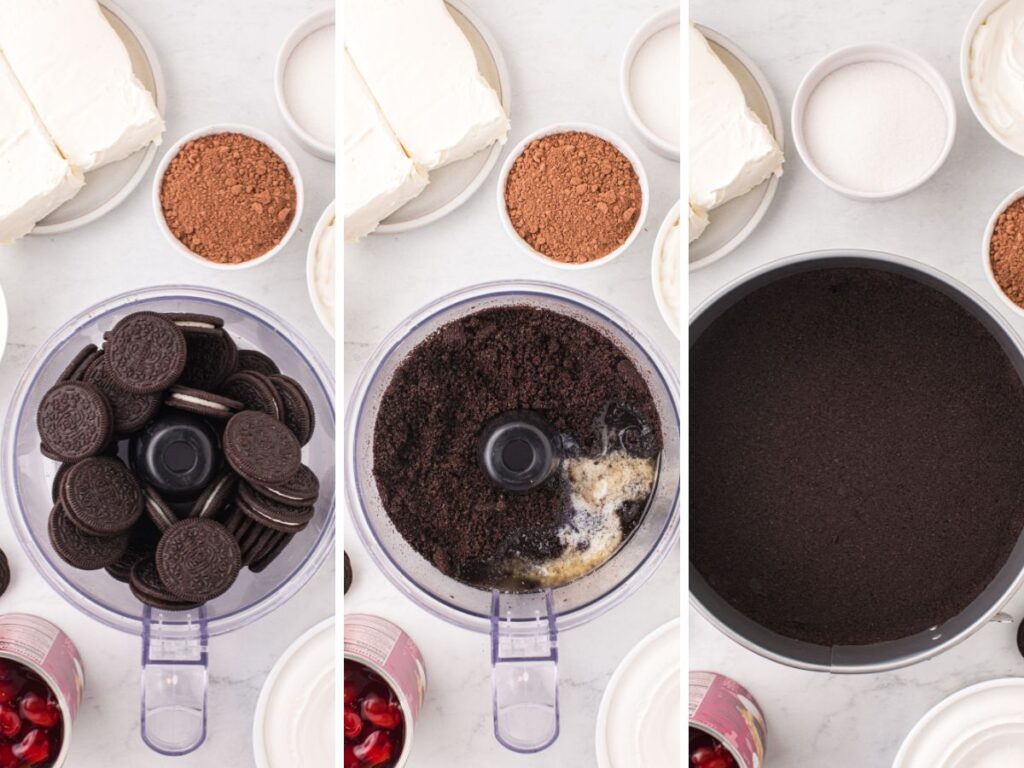
- Add the Oreo cookies into a food processor and blend unit fine crumbs. Slowly pour the melted butter in and blend again until it resembles wet sand. Evenly and firmly press the crust mixture into the bottom of a 9-inch springform pan. Cover with plastic wrap and let it freeze while you prepare the rest.
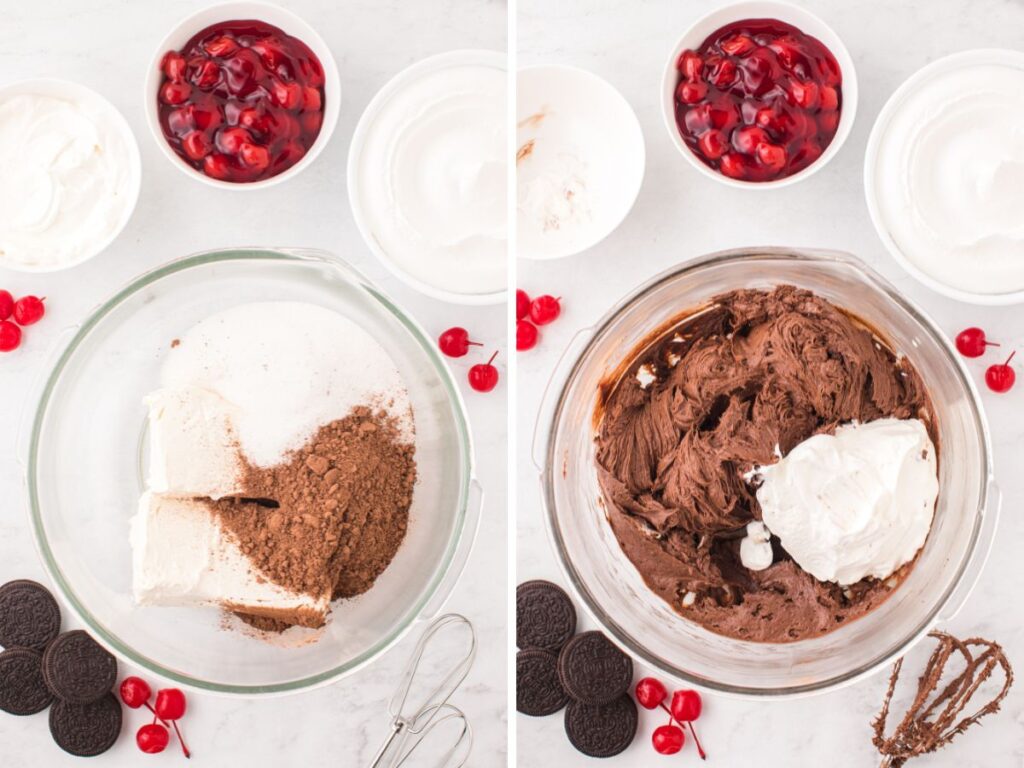
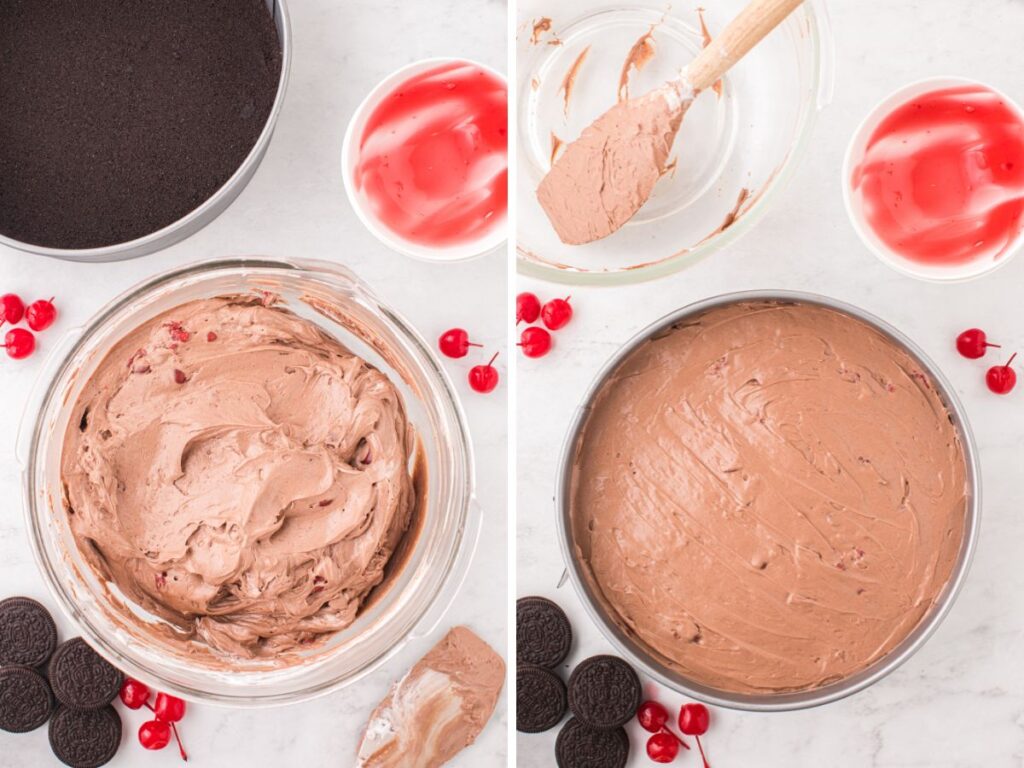
- In a large mixing bowl using an electric hand mixer, or use a stand mixer, beat the cream cheese, sugar, and cocoa powder until light in color and fluffy. About 3-4 minutes.
- Add in the sour cream and mix until combined.
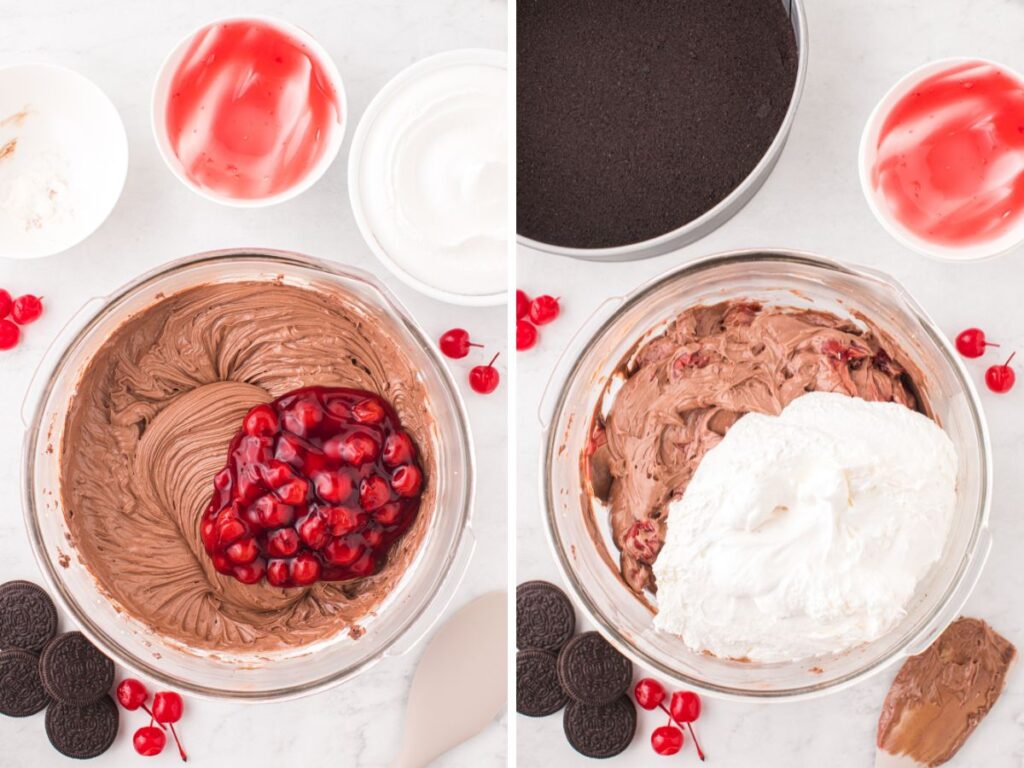
- Stir in the cherry pie filling just until combined. Add in the Cool Whip and stir just until incorporated.
- Evenly spread the cheesecake mixture into the springform pan on top of the Oreo crust. Cover with plastic wrap and let it refrigerate for at least 8 hours.
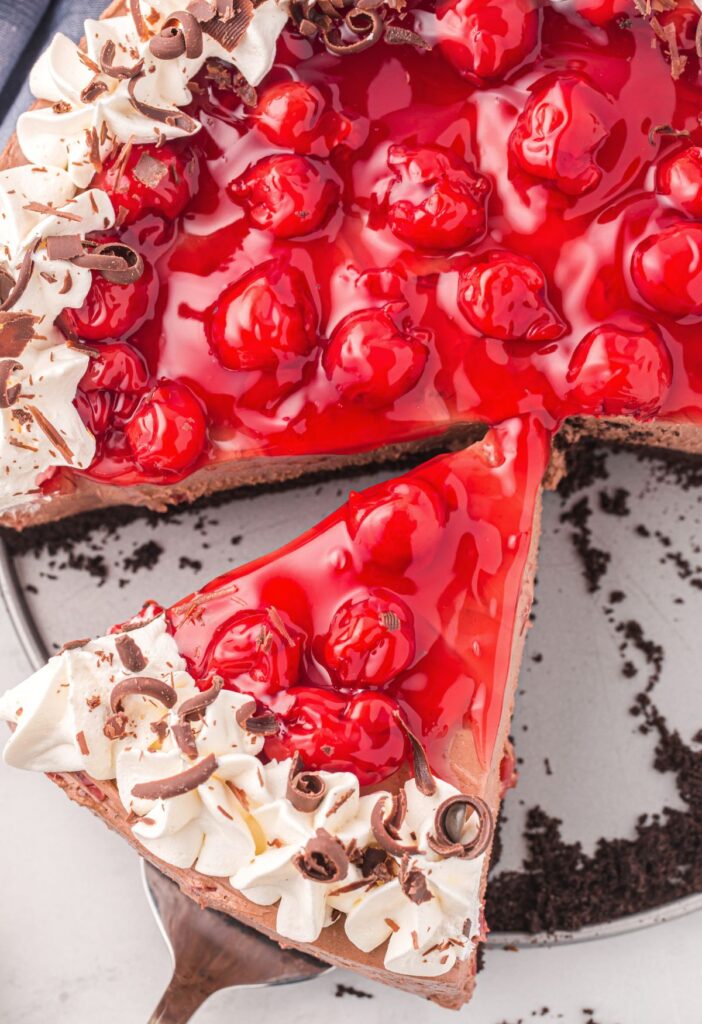
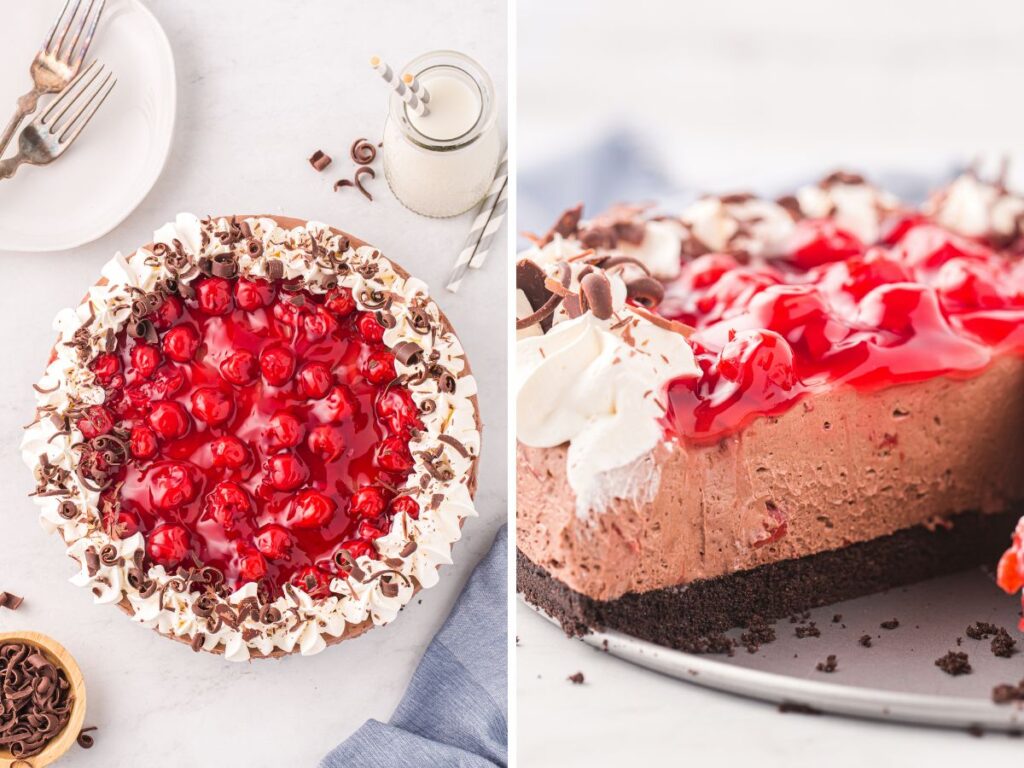
- When ready to serve, prepare the whipped cream and pipe it along the edges of the cheesecake. Place the remaining cherry pie filling into the center of the cheesecake. Use a vegetable peeler + milk chocolate candy bar to make chocolate shavings.
FAQ’s + Expert Tips
- Chill Time : Don’t rush this fridge time. This no bake cheesecake needs at least 8 hours of fridge time before slicing and serving. This ensures that the cheesecake is thickened and set, so it will cut nicely. It also helps the flavors develop and become really rich.
- Make It Ahead of Time : This dessert can be refrigerated for up to 24 hours before serving it! I love making it the day before and leaving it in the fridge until it’s time to eat it. About 12 hours plus. I don’t recommend keeping the cheesecake in the fridge for more than 24 hours before serving. The crust will begin to soften. For the best quality, serve within 24 hours of making and refrigerating the cheesecake.
- Don’t add the garnishes until right before serving. Refrigerate the cheesecake without the optional garnishes and extra toppings.
- Room Temperature Ingredients : For the best results use room temperature ingredients. If you don’t remember to set them out (about 30 minutes prior to using them) then it’s ok. I usually forget. You for sure want the cream cheese softened to avoid lumps in the cheesecake mixture. Room temperature dairy ingredients just help everything mix in more smooth without the little lamps of cream cheese and/or sour cream.
- Storing Leftovers : Store this cheesecake inside the fridge, covered in plastic wrap or foil, for up to 4 days.
What Is a Springform Pan?
A springform pan is a type of nonstick bakeware, popular for making cheesecakes, that features sides that can be removed from the base. The base of the pan and sides of the pan are separate pieces that are ‘held together’ with a clamp or hinge that easily comes undone when you’re ready to serve the cheesecake.
I use this Calphalon 9-inch Springform Pan.


No Bake Black Forest Cheesecake
Ingredients
Oreo Crust
- 32 Oreo cookies
- 4 tablespoons salted butter melted
Black Forest Cheesecake
- 2 bars (8 oz each) cream cheese (softened to room temperature)
- 3/4 cup granulated sugar
- 1/2 cup unsweetened cocoa powder
- 1 cup full-fat sour cream
- 1 cup cherry pie filling
- 8 ounces Cool Whip thawed
Toppings
- 1 cup cherry pie filling
- 3/4 cup heavy whipping cream
- 2 tablespoons powdered sugar
- chocolate shavings
Instructions
Make Oreo Crust
- Add the Oreo cookies (regular Oreos and not double stuf) into a food processor and blend until fine crumbs. * If you don't have a food processor, use a food chopper or place the cookies inside a Ziploc bag and use a rolling pin or meat pounder, to crush item into fine crumbs. Add them to a mixing bowl along with the melted butter to combine.32 Oreo cookies
- Slowly pour in the melted butter and blend again until combined and it's the consistency of wet sand.4 tablespoons salted butter
- Press the crust mixture into the bottom of a 9-inch springform pan (no need to spray it with cooking spray) and cover the pan with plastic wrap. Place it in the freezer while you make the cheesecake filling.
Make The Black Forest Cheesecake
- In a large mixing using an electric hand mixer, or use a stand mixer, beat together the cream cheese, sugar, and cocoa powder until lighter in color and fluffy. About 3-4 minutes.2 bars (8 oz each) cream cheese, 3/4 cup granulated sugar, 1/2 cup unsweetened cocoa powder
- Add in the sour cream and beat until combined.1 cup full-fat sour cream
- Stir in the cherry pie filling with a wooden spoon just until combined. Stir softly as not to crush the cherries.1 cup cherry pie filling
- Stir in the Cool Whip until incorporated evenly.8 ounces Cool Whip
- Evenly spread the back forest cheesecake mixture into the prepared springform pan over top the crust. Cover with plastic wrap and let it refrigerate for at least 8 hours, or up to overnight is better.
When Ready To Serve
- Beat the heavy whipping cream and powdered sugar in a mixing bowl, start at low speed and increase as needed, until stiff peaks form. This will take about 3-4 minutes.3/4 cup heavy whipping cream, 2 tablespoons powdered sugar
- Place the whipped cream into a piping bag with a large 1A tip or into a sandwich bag and snip the corner off. Pipe the whipped cream onto the outer edges of the cheesecake.
- Place the remaining cherry pie filling onto the middle of the cheesecake, inside the whipped topping.1 cup cherry pie filling
- Use a vegetable peeler + milk chocolate candy bar to shave chocolate shavings onto the cheesecake.
Notes
Nutrition
Did You Make This Recipe?
I’d love to see it! You can share it with me on @togetherasfamilyblog and follow on Pinterest @together-as-family-blog-recipes or Facebook @togetherasfamilyblog for more!


Did you love this recipe?
Make sure to comment below so we can chat about it! Or follow on your favorite social network for even more family recipes.