
This post may contain affiliate links, view our disclosure policy.
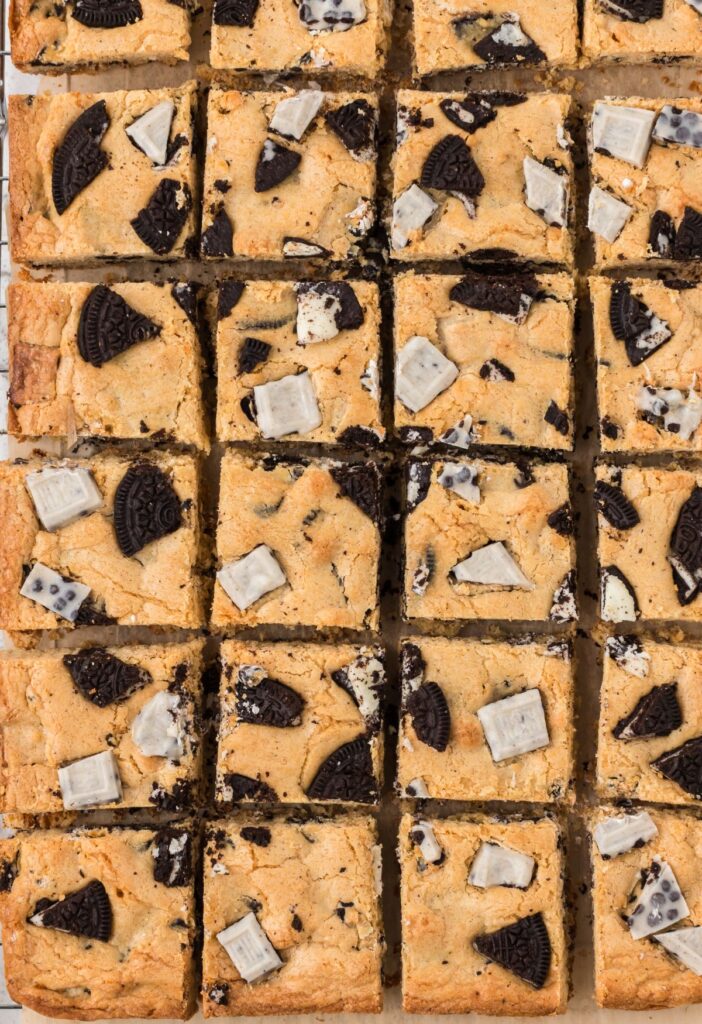
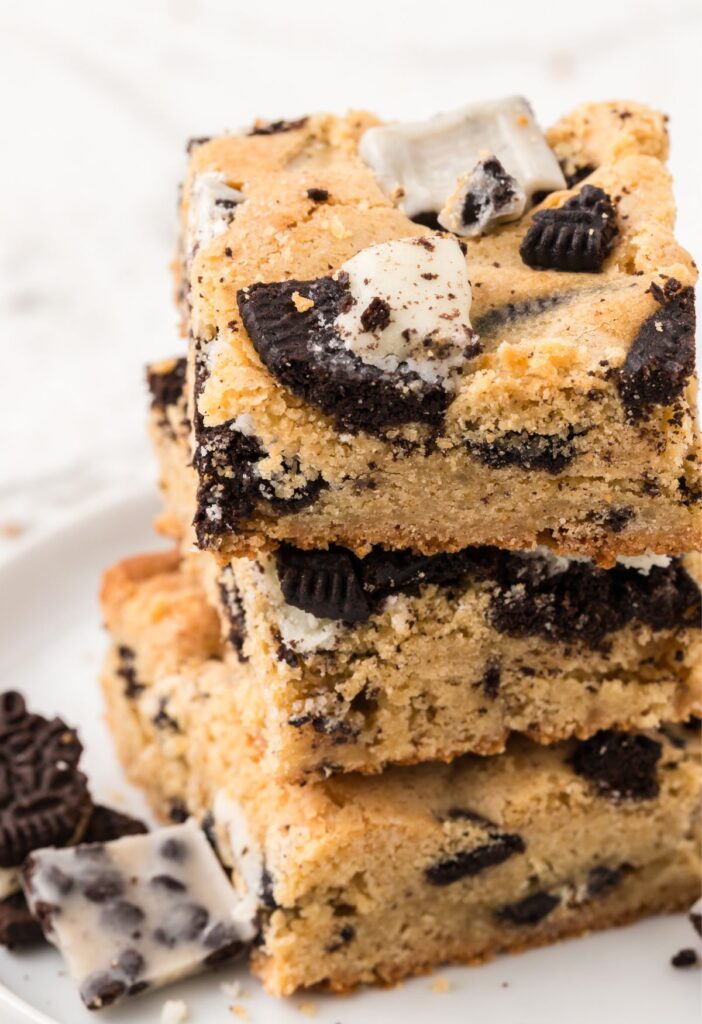
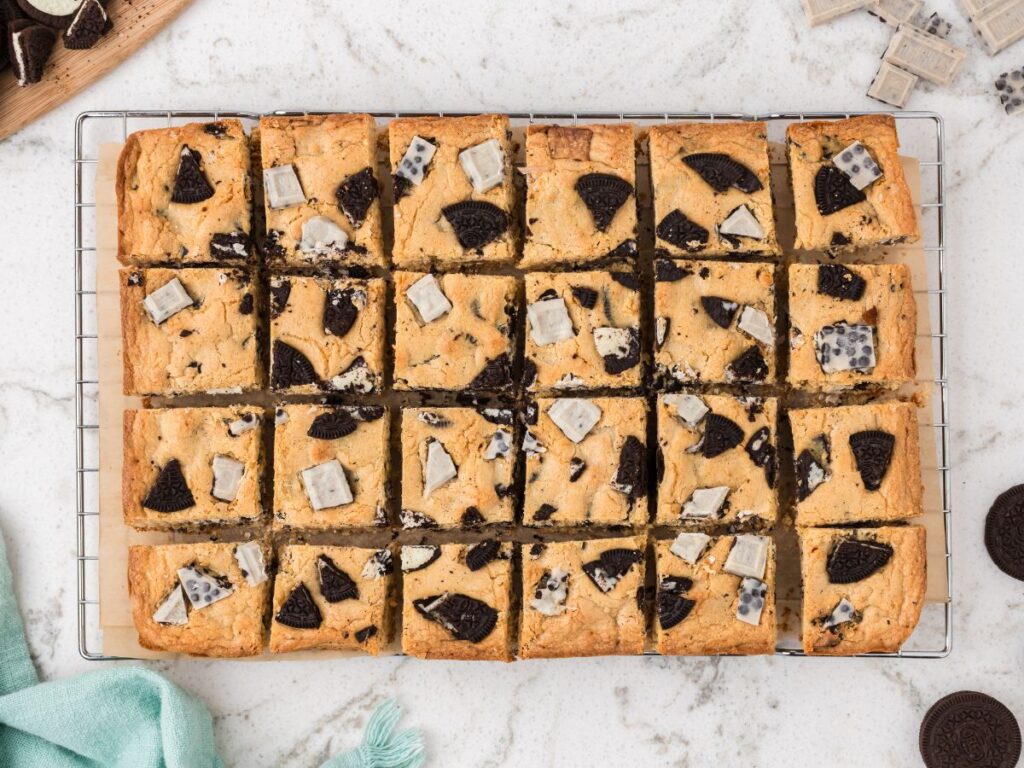
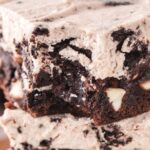
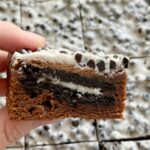
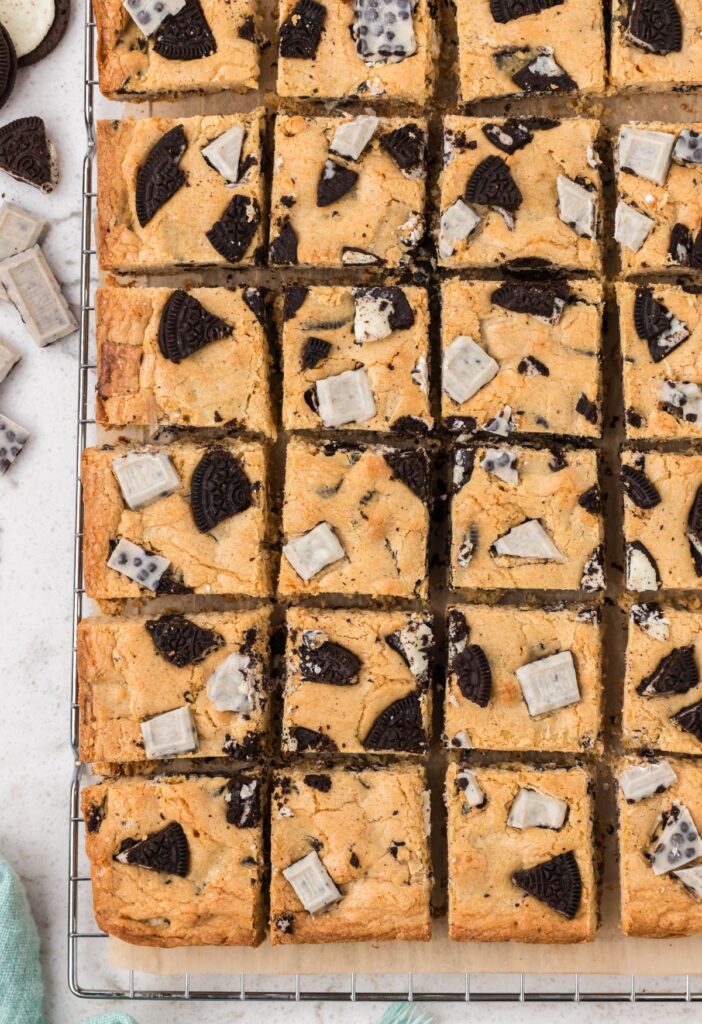
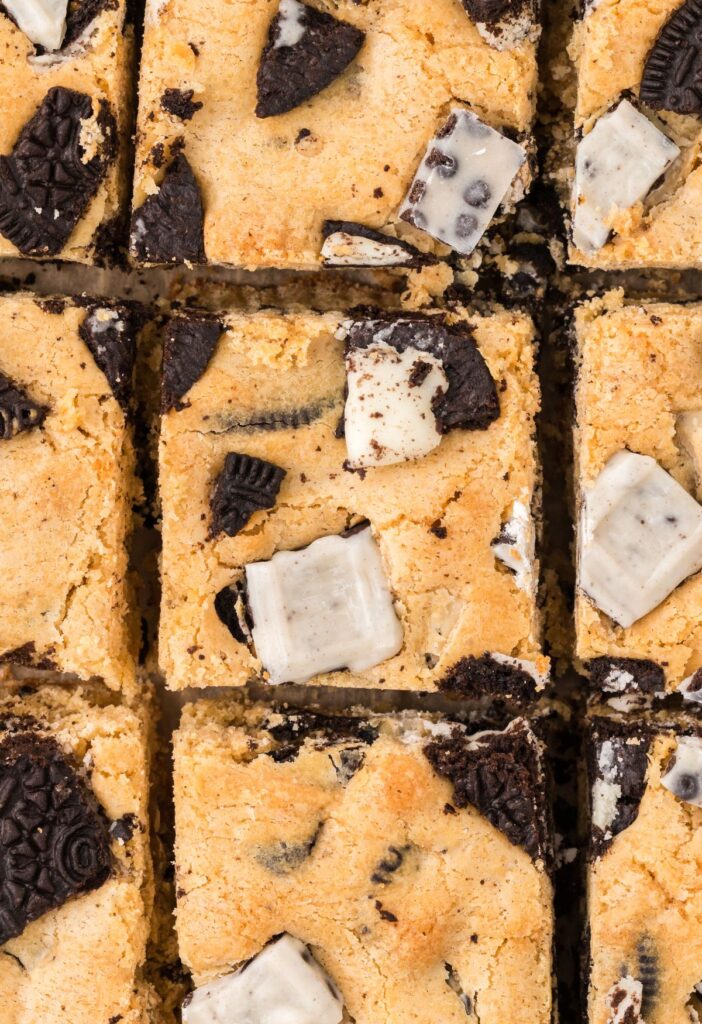
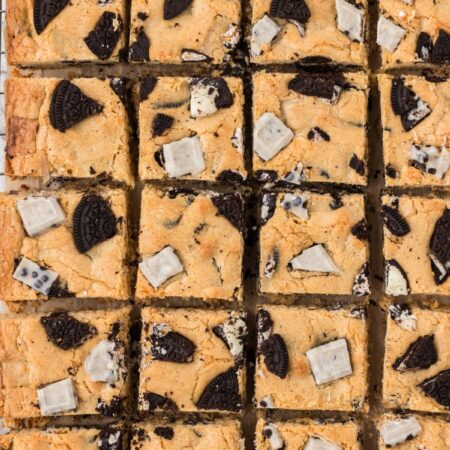
Oreo Cookies and Cream Blondie Bars are soft-baked, thick, chewy blondie bars with crispy golden brown edges and a soft center. Loaded with Oreo cookies and chunks of Hershey’s Cookies n’ Cream chocolate bars.
Oreo Cookies and Cream Blondies Recipe
We are huge Oreo lovers in my house! My kids are always begging for the Hershey Cookies & Cream chocolate bars – smooth and creamy white chocolate with chunks of cookies. And paired with chopped Oreo cookies for the ultimate blondie bars.
Blondies are the perfect treat because they use all brown sugar which means they turn out with golden brown crispy edges, and a soft baked center.
Simple Baking Ingredients Needed
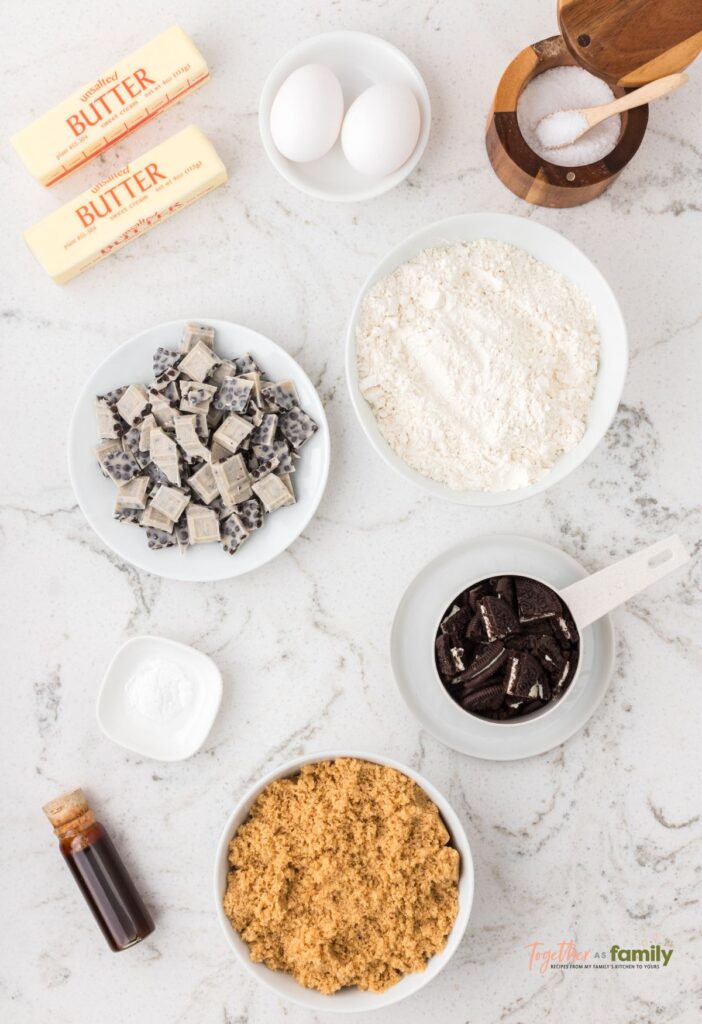
- All-Purpose Flour : I use unbleached all-purpose flour for all baking recipes.
- Baking Soda
- Sea Salt
- Butter : I use salted butter but unsalted can be used if wanted.
- Light Brown Sugar
- Large Eggs
- Vanilla Extract
- Oreo Cookies : You can chop the cookies in larger chunks or in smaller/finer pieces.
- Hershey’s Cookies n’ Cream Bars
How To Make Blondie Bars With Oreo Cookies (Printable Recipe Card)
Heat the oven to 350 degrees F. Prepare a 9×13 baking pan by spraying with nonstick cooking spray, or line the pan with parchment paper for easy removal.
In a small mixing bowl, whisk together the flour, baking soda, and salt.
In a larger bowl, or the bowl of a stand mixer, add the melted butter and light brown sugar. Use an electric mixer and beat for 2 minutes on medium-high speed. The mixture should be pale in color and fluffy looking.
Add in the eggs and vanilla extract, and beat just until combined.
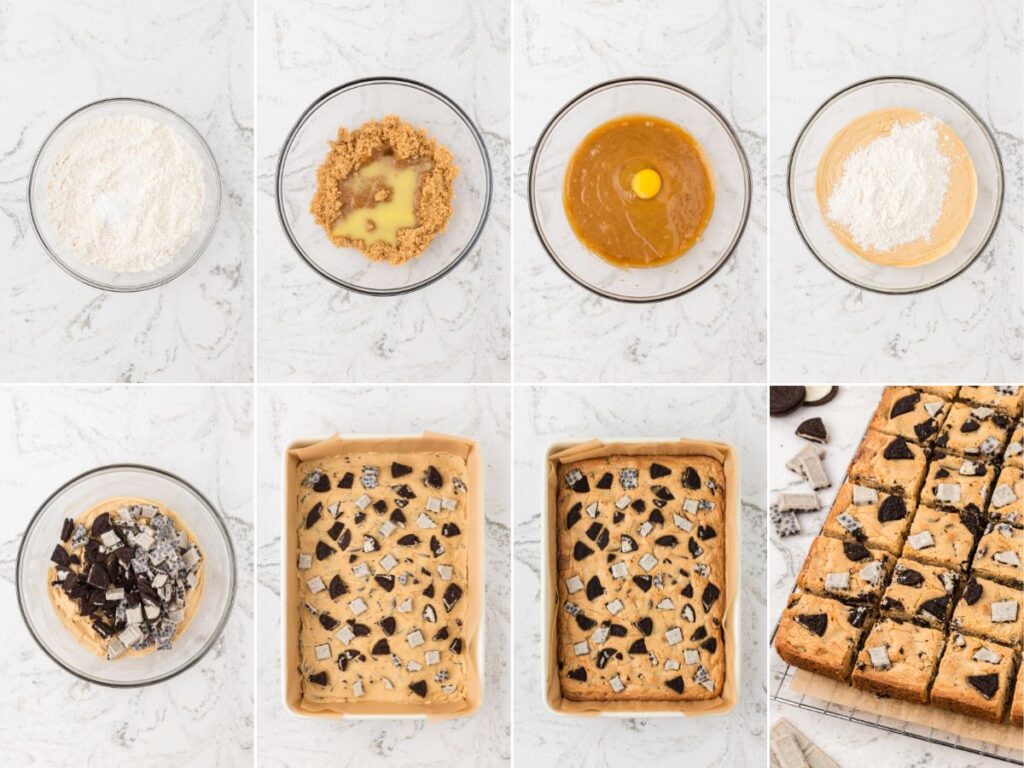
Add the bowl of dry ingredients into the wet mixture, and beat on low speed just until no flour streaks remain in the dough.
Stir in the chopped Oreo cookies and chopped Cookies n’ Cream chocolate bars until combined.
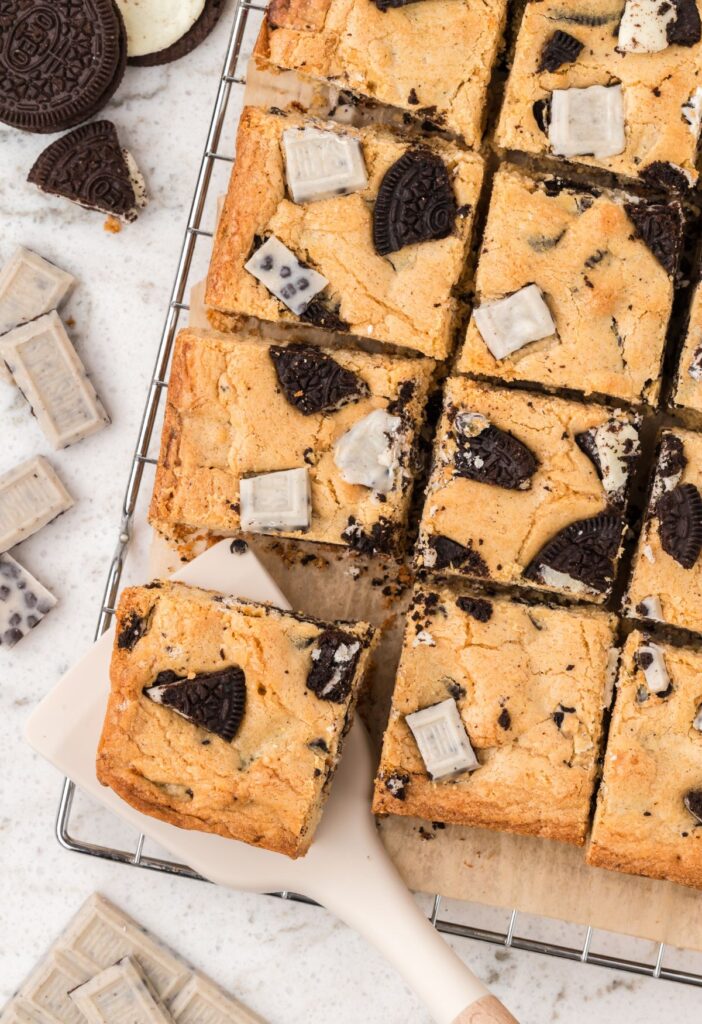
Evenly spread the dough into the prepared baking pan. It’s easiest if you drop large spoonfuls of it all over, rather than dump it in one pile, and then spread it out. If wanted, add some additional chopped Oreo cookies and/or cookies & cream bars on top.
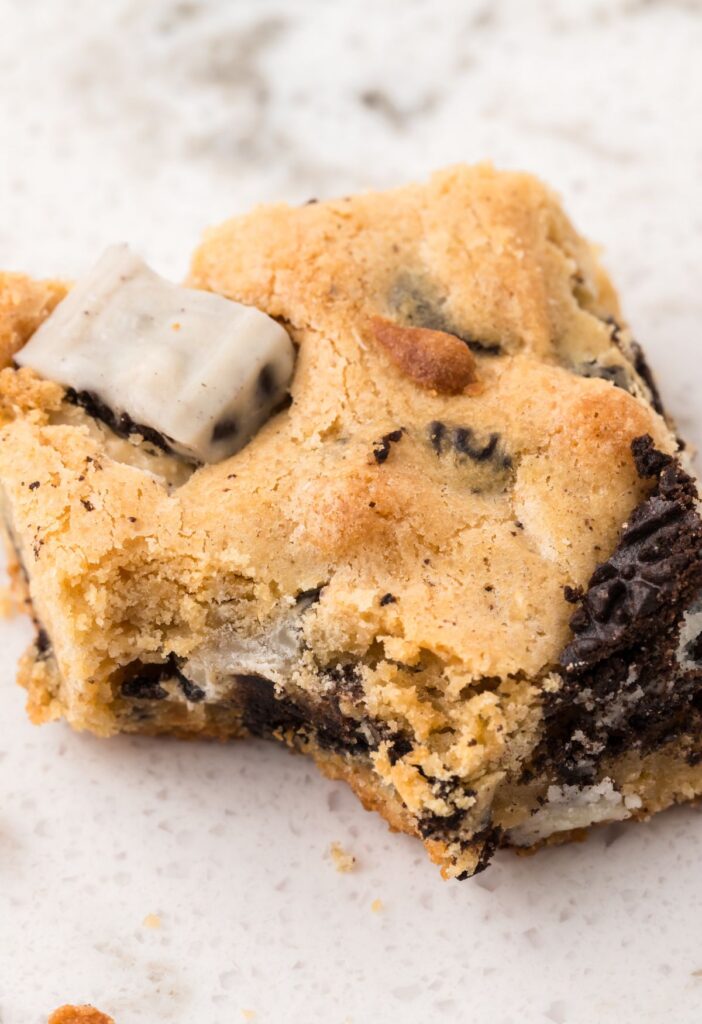
Bake for 22-26 minutes. The edges should be lightly golden brown and look ‘wrinkly’ and the middle should still look somewhat pale and puffy.
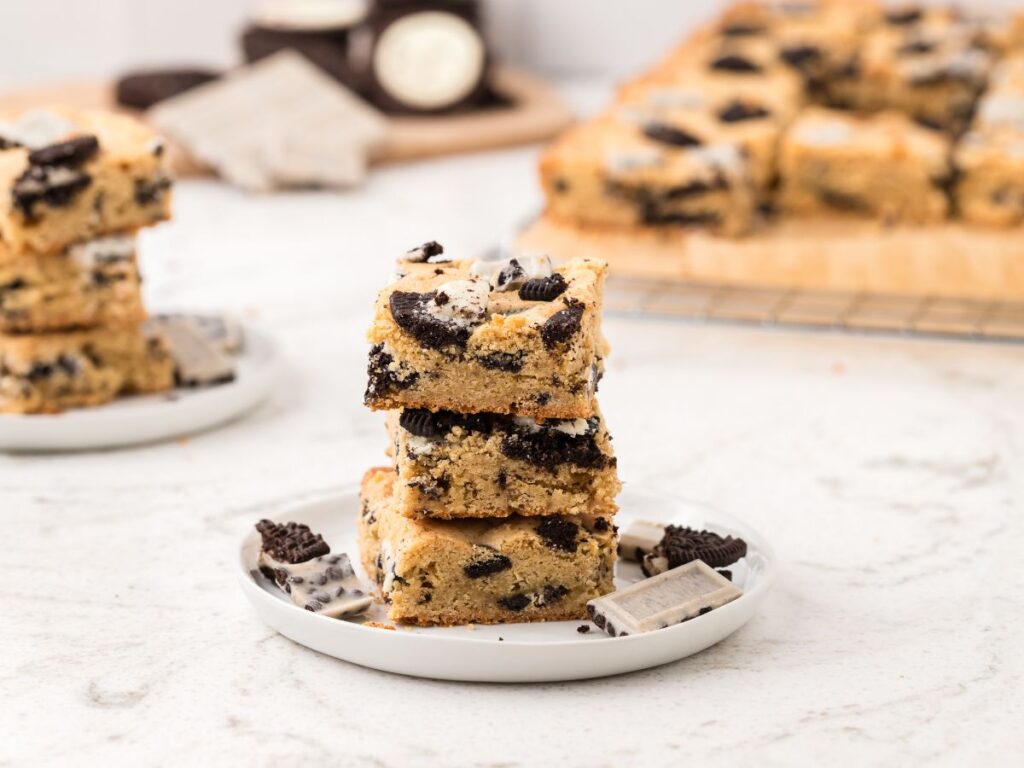
Remove the bars from the oven and allow them to cool completely in the pan before cutting and serving. They can also be eaten warm, but they will continue to set while cooling, which will make them easier to cut.
How To Store Leftover Blondie Bars
Store blondies inside an airtight container, or a Ziplock bag, at room temperature for up to 3-4 days.
You can also freeze leftovers by wrapping each bar in plastic wrap, and then again in aluminum foil, and then store the wrapped bars inside a freezer-safe bag or container for up to 2 months. Thaw in the fridge overnight, at room temperature, or microwave.
Pro Tips From The Test Kitchen
- I always make sure I have extra Oreo cookies and chocolate bars so I can add some chunks of each on top of the blondie bars before baking. This makes them look pretty and who doesn’t want more of those things!
- A tip for melted & cooled butter is to add the butter to a microwave-safe dish, and microwave for about 45-50 seconds, so you end up with half soft butter + half melted butter. Use a fork to stir it until everything is completely melted and smooth. This way the butter is not too hot because you didn’t microwave it for that long. You can use it immediately in the recipe now.
- It’s important to beat the melted butter and brown sugar together for 2 minutes. You want to achieve that pale color and fluffy looking batter; which you can only achieve if you beat it long enough.
- The bars are done when the edges look wrinkly and are a lightly golden brown color. The center of the bars should be still look paler in color and soft-baked, but not with raw or wet looking batter.
- The cooling time in the warm pan is important because as the bars cool they will continue to cook and set up nicely for cutting and serving.
- Watch them carefully in the oven because you don’t want to overbake blondies or else you’ll end up with dry and crumbly bars.
More Must-Try Oreo Recipes
- Oreo Truffles (Oreo Balls)
- Oreo Fudge
- Oreo Cheesecake Bars
- Oreo Dirt Pie
- Oreo Poke Cake
- Oreo Icebox Cake
- No-Bake Oreo Lush Dessert
- Layered Oreo Dessert

Oreo Cookies n’ Cream Blondie Bars
Equipment
Ingredients
- 2 cups all-purpose flour
- ½ teaspoon baking soda
- ½ teaspoon sea salt
- 1 cup (2 sticks) salted butter melted & slightly cooled
- 1 ½ cups packed light brown sugar
- 2 large eggs
- 1 tablespoon vanilla extract
- 1 cup chopped Oreo cookies
- 1 cup chopped Hershey Cookies n' Cream candy bars
Instructions
- Heat the oven to 350℉. Prepare a 9×13 baking pan by spraying with nonstick cooking spray, or line the pan with parchment paper for easy removal.
- In a small mixing bowl, whisk together the flour, baking soda, and salt.2 cups all-purpose flour, ½ teaspoon baking soda, ½ teaspoon sea salt
- In a larger bowl, or the bowl of a stand mixer, add the melted butter and light brown sugar. Use an electric mixer and beat for 2 minutes on medium-high speed. The mixture should be pale in color and fluffy looking.1 cup (2 sticks) salted butter, 1 ½ cups packed light brown sugar
- Add in the eggs and vanilla extract, and beat just until combined.2 large eggs, 1 tablespoon vanilla extract
- Add the bowl of dry ingredients into the wet mixture, and beat on low speed just until no flour streaks remain in the dough.
- Stir in the chopped Oreo cookies and chopped Cookies n' Cream chocolate bars until combined. * You can either reserve some for top of the blondies, OR use additional chopped Oreos and chocolate on top.1 cup chopped Oreo cookies, 1 cup chopped Hershey Cookies n' Cream candy bars
- Evenly spread the dough into the prepared baking pan. If wanted, add some additional chopped Oreo cookies and/or cookies & cream bars on top. *It's easiest if you drop large spoonfuls of it all over, rather than dump it in one pile, and then spread it out.
- Bake for 22-26 minutes. The edges should be lightly golden brown and look 'wrinkly' and the middle should still look somewhat pale and puffy.
- Remove the bars from the oven and allow them to cool completely in the pan before cutting and serving. They can also be eaten warm, but they will continue to set while cooling, which will make them easier to cut.
Notes
- I always make sure I have extra Oreo cookies and chocolate bars so I can add some chunks of each on top of the blondie bars before baking. This makes them look pretty and who doesn’t want more of those things!
- A tip for melted & cooled butter is to add the butter to a microwave-safe dish, and microwave for about 45-50 seconds, so you end up with half soft butter + half melted butter. Use a fork to stir it until everything is completely melted and smooth. This way the butter is not too hot because you didn’t microwave it for that long. You can use it immediately in the recipe now.
- It’s important to beat the melted butter and brown sugar together for 2 minutes. You want to achieve that pale color and fluffy looking batter; which you can only achieve if you beat it long enough.
- The bars are done when the edges look wrinkly and are a lightly golden brown color. The center of the bars should be still look paler in color and soft-baked, but not with raw or wet looking batter.
- The cooling time in the warm pan is important because as the bars cool they will continue to cook and set up nicely for cutting and serving.
- Watch them carefully in the oven because you don’t want to overbake blondies or else you’ll end up with dry and crumbly bars.
Nutrition
Did You Make This Recipe?
I’d love to see it! You can share it with me on @togetherasfamilyblog and follow on Pinterest @together-as-family-blog-recipes or Facebook @togetherasfamilyblog for more!


You had me at “Oreos”. With kids, seasons get different meanings…gone are the days when Sunner meant “Bikini seasons” and winter meant “new boots”…now is a count down to the moment i’ll walk her to the bus station! Got to love it 🙂
hahaha, that’s the truth 🙂 We love Oreos too! I can never pass one up.
These Blondie bars taste so good. They turn out perfect each time.
Thanks these are amazing!!!!!
Really really good. I made 2\3 of the recipe in a 9×9 pan. I also used 1\2 butter 1\2 applesauce to cut calories. This is a winner.
What do you do when you have a smaller baking dish, do you have to alter the grams? that’s what confuses me with baking
I just half every single ingredient. This recipe calls for a 9×13 baking dish, so a half recipe would be an 8×8 baking dish. Hope that helps.
I’ve made so many different bars over the years and this one is turning out fine in the outside but very Gooey and undone below the surface. I’m so disappointed because I had to make two pans and I have the other ready to put in the oven. What a waste of ingredients.
I’m so sorry to hear that they didn’t work out for you! Was the second pan any better? My first thought is if they were left to cool long enough after being pulled from the oven. In my experience if the outside appears done but I don’t let the bars sit long enough they can end up gooey on the inside.
These were amazing!!! So easy and delicious! Definitely a recipe I will make again!
Thank you! So glad you liked the recipe!
I LOVE THIS!! I make it every other week for my coworkers. little tip! wet your hand when pressing the dough in your pan. your hand won’t stick.. thank you for posting this recipe!!!
I made these recently for my daughter’s birthday and they are perfection! She has requested I make these for her every year! I was afraid these wouldn’t be done but went with the instructions of how it looks when I removed from the oven. Trust the process….it is worth it!