
This post may contain affiliate links, view our disclosure policy.
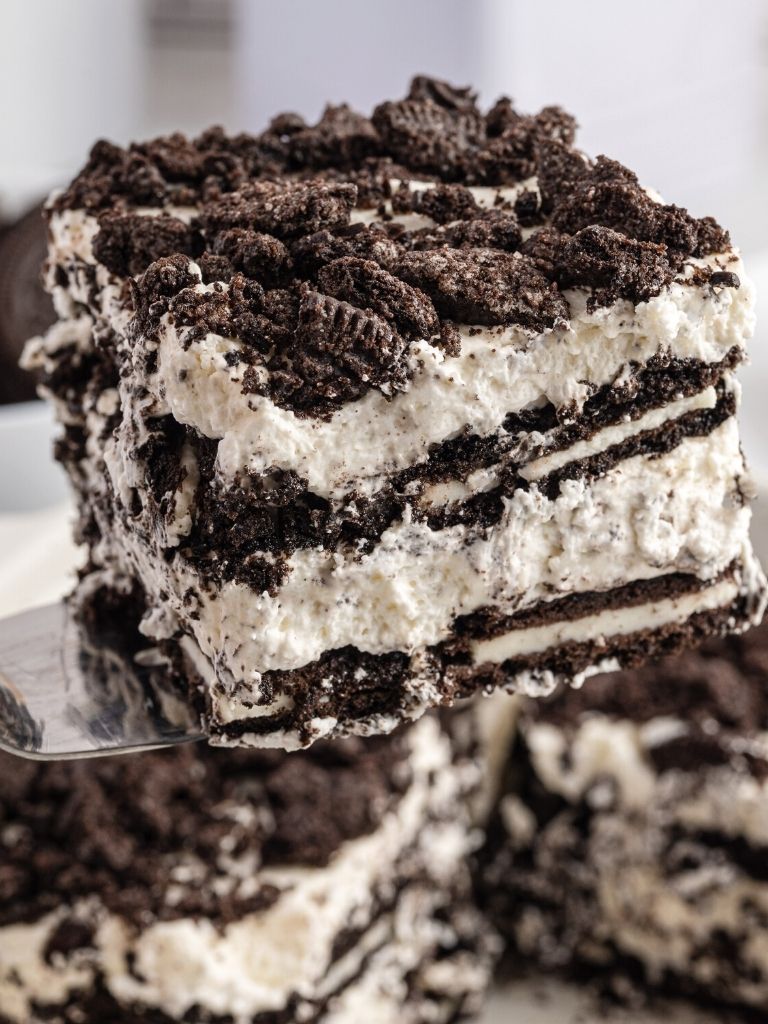
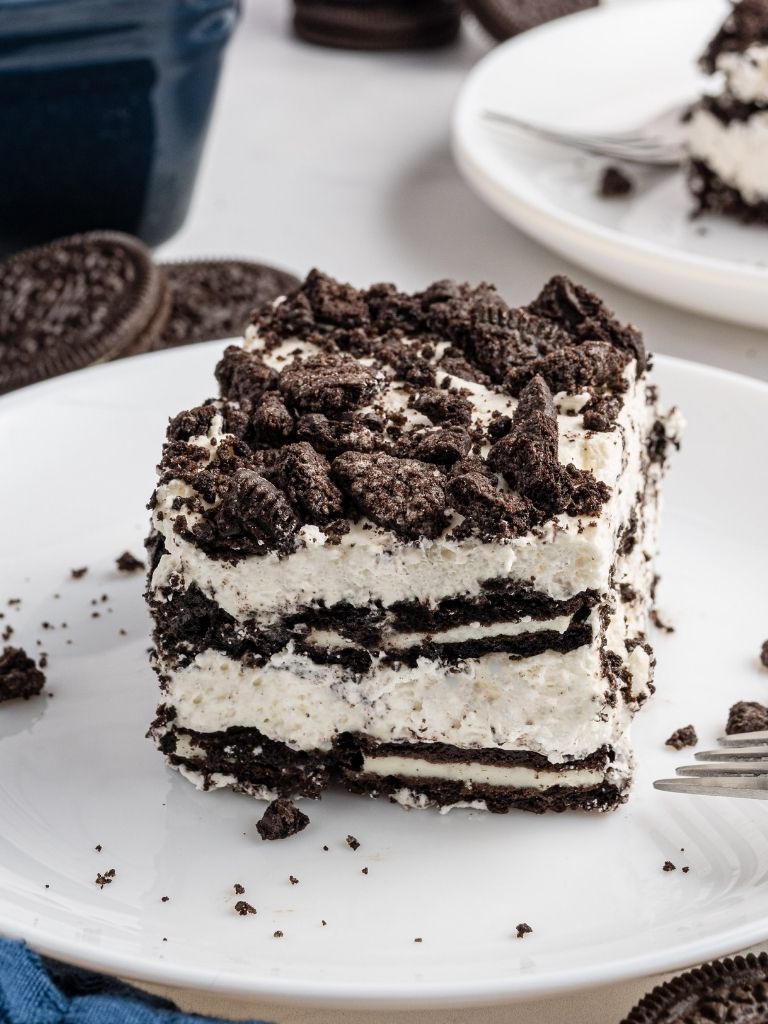
Oreo Icebox Cake is an easy no bake dessert recipe with layers of Oreo cookies and freshly whipped cream. Simple to make and it’s the perfect dessert to make the day before for easy prep. The Oreo cookies soften during the fridge time, making this a simply & tasty dessert that the entire family will love.
Be sure and try our other favorite Oreo desserts like my Layered Oreo Dessert, No Bake Oreo Cream Pie, and Easy Oreo Dirt Cake.
Oreo Icebox Cake Recipe
My family has a thing for Oreo cookies and I happen to love no bake desserts! So this Oreo Icebox Cake is a match made in heaven with soft Oreo cookie layers sandwiched between sweetened freshly whipped cream. It’s always a crowd pleaser and it’s a great make-ahead dessert, which makes it perfect for transporting or to make prep work easier the day of.
Simple to make with only 4 ingredients and about 20 minutes prep time.
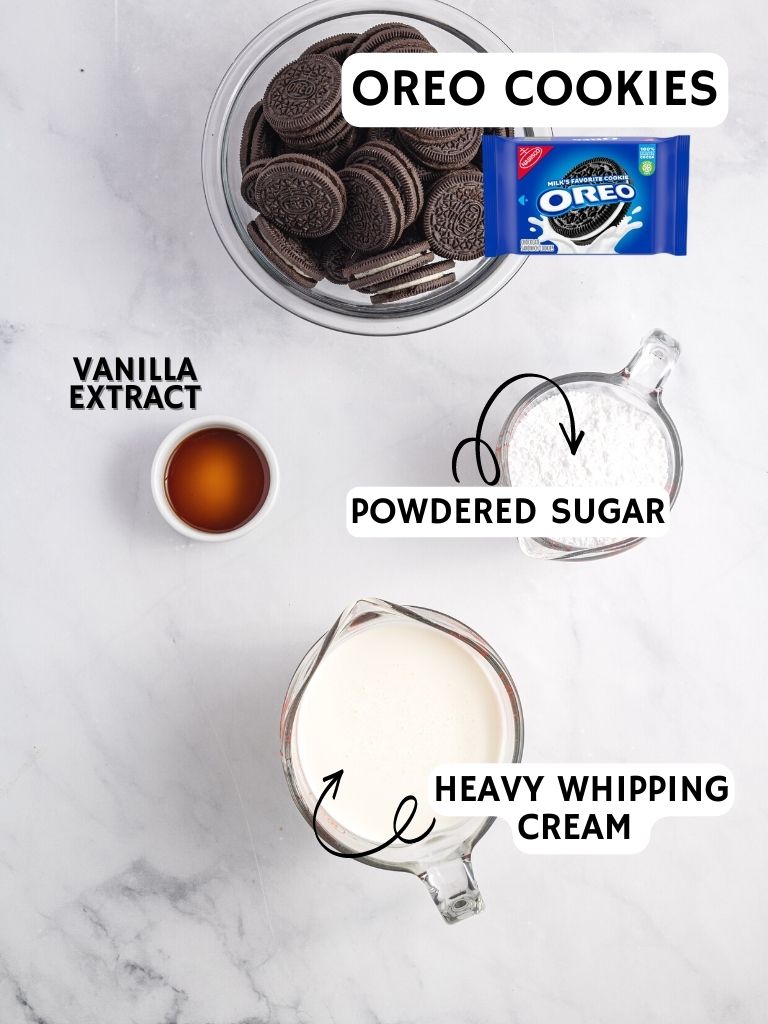
Ingredients Needed
Here is the short list of ingredients you will need to make this Oreo Icebox Cake recipe. I also share a few tips too!
- Oreo Cookies – You can use Oreo cookies or use a generic brand of cookies. Be sure and get a larger family-size pack so you have plenty to sprinkle on top of the icebox cake.
- Heavy Whipping Cream – There are NO substitutes for this. Use heavy whipping cream not half & half or anything else like that.
- Vanilla Extract
- Powdered Sugar – This sweetens the homemade whipped cream.
How To Make an Icebox Cake with Oreos
Learn how to make this easy recipe for a no bake Icebox Cake with the simple steps below. Be sure and read to the bottom of the post where there is a handy printable recipe card, pin it button to save to Pinterest, and all the instructions & ingredients.
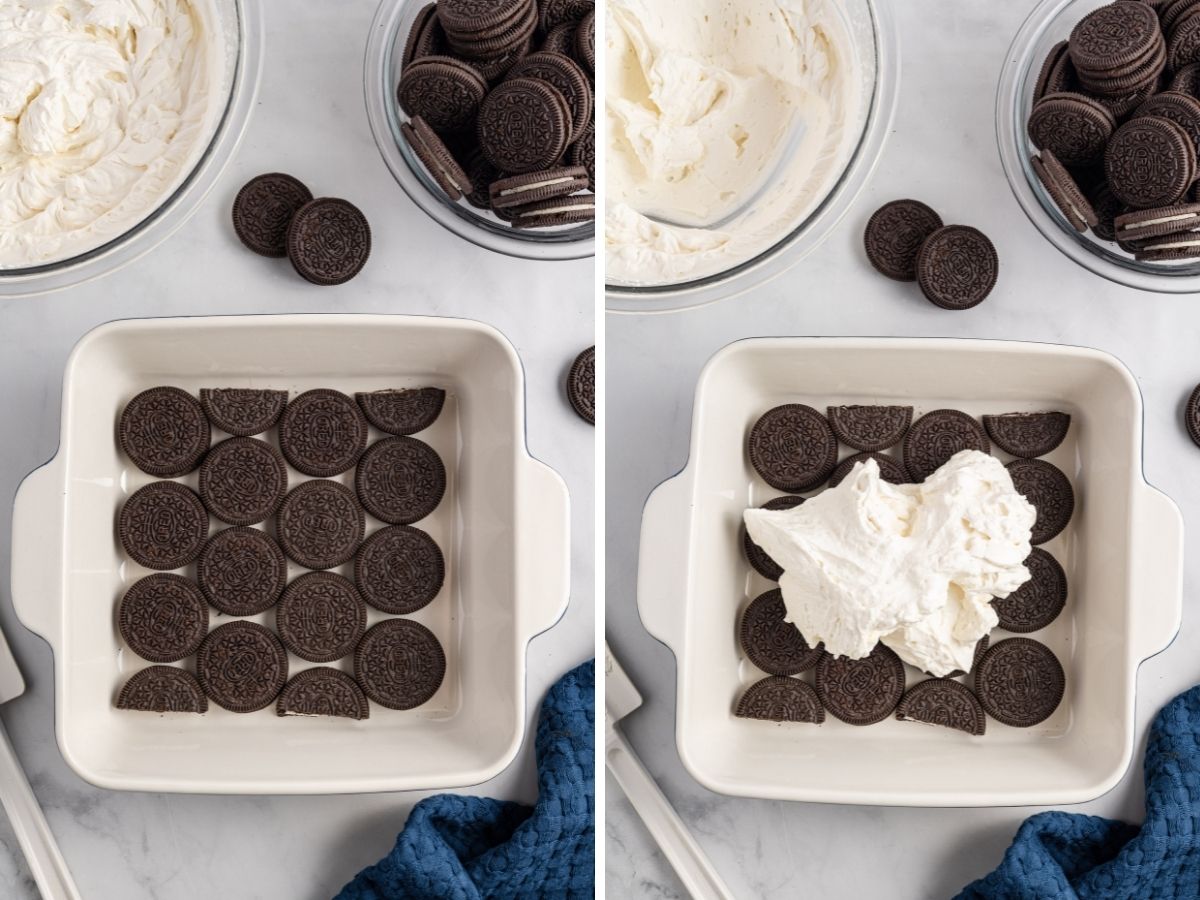
- Make Homemade Whipped Cream : Add the heavy whipping cream to a mixing bowl, or use a stand mixer, along with the vanilla extract and powdered sugar. Start on low speed, increase speed as it thickens, and beat until stiff peaks form. This will take about 7-8 minutes. For a hands-off approach, be sure and use a stand mixer with the whisk attachment. You can also use a mixing bowl + hand mixer if you don’t have a stand mixer.
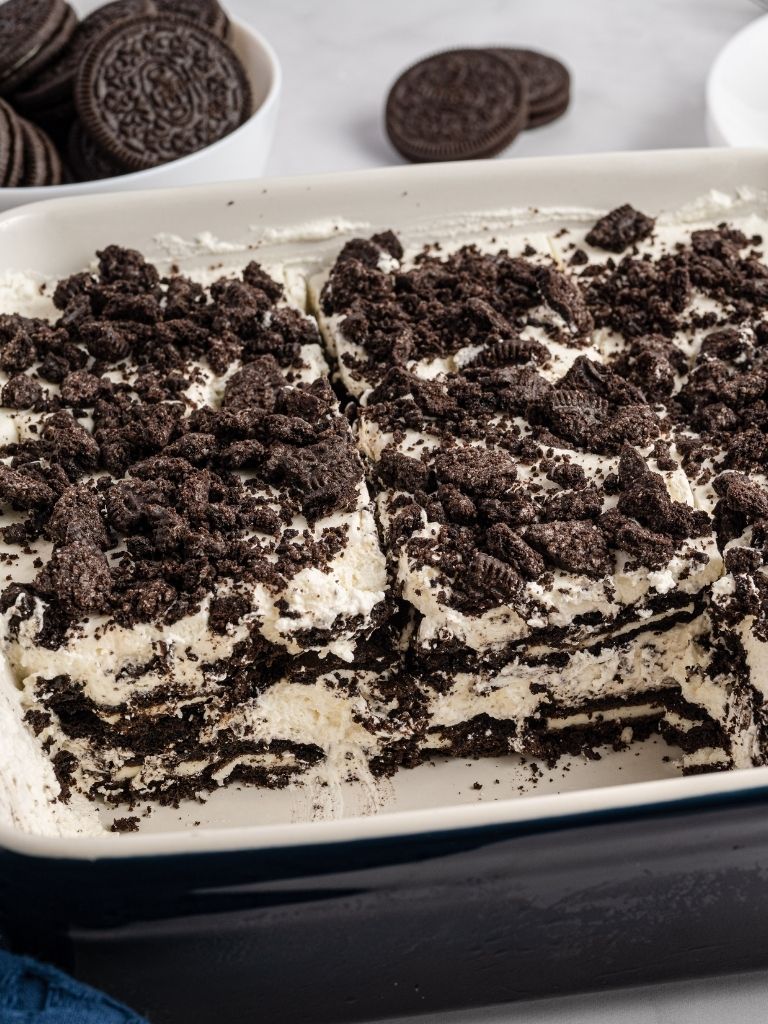
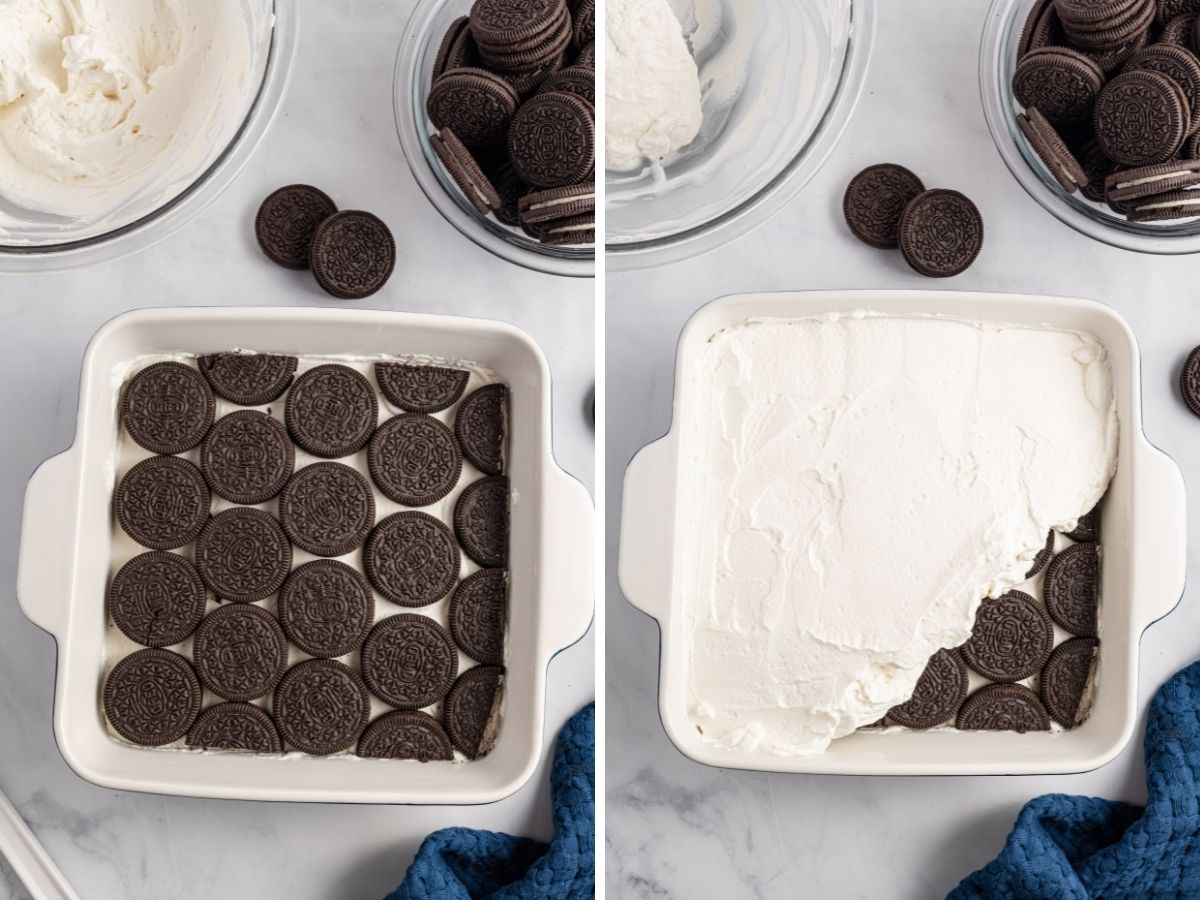
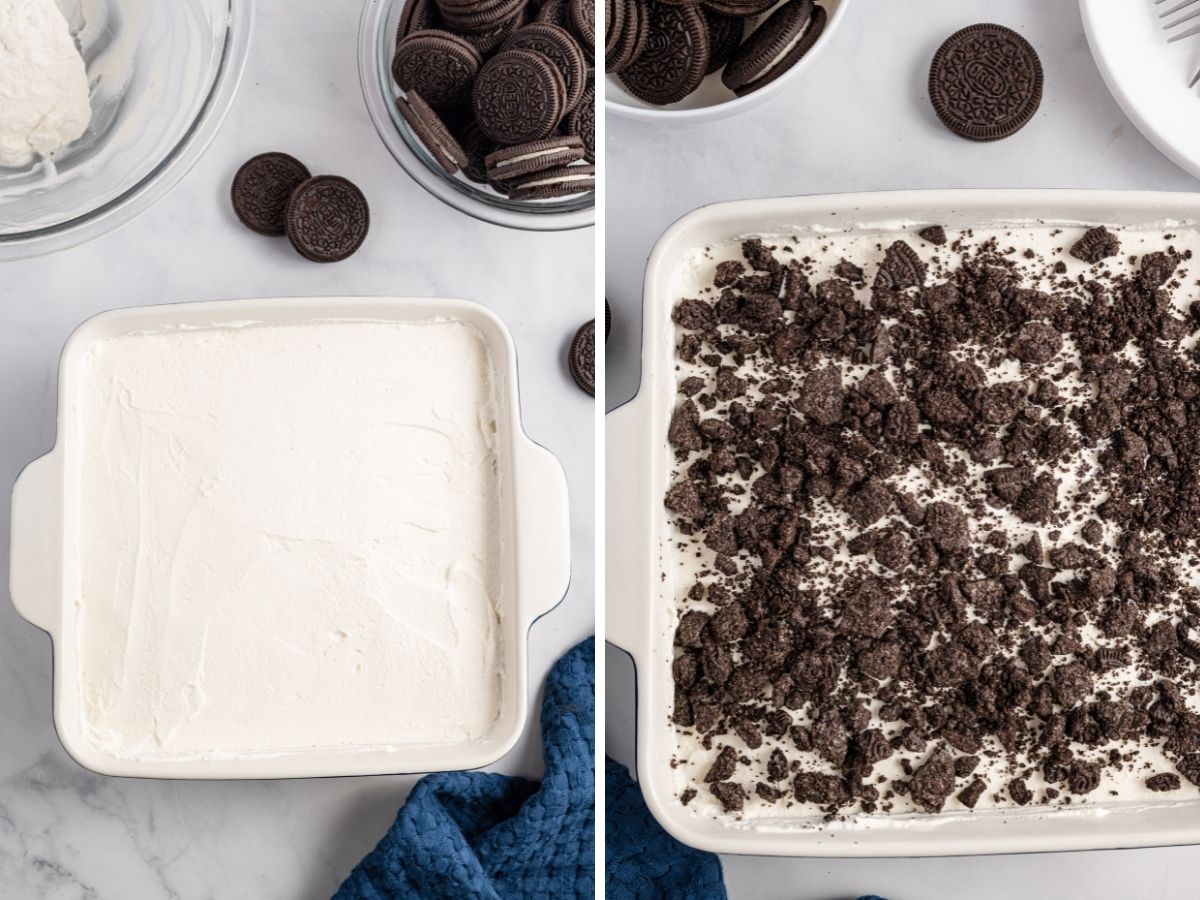
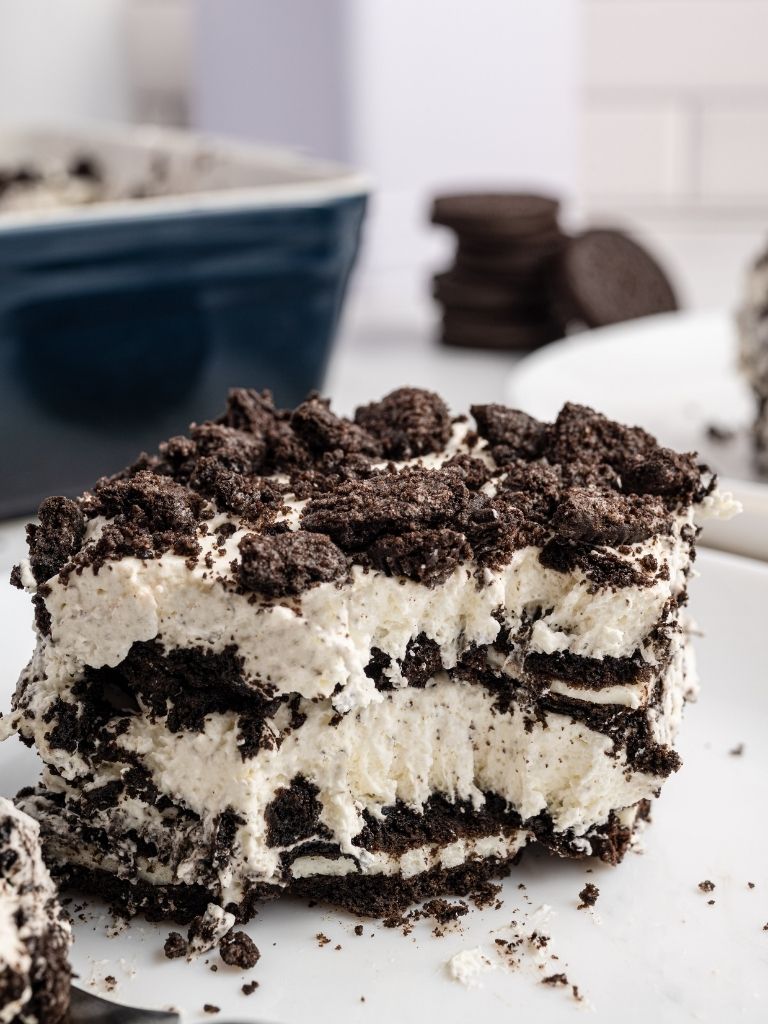
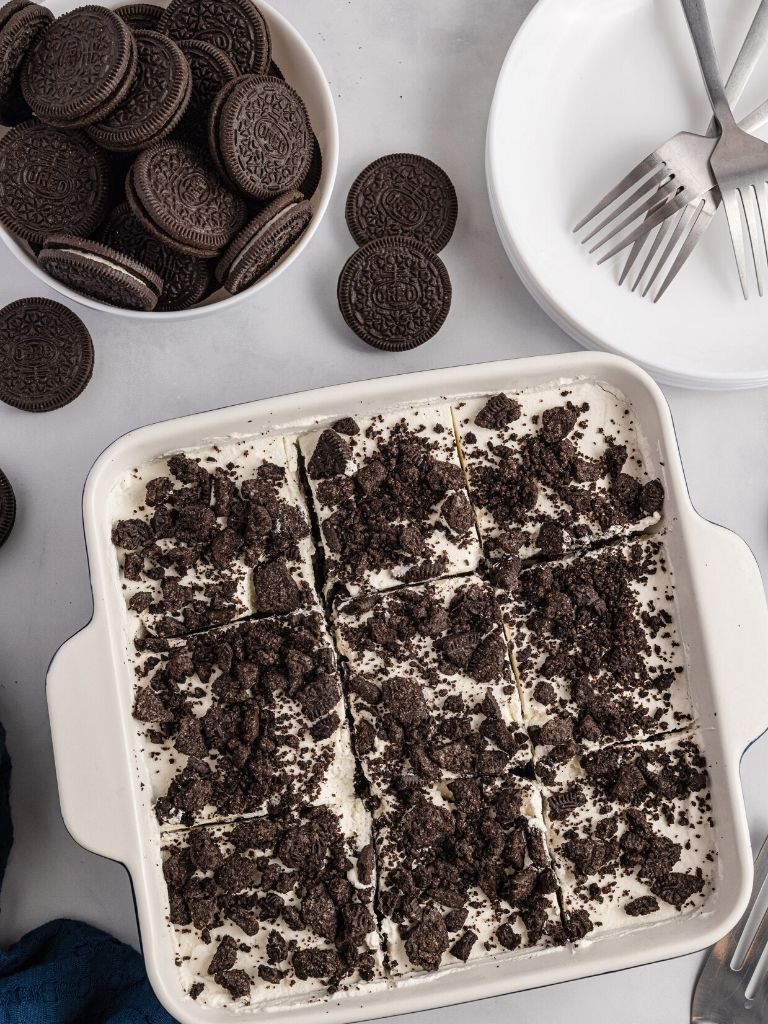
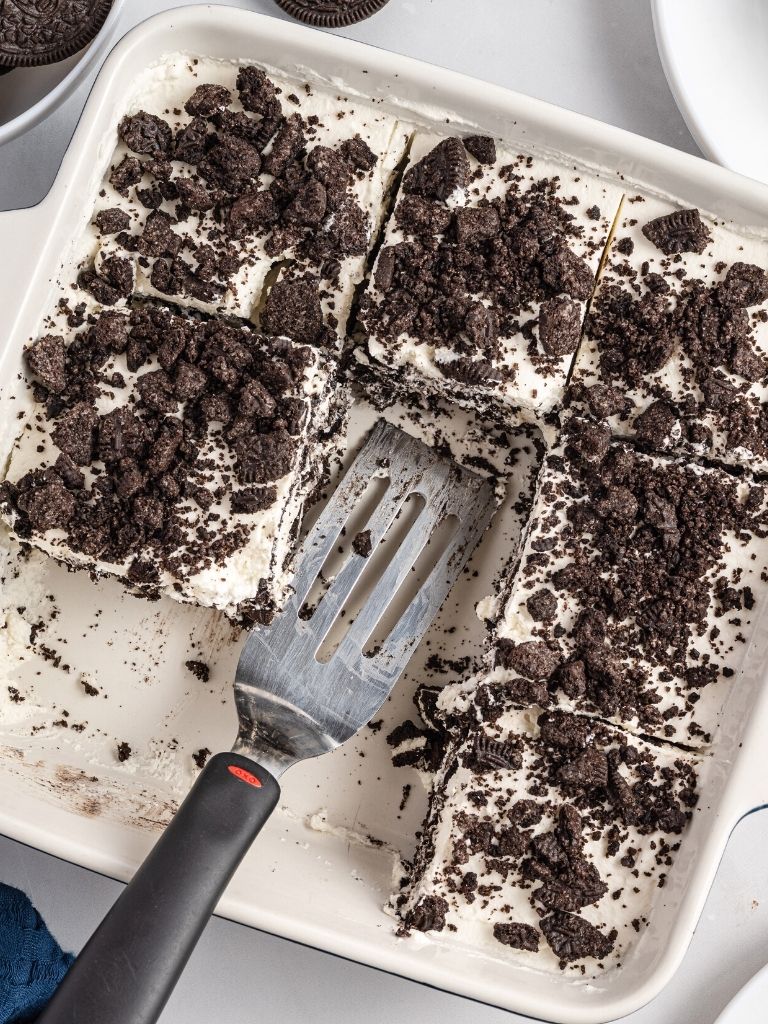
- Layer the Icebox Cake : Begin with a layer of Oreo cookies in the bottom of the 8×8 baking dish. Top with half the whipped cream. Add another layer of Oreo cookies, and top with the remaining whipped cream. Add a generous amount of chopped Oreo cookies on top.
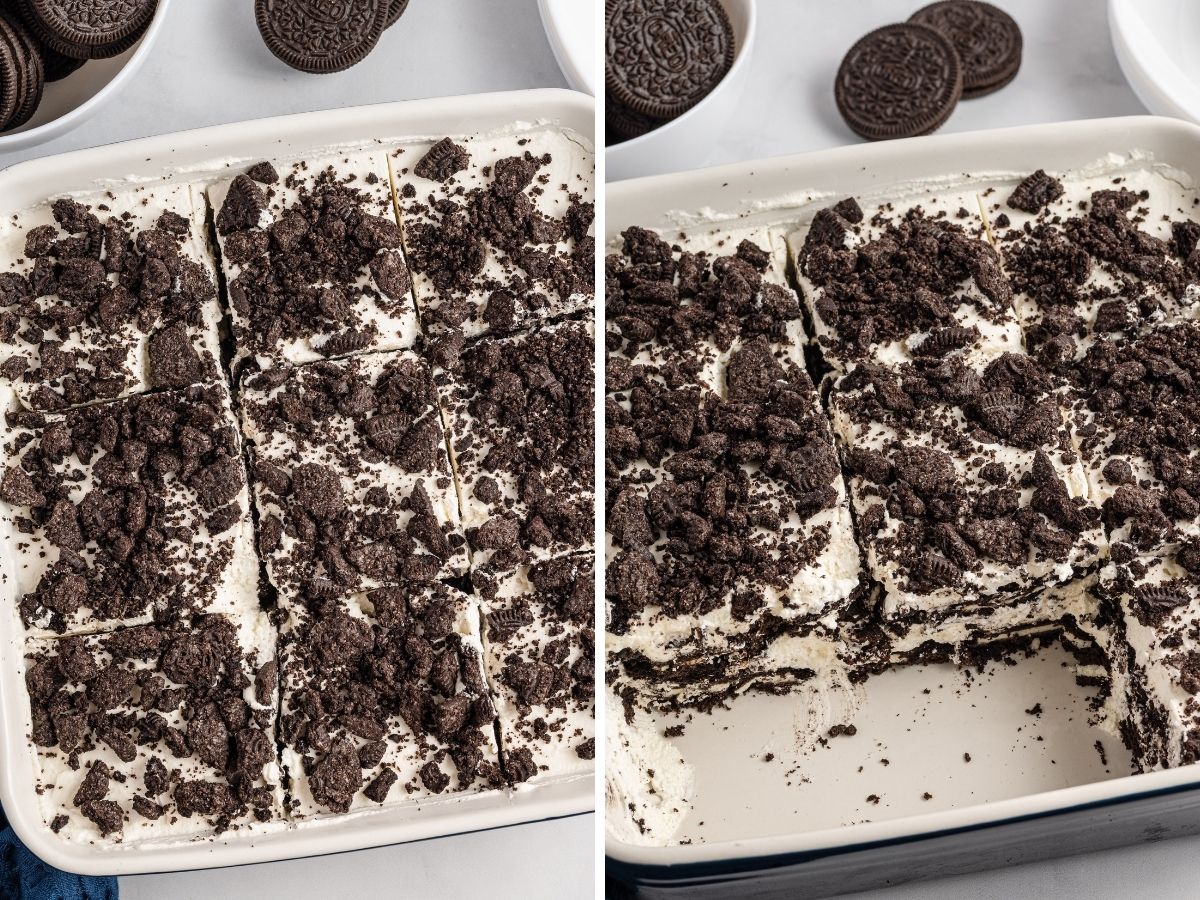
- Refrigerate : Cover the pan with a lid or plastic wrap. Refrigerate for at least 8 hours, or overnight is preferred. The cookies soften, which makes it delicious and easy to cut and eat, and the flavors all combine together.
- Serve : When it’s time to serve, cut into 9 slices, and eat!

Tips For Success
Here are a few of my helpful tips that will hopefully make this a success in your own kitchen!
- Refrigerate : Don’t try to rush the fridge time. Icebox cakes need at least 8 hours of time in the fridge so the cookie layer can soften, the whipped cream can thicken and stabilize, and for the flavors to meld together. I always make this dessert the night before and then leave it in the fridge for more like 12-18 hours.
- Oreos : Normally, generic brand is fine with me but not in this recipe. Oreo cookies taste the best and I highly recommend not using a generic cookie instead.
- Don’t Use Cool Whip : I know it may be tempting to save time, and dishes, but do not use Cool Whip instead of the homemade whipped cream. It won’t taste nearly as good, and the freshly whipped cream will thicken and stabilize better than Cool Whip will.
- Homemade Whipped Cream Tip : To speed up the process of making the whipped cream, place the bowl and beater(s) into the freezer for about 30 minutes prior to starting the recipe. The coldness of the bowl and beaters, will help keep the cream colder which will speed up the process.
Icebox Cake FAQ’s
- Can I Use Cool Whip Instead?
- You can if wanted. I do not recommend using Cool Whip because it won’t thicken, or stabilize while in the fridge, as well as the homemade whipped cream does. It also tastes much better with the homemade sweetened whipped cream vs. Cool Whip.
- If you must use Cool Whip, I recommend buying two (8 oz each) tubs of Cool Whip and make sure it’s thawed completely before using. You probably won’t use all of it.
- Serving Suggestions for Icebox Cake
- Be sure and top the icebox cake with a generous amount of chopped/crushed Oreo cookies on top.
- You can also drizzle each slice with some chocolate syrup or sauce before serving.
- How To Store Leftovers
- Leftovers can be stored, covered or in an air-tight container, for up to 5-7 days.
- The longer the cake sits in the fridge, the softer the cookies will get.
- Can I Freeze an Icebox Cake?
- Yes you can freeze this icebox cake. I don’t love the texture of it once frozen and thawed, but it does freeze fine.
- Double wrap the 8×8 pan in tin foil and freeze for up to 3 months.
- Let it thaw in the fridge before serving. Or you can also serve it colder/slightly frozen, for a frozen treat.
More Dessert Recipes You’ll Love
- Easy Nutella Pie
- No Bake Pie Recipes
- Cream Cheese Cherry Pie
- Root Beer Float Pie
- Monster Cookie Dough Cheeseball


Oreo Icebox Cake
Ingredients
- 2 cups heavy whipping cream
- 1 cup powdered sugar
- 1 tablespoon vanilla extract
- 30 whole Oreos
- 12 crushed/chopped Oreos
Instructions
- In a large mixing bowl with a hand mixer, or use a stand mixer with the whisk attachment, add the heavy whipping cream, powdered sugar, and vanilla extract.
- Start on low speed, increasing speed as it thicken, and beat until stiff peaks form. This takes about 7-8 minutes.
- In an 8x8 baking dish or pan, cover the bottom with a single layer of Oreos. You may have to cut a couple of them in half to fill the gaps.
- Spread half of the whipped cream on top and smooth out the top with a spatula.
- Add another layer of Oreo cookies.
- Add the remaining whipped cream and smooth out the top.
- Cover the pan with a lid or plastic wrap, and refrigerate for at least 8 hours, or overnight is recommended.
- Top the icebox cake with the crushed Oreos right before serving.
Video
Notes
Nutrition
Did You Make This Recipe?
I'd love to see it! You can share it with me on @togetherasfamilyblog and follow on Pinterest @together-as-family-blog-recipes or Facebook @togetherasfamilyblog for more!


can I use a 9×13 pan how would I adjust the ingredients
I would suggest multiplying all ingredients by 1.5, that should fill a 9X13 pan.
Can I freeze it?! It’s my husband’s birthday and we want to eat it in two hours. Can I throw it in the freezer for two hours?
Sorry, I’m just seeing this! It is fine to sit in the fridge until you eat it and if you have leftovers. I hope you enjoyed it!