This post may contain affiliate links, view our disclosure policy.
BAKED SWEET AND SOUR CHICKEN RECIPE
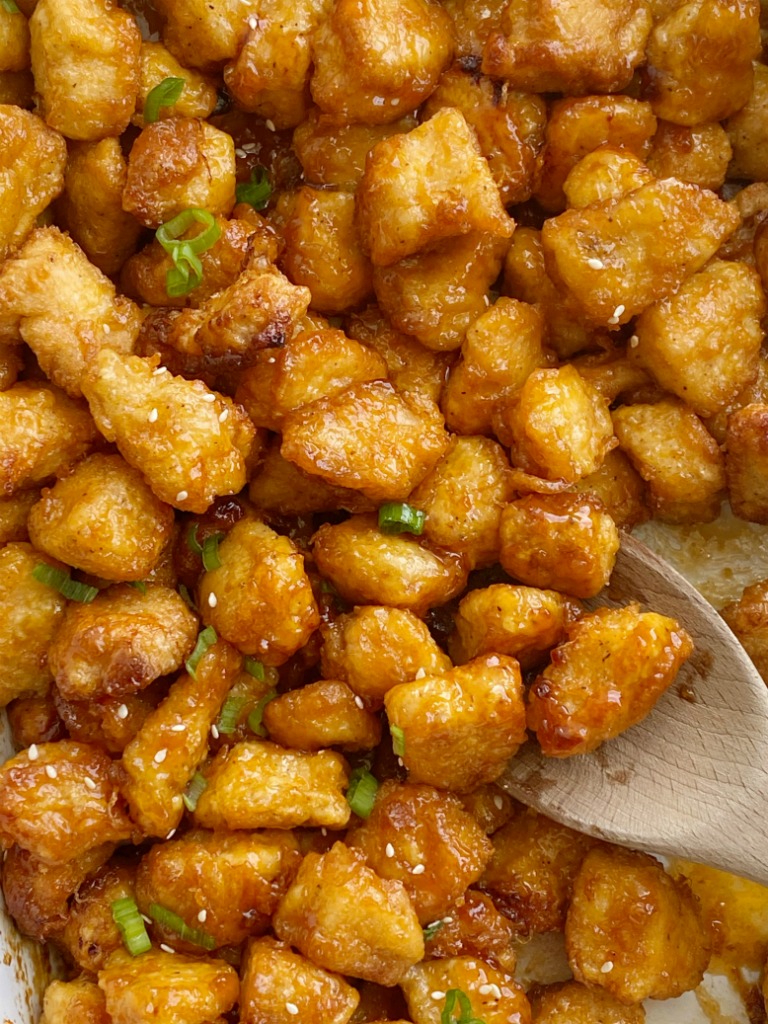
Baked sweet and sour chicken is a yummy dinner that is better then any take-out! This dinner recipe does take some time to prep and cook, but it’s one of those dinners that you make every once in a while when you want something truly outstanding and worth all the work.
Pieces of crispy fried chicken bake in one pan with an easy homemade sweet and sour sauce. The chicken turns into these glorious sticky, sweet, crispy chicken bites.
INGREDIENTS NEEDED FOR BAKED SWEET AND SOUR CHICKEN
Boneless, Skinless Chicken Breasts – You need 4 chicken breasts for this recipe. Cut them into small 1-inch sized chunks.
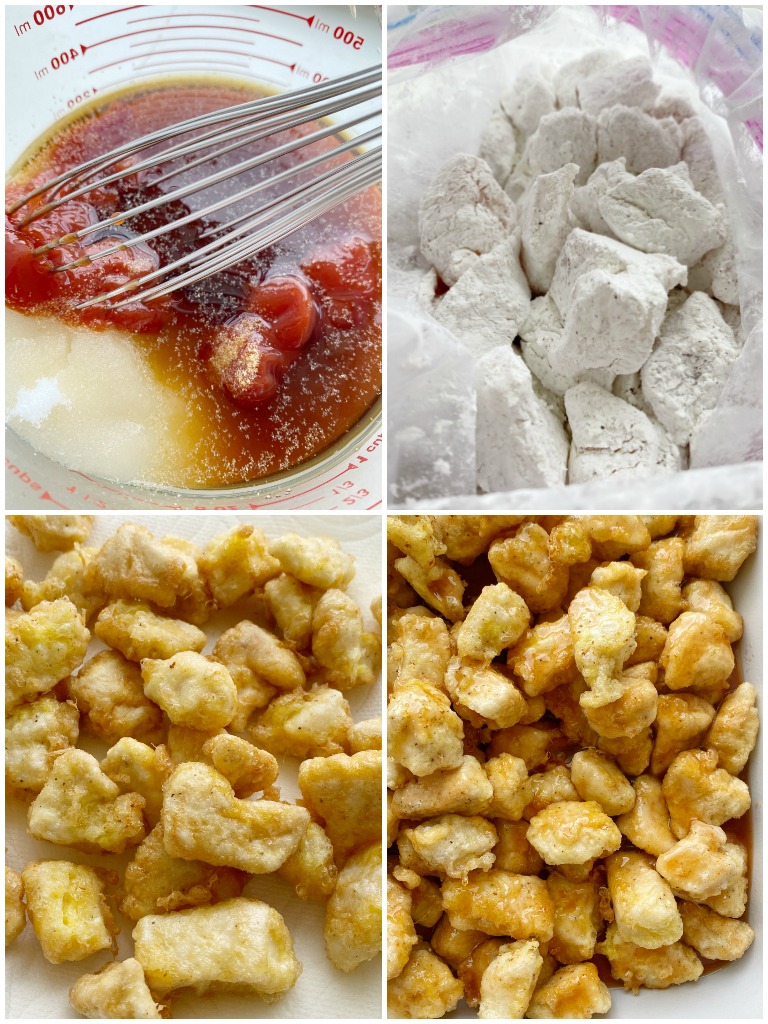
Cornstarch, Salt, & Pepper – Add the chicken pieces into a Ziploc bag with cornstarch, salt, and pepper. Shake it up to coat all the chicken in the cornstarch.
Oil – I use canola oil but vegetable oil would also work. Fill a skillet pan, with high sides, with enough oil to cover about 2 inches of the pan. Let it heat up over medium heat.
Eggs – Crack 3 eggs into a bowl or rimmed plate (like a pie plate). Take the cornstarch coated chicken and dip it into the egg mixture (working with a few chicken pieces at a time) and then put into the hot oil. This will take about 3 batches to complete all the chicken.
Sugar, Apple Cider Vinegar, Ketchup, Soy Sauce, Garlic Powder – Mix this up and then pour over the fried chicken pieces in a 9×13 baking dish.
MY TIPS FOR THIS RECIPE
– Start heating the oil up before you cut the chicken and prepare the sauce. It does take awhile for the oil to get hot enough. Don’t turn the heat up or else it will be too hot which means that once you put the chicken in, it will splatter. Leave it on medium heat during the warm up time and during cooking.
– An easy way to test if oil is hot enough is to sprinkle just a tiny bit of flour into the oil. If the oil bubbles around the flour then it’s ready to fry.
– The recipe as is, does not make tons of sauce. During the cook time the chicken soaks up most of it. That being said, we love it as is. It’s not supposed to be a saucy dish like a stir-fry. The chicken is moist and juicy even with the rice.
– You do not need to cook the chicken all the way through during the frying stage in the pan. You just want to cook it until it has a nice, golden brown exterior. It will finish cooking all the way during the cook time.
– I get asked all the time if the chicken turns out dry with the 1 hour cook time. I promise it does not! I don’t know how that works or why, but the chicken is crispy and juicy and so yummy.
TRY THESE OTHER CHINESE INSPIRED DINNER RECIPES
- crispy honey chicken
- baked orange chicken
- skillet cashew chicken
- chinese chicken skillet
- chicken stir fry recipe
- pineapple teriyaki chicken stir fry


Baked Sweet & Sour Chicken
Ingredients
Sweet & Sour Sauce
- ¾ cup granulated sugar
- ½ cup apple cider vinegar
- ¼ cup ketchup
- 1 tablespoon soy sauce I use reduced-sodium
- ½ teaspoon garlic powder
Chicken
- 4 boneless, skinless chicken breast about 2 pounds
- ½ cup cornstarch
- 1 teaspoon salt
- ½ teaspoon black pepper
- 3 large eggs
- canola or vegetable oil for frying enough for about 2" in pan
Instructions
- Add all the sweet & sour sauce ingredients into a small bowl and whisk together until combined. Set aside.
- Pour enough oil into a skillet pan (with high sides) to cover about 2" in the pan. Turn heat to medium and let it heat up while you prepare the chicken.
- Cut chicken into 1-inch bite-sized chunks. Place in a gallon sized Ziploc bag, or a bowl, and add the salt, pepper, and cornstarch. Shake the bag, or stir in the bowl, until all chicken pieces are coated. * This is easier to do if you use the gallon size Ziploc bag. Just zip it shut and shake.
- Heat oven to 325°. Prepare a 9x13 baking dish and spray with cooking spray.
- Crack the eggs into a rimmed plate (like a pie plate) or a bowl. Whisk together with a whisk or a fork.
- Take the cornstarch coated chicken pieces and working with a few at a time, dip them in the eggs, shaking off excess egg, and then place in the hot oil. Continue coating the chicken pieces and adding to the pan until it's full.
- Cook chicken for about 3 minutes on each side. Turn over the pieces and let cook for another 3 minutes. The chicken does not need to be fully cooked, it just needs to have a golden brown outside. When chicken is done, remove from the skillet pan with a slotted spoon. Place onto a plate that has been lined with paper towels so the chicken can drain a bit.
- Repeat this in batches until all the chicken is done. Depending on how big your skillet pan is, it may take anywhere from 3 to 4 batches.
- When each batch is done draining on the paper towels, dump into the prepared baking dish.
- Once all the chicken is in the baking dish, pour the sweet & sour sauce over the chicken and gently stir to coat.
- Cook for 60 minutes. Stirring every 15 minutes.
- Serve over rice and garnish with green onions.
Notes
Nutrition
Did You Make This Recipe?
I'd love to see it! You can share it with me on @togetherasfamilyblog and follow on Pinterest @together-as-family-blog-recipes or Facebook @togetherasfamilyblog for more!


I cannot begin to express how much me and my family LOVES this sweet and sour recipe! It has become a staple! I have celiac disease and alter it to my needs, and it still tastes better than any takeout I’ve had! Thank you for sharing ❤️
When you call something “baked”, it’s kind of assumed that it’s not fried and that’s why people look at the recipe at all–because it’s SUPPOSED to be healthier. This is practically false advertising.
Thanks for your input.
I was just saying the same thing! Not sure how to use my air fryer when corn starch is used….
I did up 2 Batches of this in the past month and at the end of the night every last morsel was devoured. I’m cooking it again tonight, we love this more then we probably should.
Love it! Thanks so much for your comment and review. I love when dinner is completely gone. Best feeling ever 🙂
This was delicious!!!! We will definitely be making it again. We are soy free so I subbed in with fish sauce and we were out of vinegar so I used lemon and it worked well!
I tried this tonight and my family loved it. I will be cooking it again
You have good recipe, the ones we like.
Thank you Judy!
My mom makes this for us about 3 times a month and we all love it, we even double the souce and make it with pork fillet and all I can say is yum yum. Thanks for posting it so that my mom could come across it and make it.
I love to hear that this recipe has become a part of your family! Thank you for your comment!
I love the two chicken recipes that I tried. I would like to subscribe. How can do this?
Thank you! I don’t do an email signup/subscription right now, but maybe in the future!
I did make this recipe tonight, and it was good. Thank you for sharing your recipe.
As for AK ‘s negative response, I would like to share some unsolicited advice. Instead of complaining of the fried element, maybe offer another way to crisp up the chicken such as an air fryer or pre bake prior to adding the sauce. There is seriously enough negative in this world, we really don’t need to berate someone doing a nice thing sharing a delicious recipe. Hopefully the suggestions for crisping your chicken helps with your NO FRY element. Have a wonderful day
So happy you liked the recipe! 🤗
planning on making th ou s tonight . I was trying to figure out to make f o r dinner. thankyou [email protected]
Please let me know how you liked it!
We made this for dinner tonight and it was tasty. I would definitely double the sauce. When it goes into the oven, I would bake for only 20 minutes, otherwise the chicken will be over cooked.
I won’t make again, as it is a lot of work.
Glad you liked the taste. Thanks for sharing your thoughts about the recipe!
How is this “baked” if you fry the chicken?
The frying is just to get crispy skin but the chicken finishes by baking in the sauce.
Planning on making this tonight but with shrimp. Any suggestions on cooking times?
Sorry I’m just seeing this! I’m not super familiar with baking shrimp. You probably already made it; but I would suggest baking at the same temp and start checking it at 8-10 minutes to ensure it reaches the correct temperature. Let me know how it turns out.
I think I would have loved the recipe but there are so many adds on your directions, that you can not read it. Mother of 8
Thanks for sharing your feedback. The ad will have a small ‘x’ on the top right corner and you can click it to get rid of the ad. Hopefully that helps!
I made this Sweet and Sour Chicken for dinner today. My family absolutely loved it. I will definitely be making this again.
Thank you! It makes my day to hear when a recipe earns ‘repeat’ status.
This is so good! I followed the recipe to the T, except I used tomato paste instead of ketchup (forgot to get it at the store lol). Came out perfect! Definitely a new favorite.
My daughter is 15, she started making this at 14. It’s become one of our favourite dishes. Absolutely delicious. There are never any leftovers.
So impressive your daughter is making this. Makes me so happy to hear that!