
This post may contain affiliate links, view our disclosure policy.
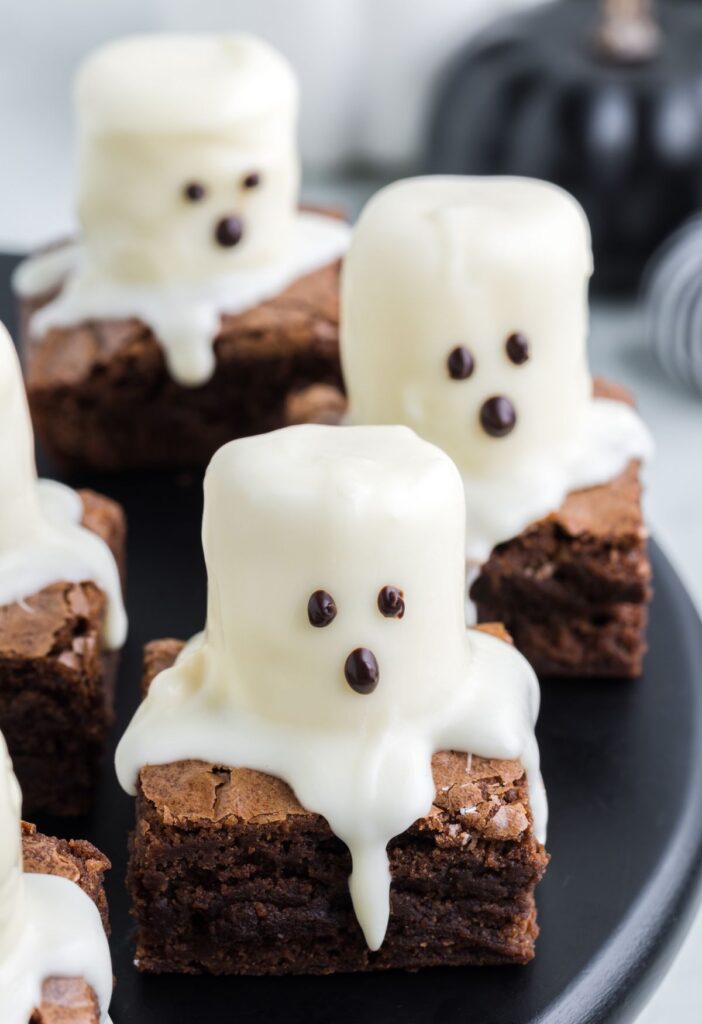
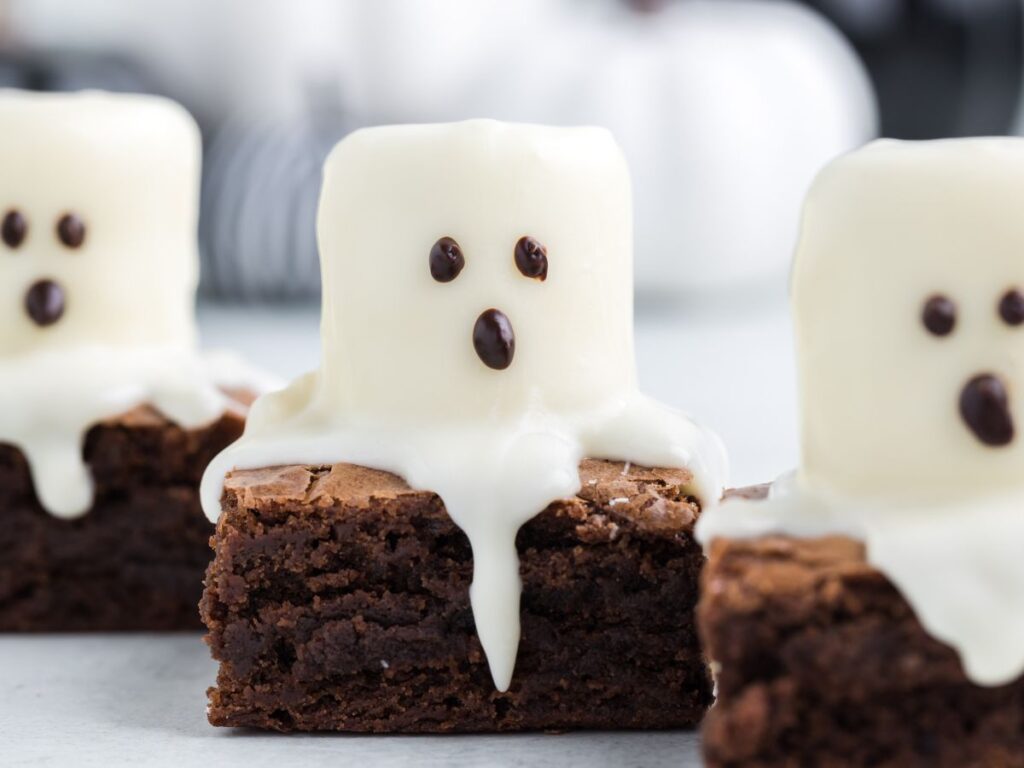
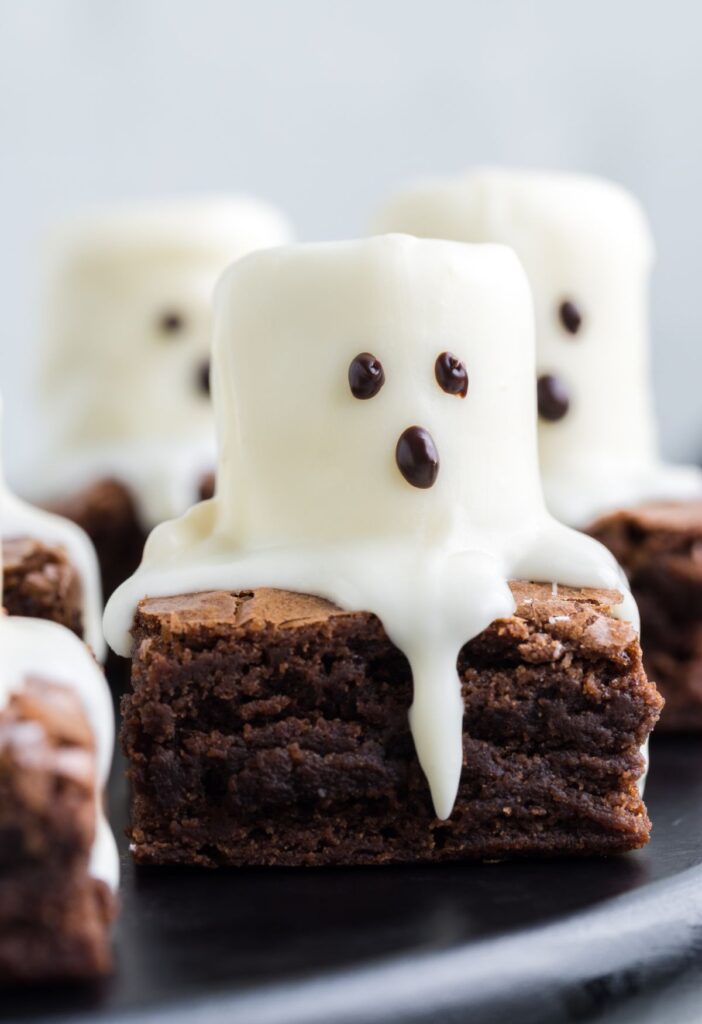
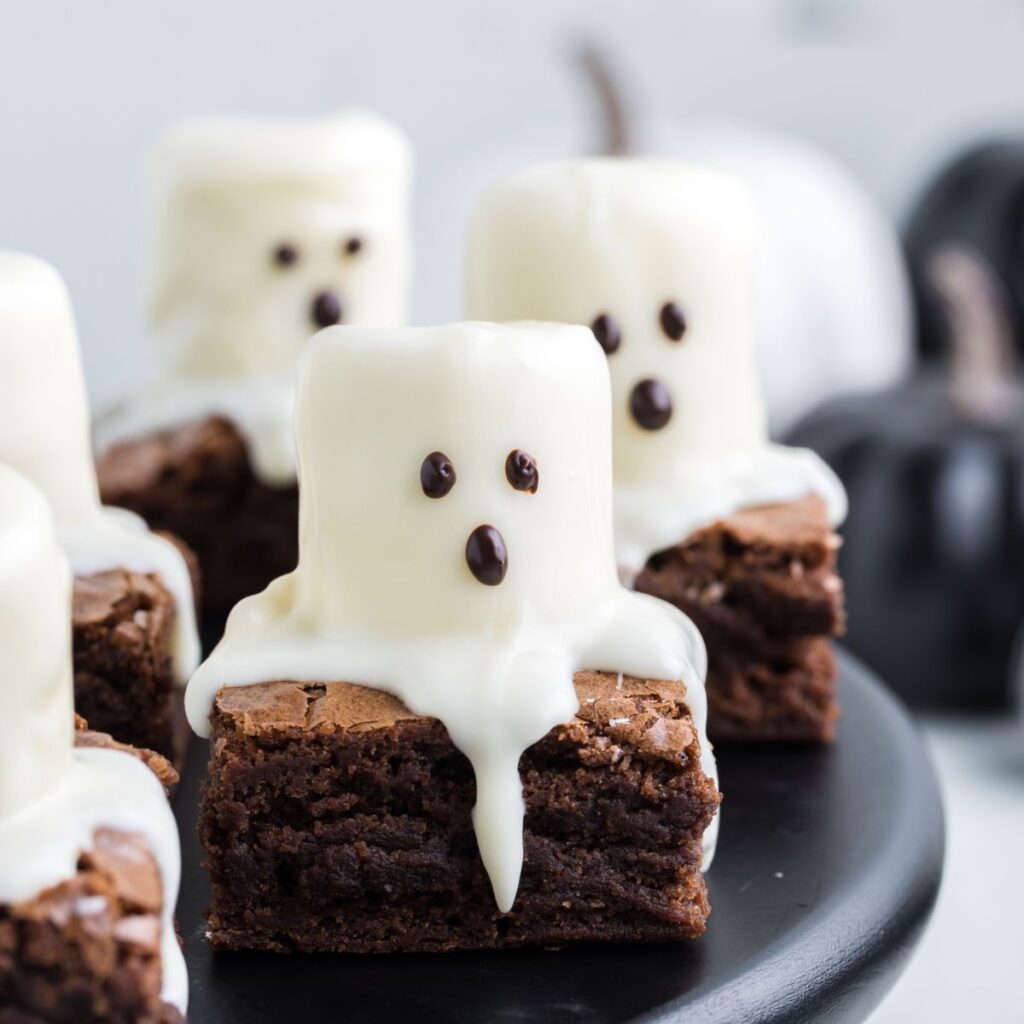
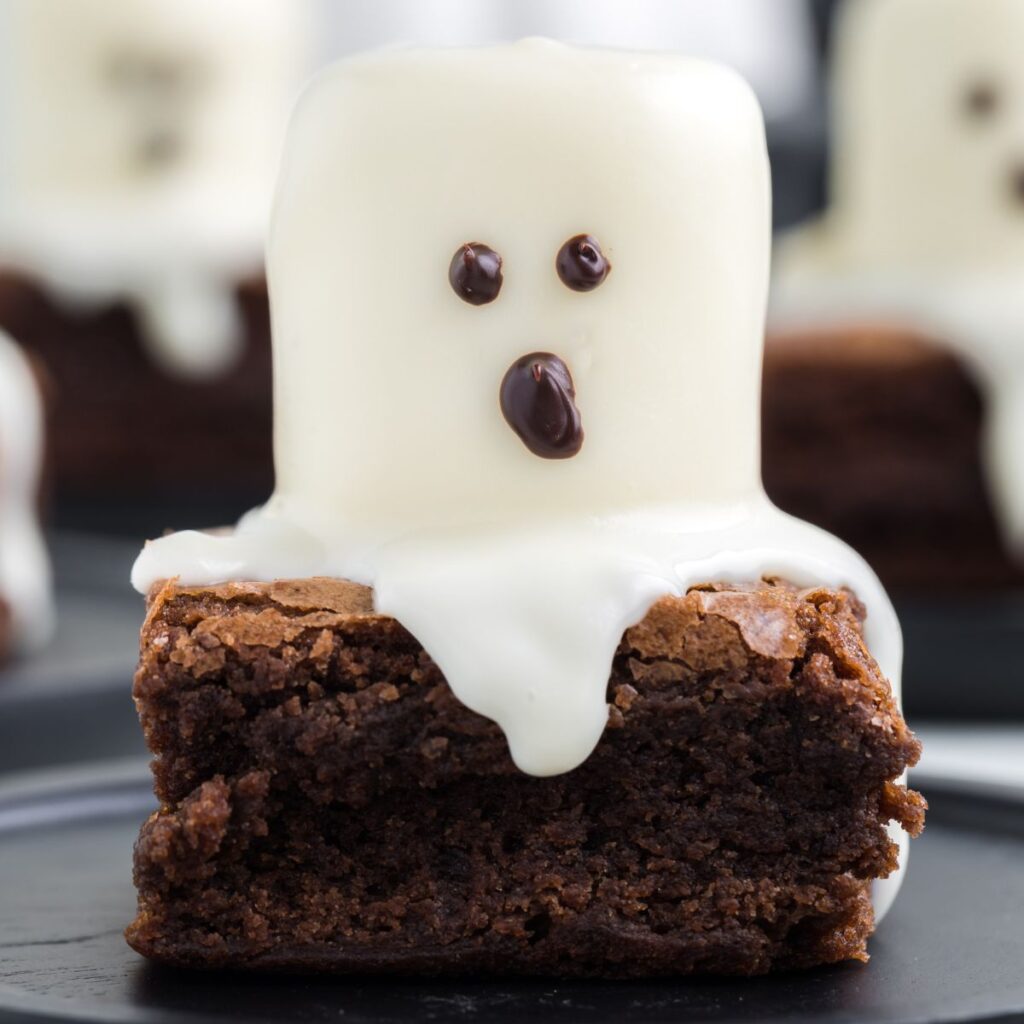
Ghost Brownies are spooky brownies that are so adorably cute! Boxed brownies are topped with a marshmallow and melted chocolate to create the spooky ghosts. This Halloween brownies recipe is so easy to make and always a hit at any party.
For more ghostly Halloween treats be sure and make my Ghost Pretzels and these Twinkie Ghosts.
Ghost Brownies Recipe (Halloween Recipes With Brownies)
Halloween treats are my favorite theme to make cute food for. So many fun and festive options whether it’s Peanut Butter Spider Cookies or Halloween Monster Cookies complete with google eyeballs in them.
These super simple ghost brownies are always a hit and make everyone smile. They start with a boxed brownie mix, but you could also try making Homemade Brownies instead, and then they’re topped with a marshmallow ghost for the ultimate Halloween treat recipe that all kids LOVE.
Plus, we all know the more treats and more sugar on Halloween… the better! haha, it’s like my kids’ one free day of endless sugar per year. Totally worth it!
Ingredients To Make Spooky Brownies For Halloween
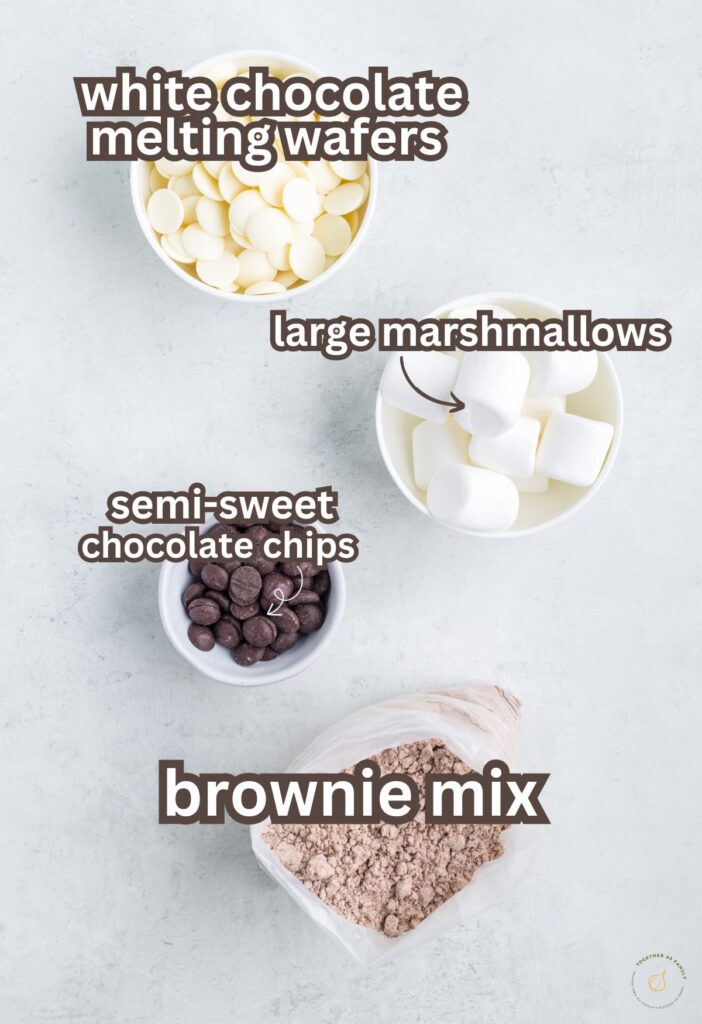
- Brownie Mix : The larger box (18 ounce) is what you’ll need to make these easy ghost brownies. Sometimes they’re labeled as ‘family-size’ on the outside of the box.
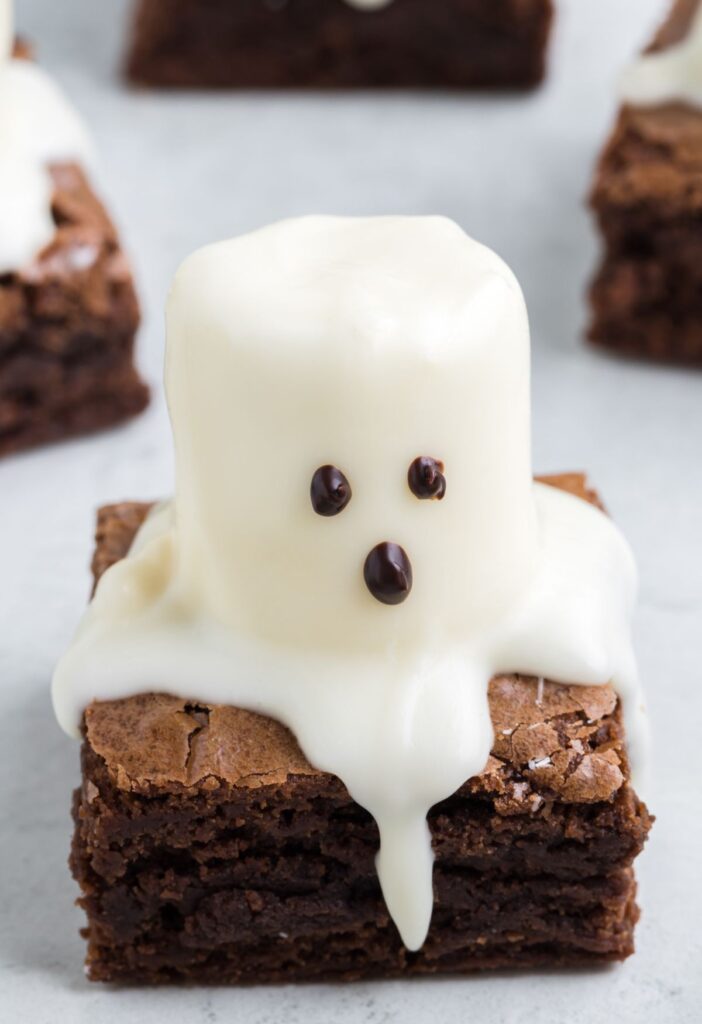
- Large Marshmallows : The large marshmallows are the ‘body’ of the ghost.
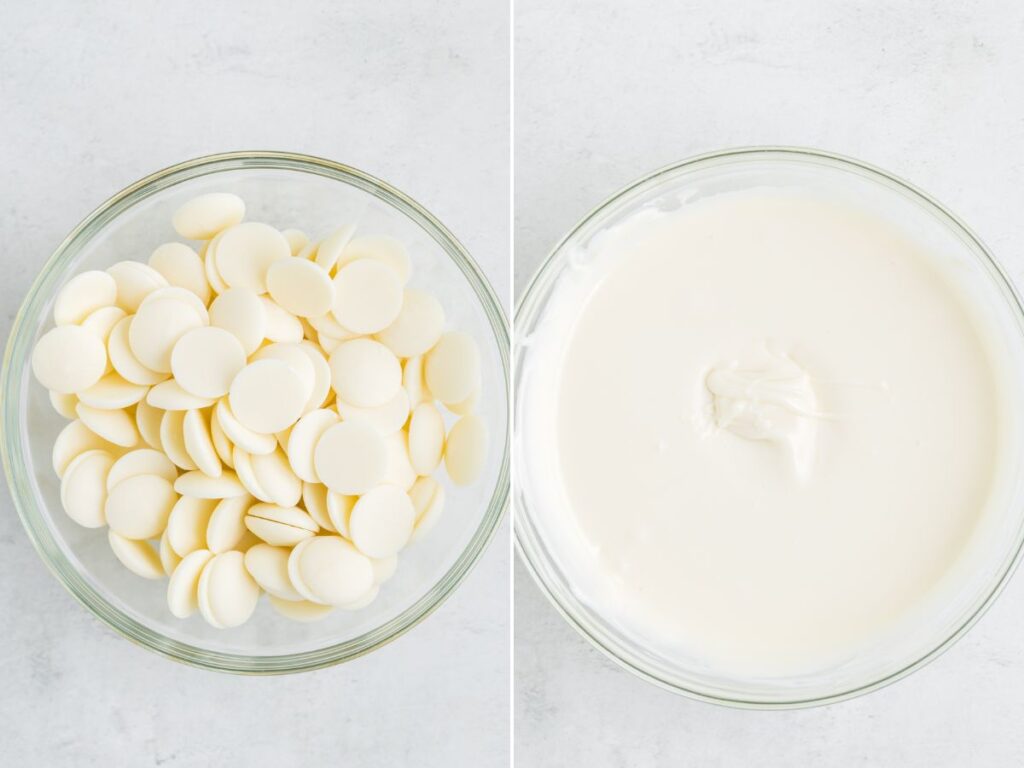
- White Melting Wafers OR White Candy Melts : This is what gets poured over the marshmallow to create the ghost on top of each brownie.
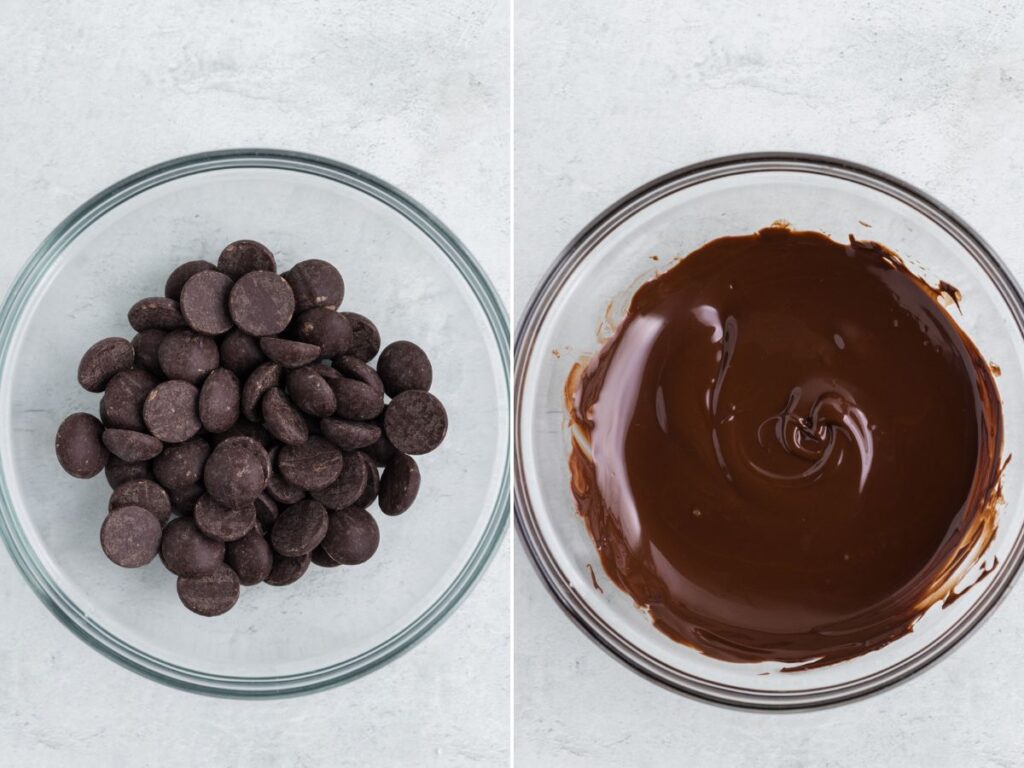
- Semi-Sweet Chocolate Chips : These create the eye of the ghosts.
How To Make It!
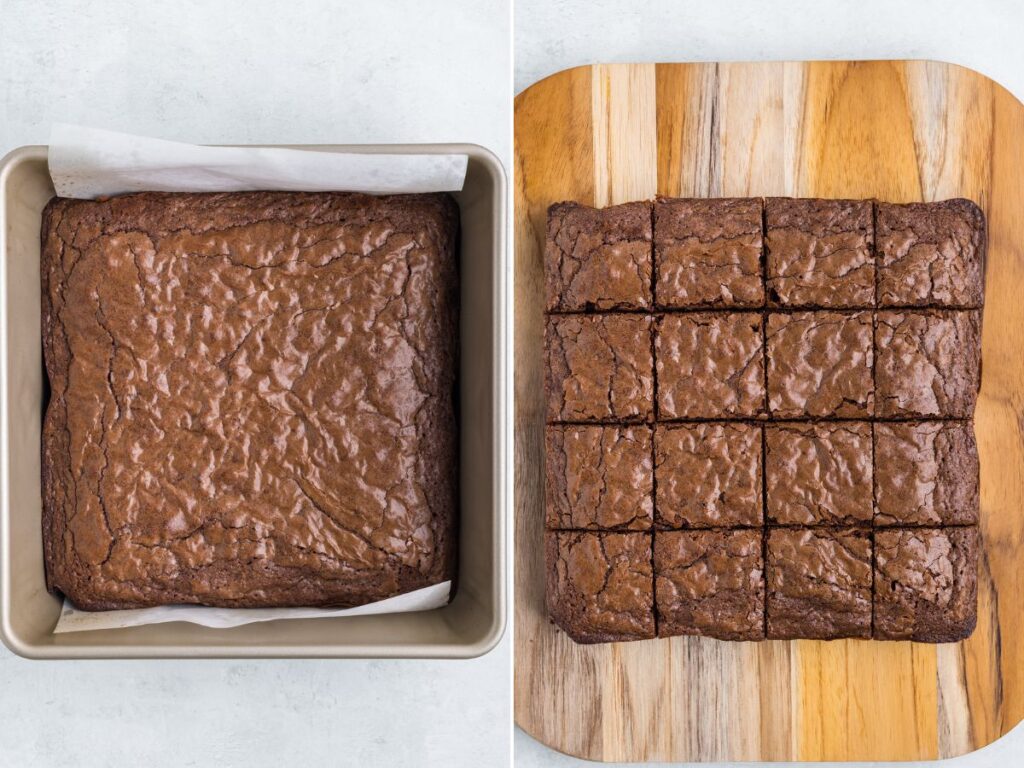
Prepare the brownies according to the box directions for a 9×9 baking pan. Once done, remove the brownies from the oven and let them cool completely before proceeding with the ghost brownies.
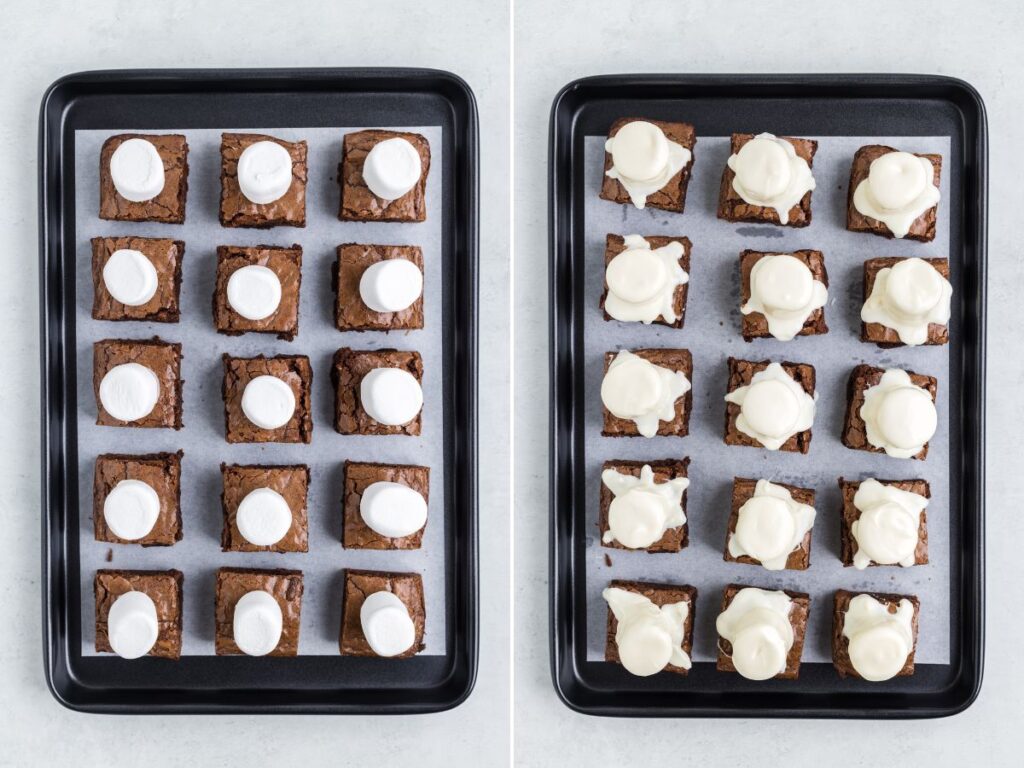
Remove the brownies from the pan and cut into 16 squares. Transfer the brownie squares to a parchment-lined baking sheet leaving at least 1-inch between each square.
Melt the white chocolate melting wafers according to package directions.
Dip the bottom of a large marshmallows into the melted white chocolate and place it firmly onto the center of each brownie. Repeat with the remaining brownie squares.
Drop a spoonful of the melted white candy melts over top the large marshmallows, allowing the chocolate to run down and cover all sides of the marshmallow. You may need to use the spoon to gently coax the chocolate around the marshmallow to ensure it’s evenly coated. It’s ok if the chocolate drips down the sides of the brownies.
Allow the brownies to set until the melted chocolate ghosts are firm and set.
Once the ghosts have set melt the semi-sweet chocolate chips in 15-second increments until smooth, making sure to stir it well after each increment. Transfer the melted chocolate to a sandwich Ziploc bag and cut a small opening in the bottom corner. Pipe eyes onto each ghost and a mouth to create the face. Allow the chocolate to set before serving.
How To Store Leftover Easy Ghost Brownies
Store any remaining ghost brownies inside an airtight container, at room temperature, for up to 5 days. If the room temperature is warmer, then you may want to store the brownies in the fridge to prevent the candy coating from becoming soft.
Recipe Tips For Success
- Move quickly when applying the white melting wafers on top of the marshmallows to prevent them from hardening before you finish coating the ghosts. If the melted wafers become too firm to work with during the process, simply add 1 teaspoon of shortening or coconut oil and remelt them in the microwave for 15-30 seconds.
- I recombine only using white melting wafers (Ghiradelli brand) or the white candy melts. Do not use white chocolate chips. The melting wafers or candy melts are designed to be melted and stay melted longer than white chocolate chips, which makes the ghosts easier to decorate. Melting wafers or candy melts also result in a smoother finish on the outside of the marshmallows.
- Instead of melting semi-sweet chocolate chips for the ghost’s faces, you could also use mini chocolate chips or use black decoration gel instead. I think the melted chocolate looks better as the face and it tastes the best as well.


Ghost Brownies
Ingredients
- 1 box (18 oz) brownie mix (plus the ingredients called for)
- 1 bag (10 oz) white melting wafers (about 1½ cups)
- 16 large marshmallows
- 2 tablespoons semi-sweet chocolate chips
Instructions
- Prepare the brownies, in a 9×9 square baking pan, according to the box directions.Once done, remove the brownies from the oven and let them cool completely before proceeding with the ghost brownies. * I recommend lining the pan with parchment paper so you can easily lift the brownies out to cut them in the next step.1 box (18 oz) brownie mix
- Remove the brownies from the pan and cut into 16 squares. Transfer the brownie squares to a parchment-lined baking sheet leaving at least 1-inch between each square.
- Melt the white chocolate melting wafers according to package directions.1 bag (10 oz) white melting wafers
- Dip the bottom of a large marshmallows into the melted white chocolate and place it firmly onto the center of each brownie. Repeat with the remaining brownie squares.16 large marshmallows
- Drop a spoonful of the melted white candy melts over top the large marshmallow, allowing the chocolate to run down and cover all sides of the marshmallow. You may need to use the spoon to gently coax the chocolate around the marshmallow to ensure it's evenly coated. It's ok if the chocolate drips down the sides of the brownies.
- Allow the brownies to set at room temperature until the melted chocolate ghosts are firm and set.
- Once the ghosts have set melt the semi-sweet chocolate chips in 15-second increments until smooth, making sure to stir it well after each increment. Transfer the melted chocolate to a sandwich Ziploc bag and cut a small opening in the bottom corner. Pipe eyes onto each ghost and a mouth to create the face. Allow the chocolate to set before serving.2 tablespoons semi-sweet chocolate chips
Notes
- Move quickly when applying the white melting wafers on top of the marshmallows to prevent them from hardening before you finish coating the ghosts. If the melted wafers become too firm to work with during the process, simply add 1 teaspoon of shortening or coconut oil and remelt them in the microwave for 15-30 seconds.
- I recombine only using white melting wafers (Ghiradelli brand) or the white candy melts. Do not use white chocolate chips. The melting wafers or candy melts are designed to be melted and stay melted longer than white chocolate chips, which makes the ghosts easier to decorate. Melting wafers or candy melts also result in a smoother finish on the outside of the marshmallows.
Did You Make This Recipe?
I’d love to see it! You can share it with me on @togetherasfamilyblog and follow on Pinterest @together-as-family-blog-recipes or Facebook @togetherasfamilyblog for more!


Did you love this recipe?
Make sure to comment below so we can chat about it! Or follow on your favorite social network for even more family recipes.